Author Archive
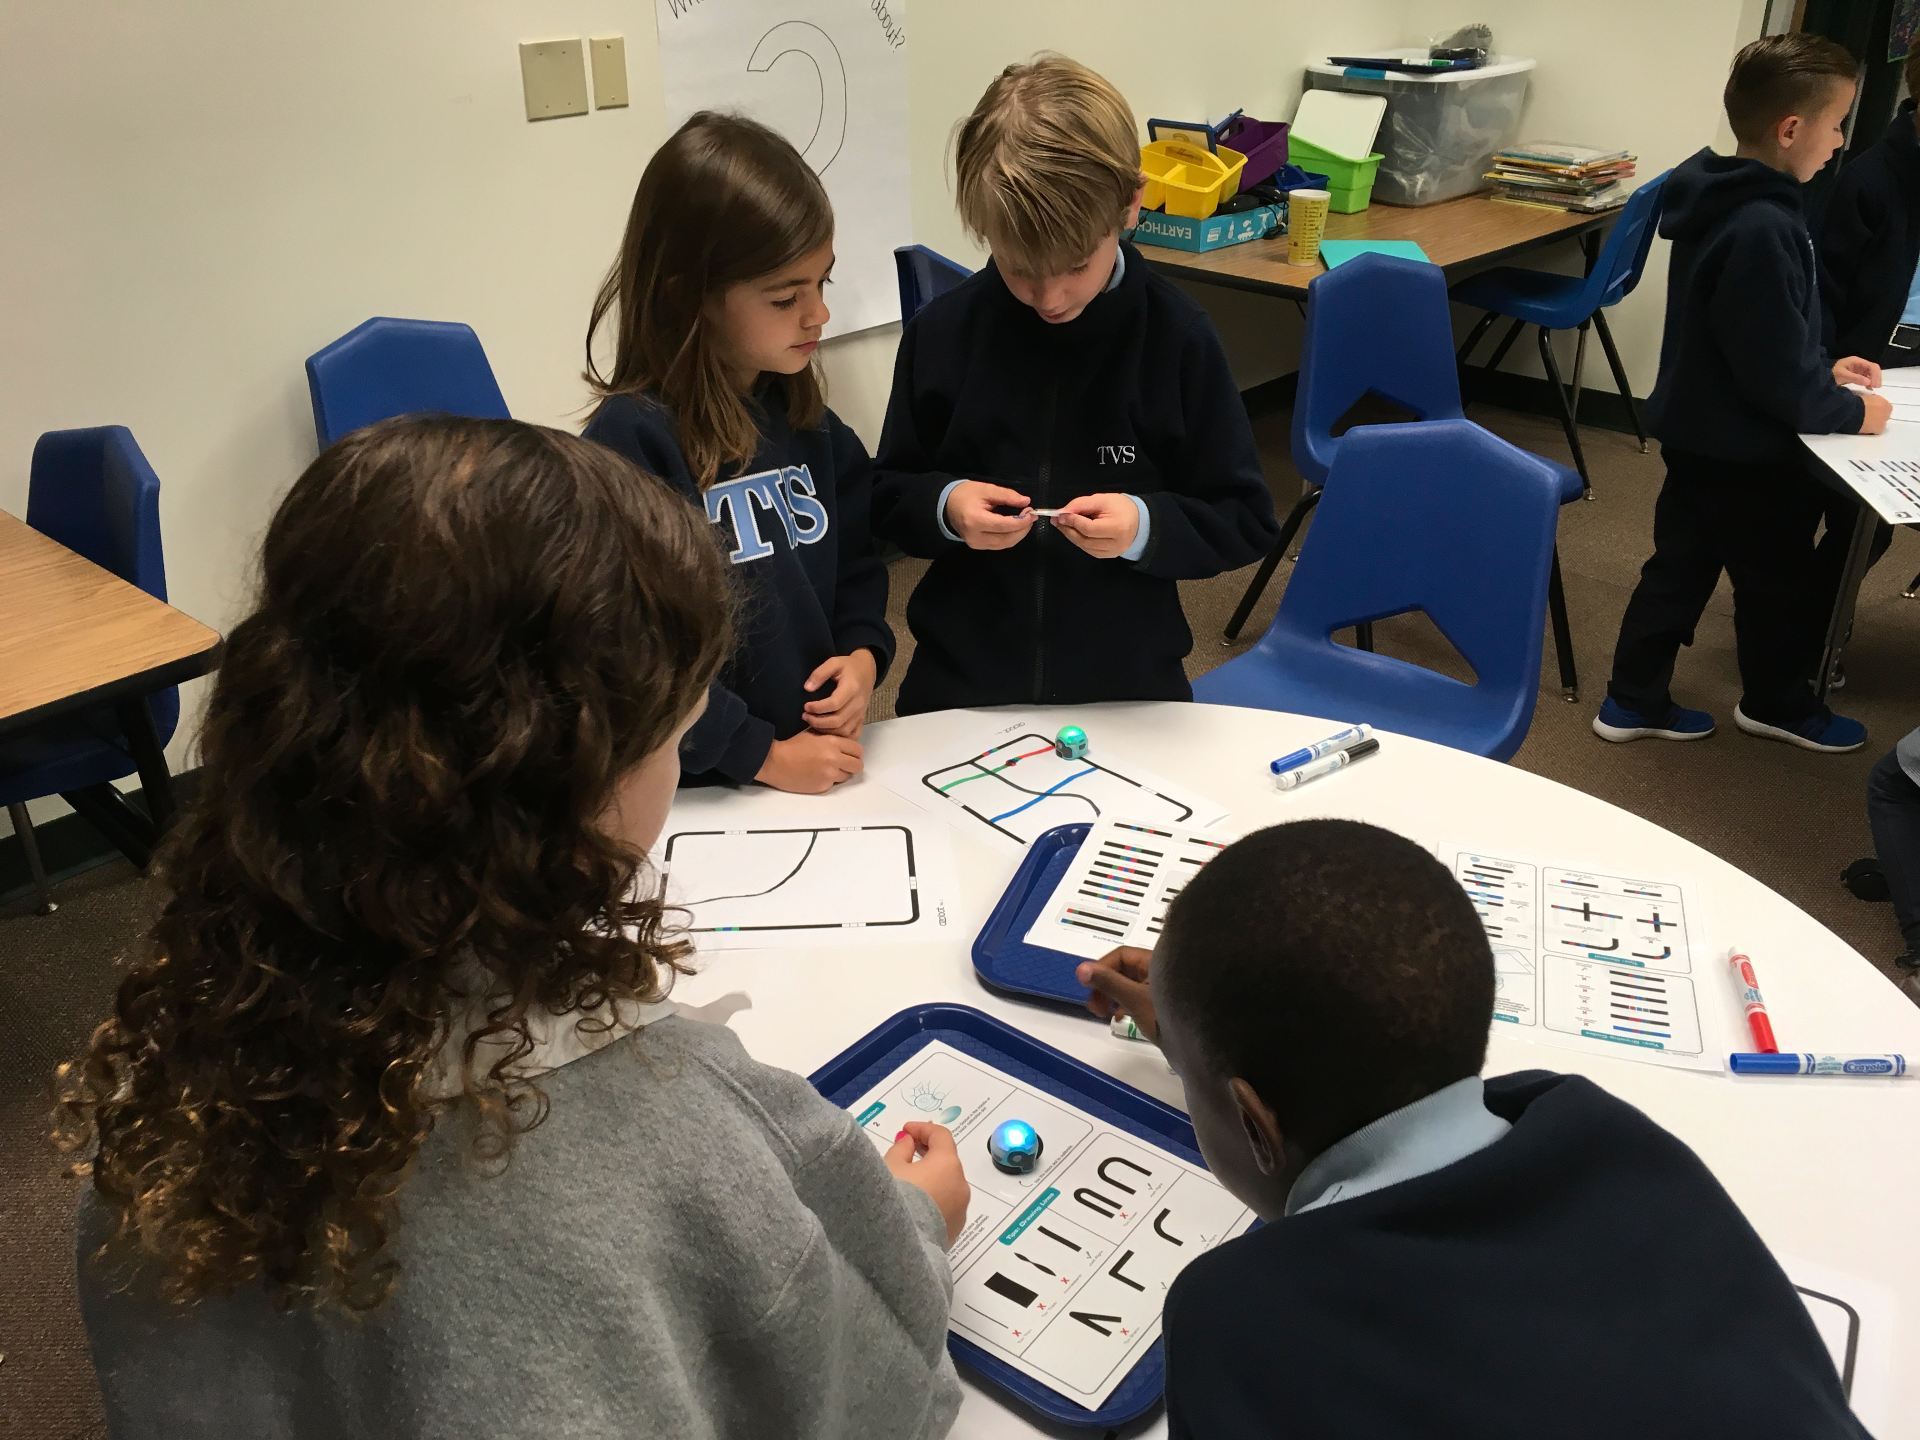
 I love bringing out Ozobots for Hour of Code! There are so many things you can do with them – draw paths and codes on paper using markers and predetermined code combinations, make paths and insert codes using the Ozobot Draw app, and drag and drop programming with Ozoblockly. There’s something for all ages!
 Until I discovered OzoEasy sticker codes, asking kinder and 1st graders to draw their own codes was just a bit tricky. As I tell the students, Ozobot is like Goldilocks – every code has to be just right! Just as Goldilocks tasted the porridge and determined one was too hot, another was too cold, but one was just right, Ozobot likes those color combinations to be close to perfect! In fact, we even started calling the little robot “Ozolocks” when something didn’t go as expected!
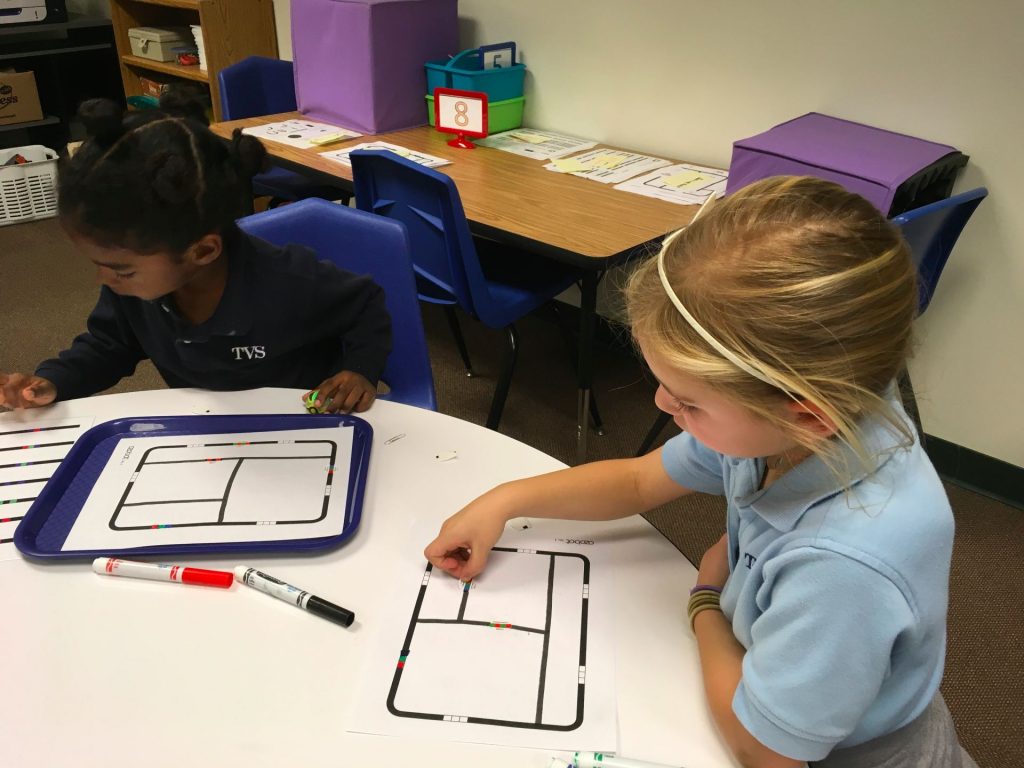
This year I gave each child a sheet printed off the Ozobot Educator’s page (can’t remember which lesson). It had a rectangular path printed with blank squares for coloring in the codes requiring three colors. I added additional lines in the inner part of the rectangle. For the little ones, I created a condensed version of the codes that was easier to read so they could choose a code for coloring each of the groups of squares.
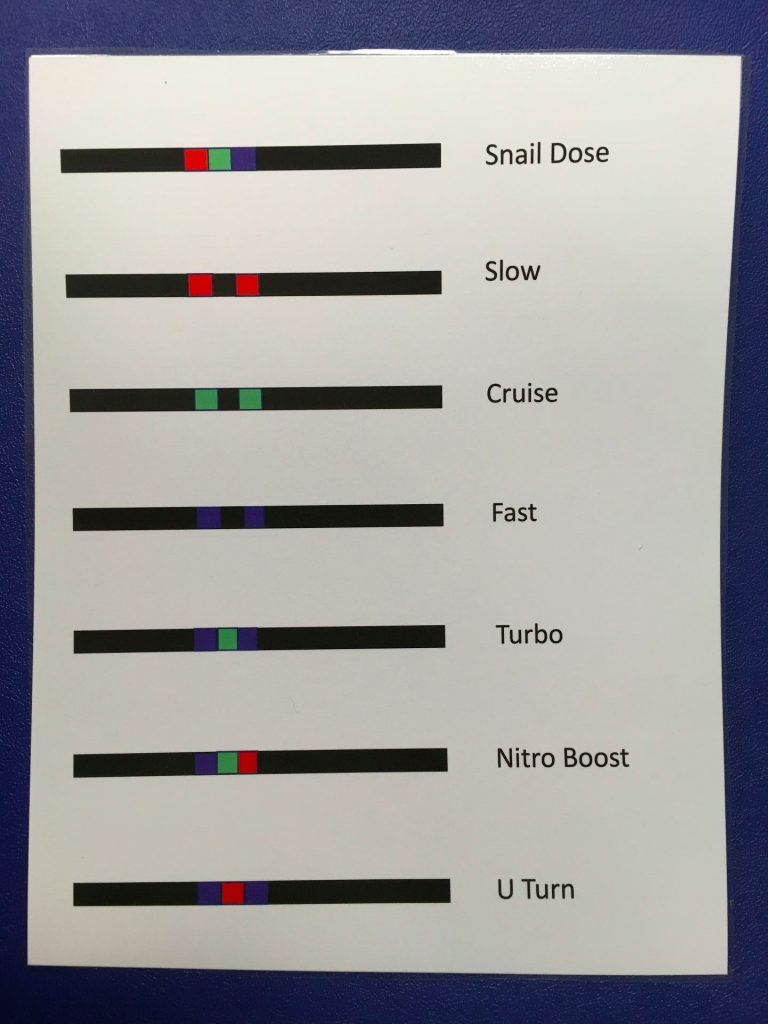 Each child also received 4 stickers. These were the “special moves” like tornado, backwalk, spin. They loved those!
 It was SO much fun watching the kindergartners interact with the Ozobots. The look of awe on their sweet faces was priceless! I wonder how many children requested these for Christmas!
Here are short videos from each class of the students enjoying the Ozobots.
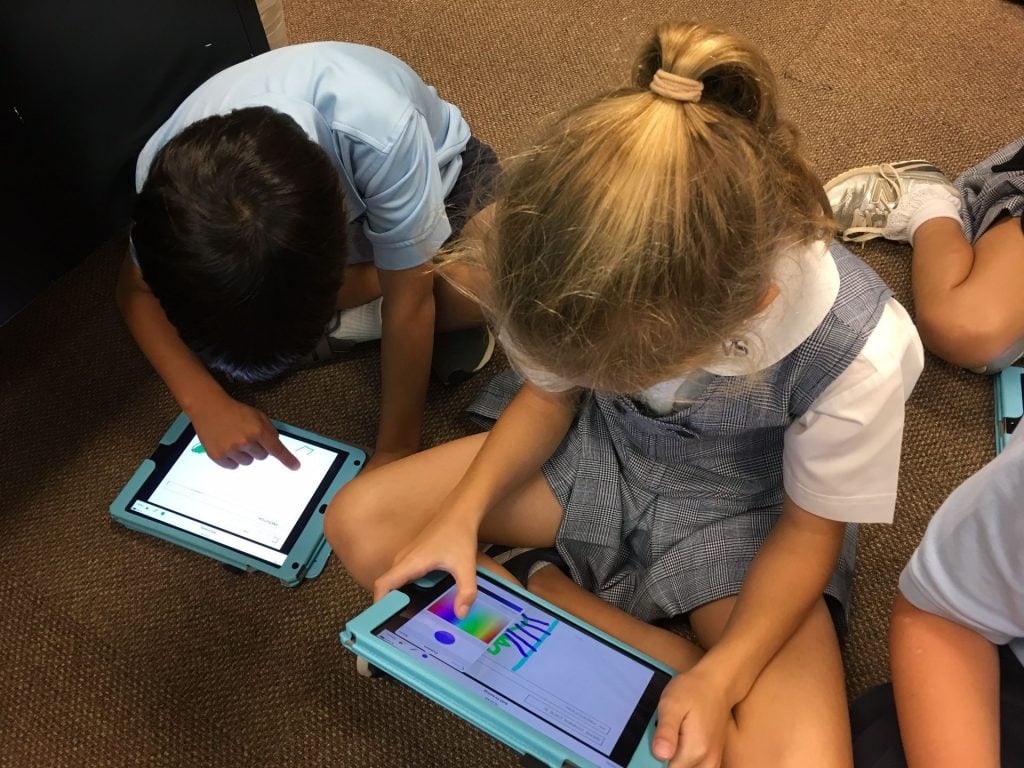
What a hit! The students absolutely LOVE programming the tiny Ozobots! These are small robots that are programmable using color codes, the Ozobot app or the online Ozoblockly block-based program. What I love about these is that they can be adapted to several ages.
One first grade class entered the room, immediately noticed the Ozobots on each table, and suddenly I heard, “Oh, Oh, Oh, we get to do Ozobots!” This little boy was practically dancing with excitement; even rushing over to give me a hug.
 Some of the second, third, and fourth grade classes were asked to video their paths and codes to upload to Seesaw journals while explaining what Ozobots are and what they do.
Here’s an example:
These fourth grade students did a fantastic job with their explanations. I see a future in sales!
Ozobots are a fun and easy way to introduce computational thinking to children. It’s easy to adapt these robots to any age.
 How the Grinch Stole Christmas, by Dr. Seuss, is one of my favorite books! When Mrs. Kee, a first grade teachers, came to me wanting to incorporate technology for “Grinch Day,” I jumped into brainstorming mode.
She wanted to have the students come up with ways to make the Grinch grin, and wondered if the Seesaw app would be an appropriate tool for this. I agreed that Seesaw would be perfect for this.
Using the DRAW tool in Seesaw, the children illustrated what they would do to make the Grinch grin. Before posting to their journal, they recorded what they would do. They came up with some very creative methods.
Here are samples from all of our first grade classes:
And, for the true meaning of Christmas . . .
Don’t you just love these cute drawings? And, wouldn’t this make a fun class book? The Book Creator app would be perfect for this activity. Hmmm. . . perhaps I’ll do that!
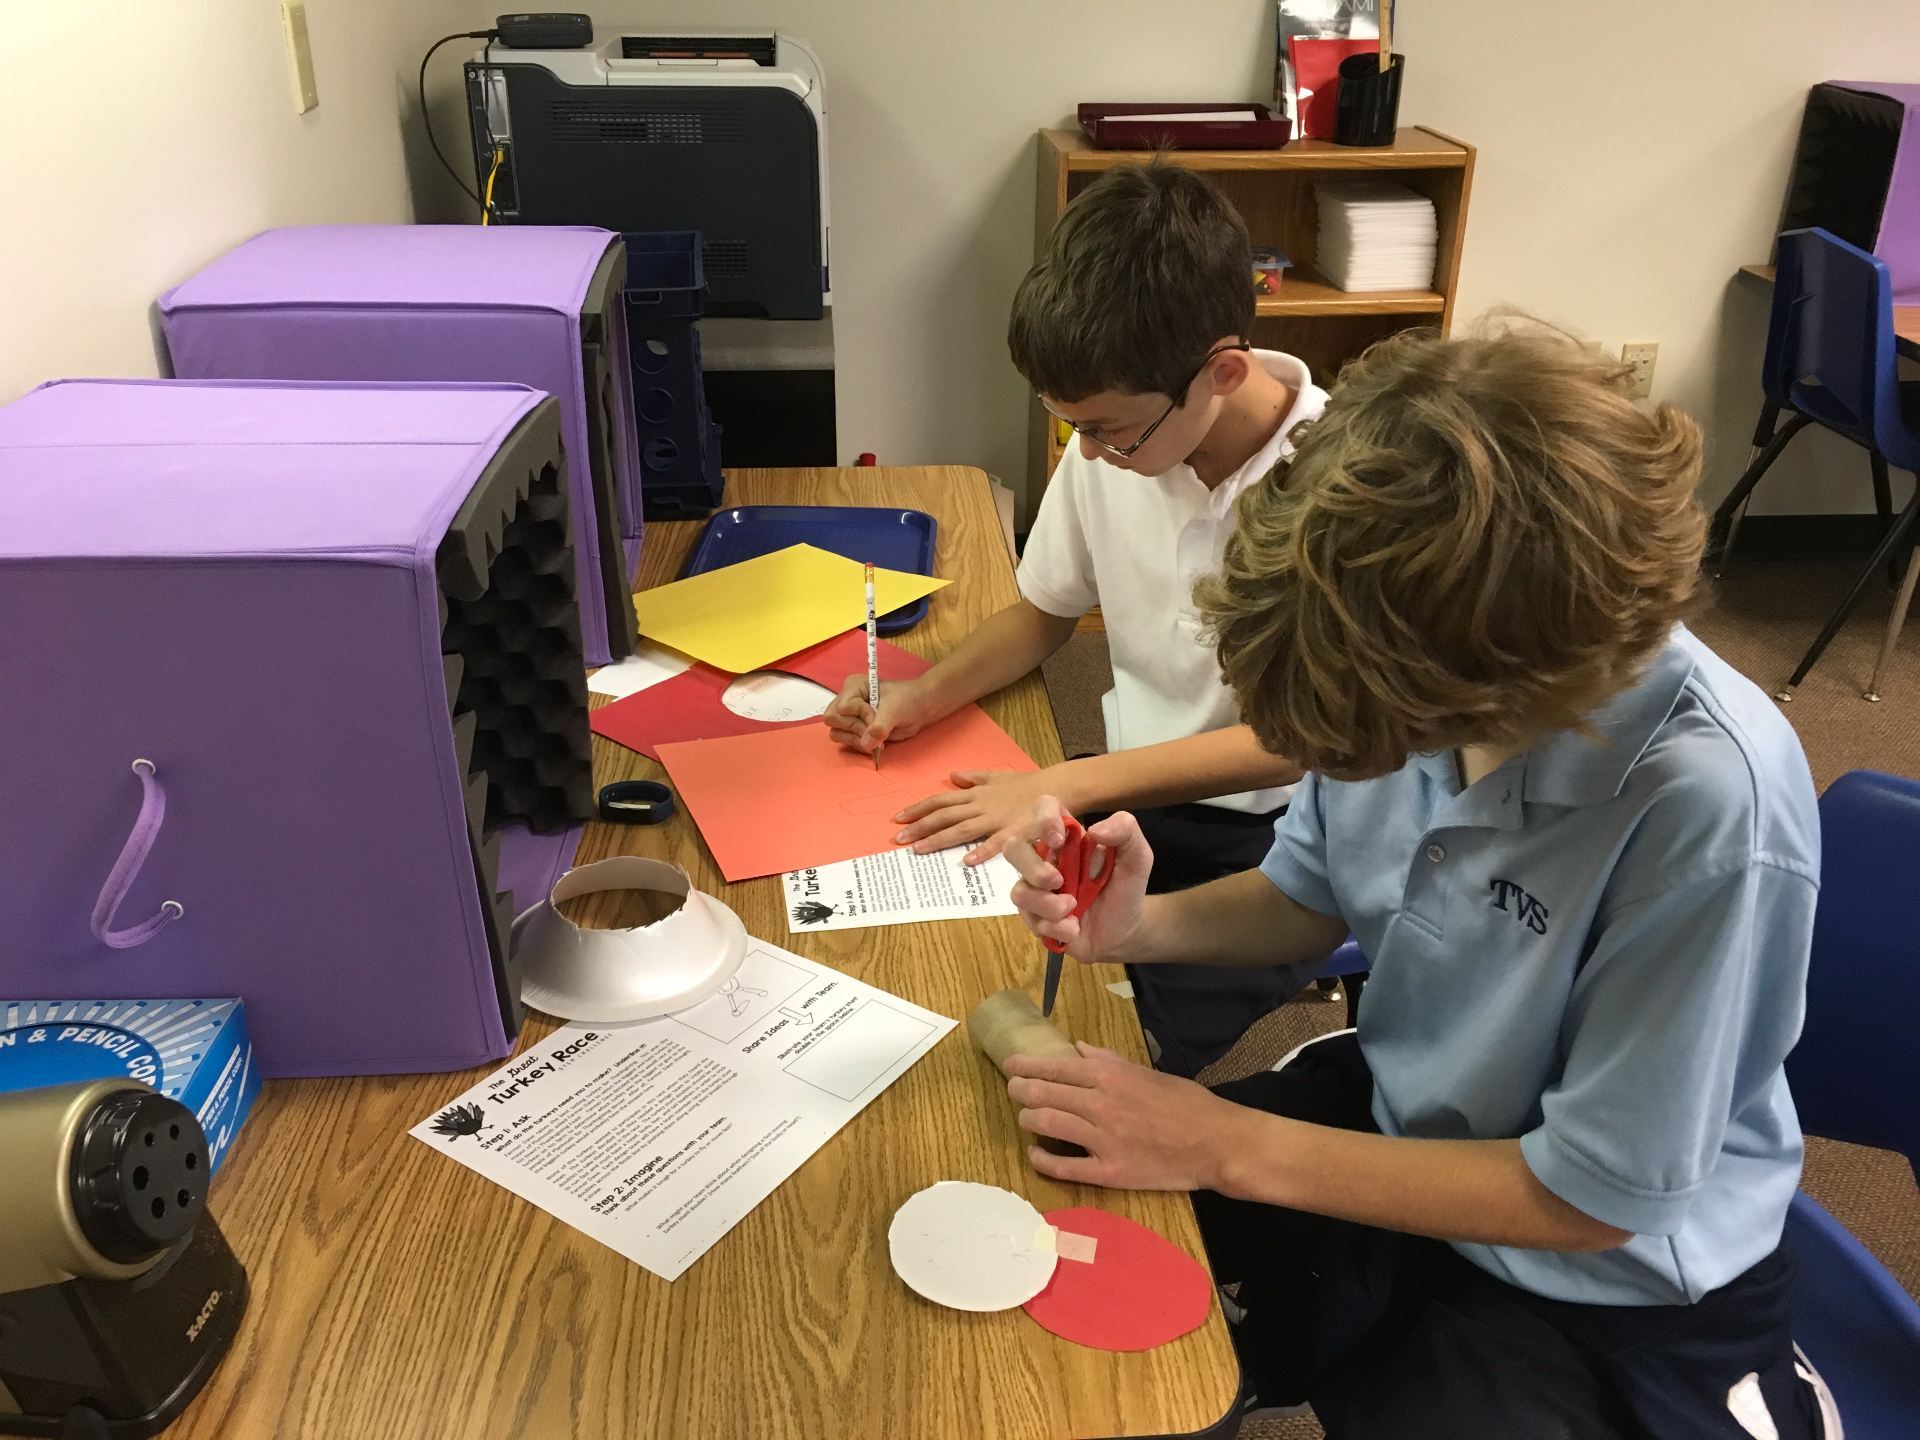
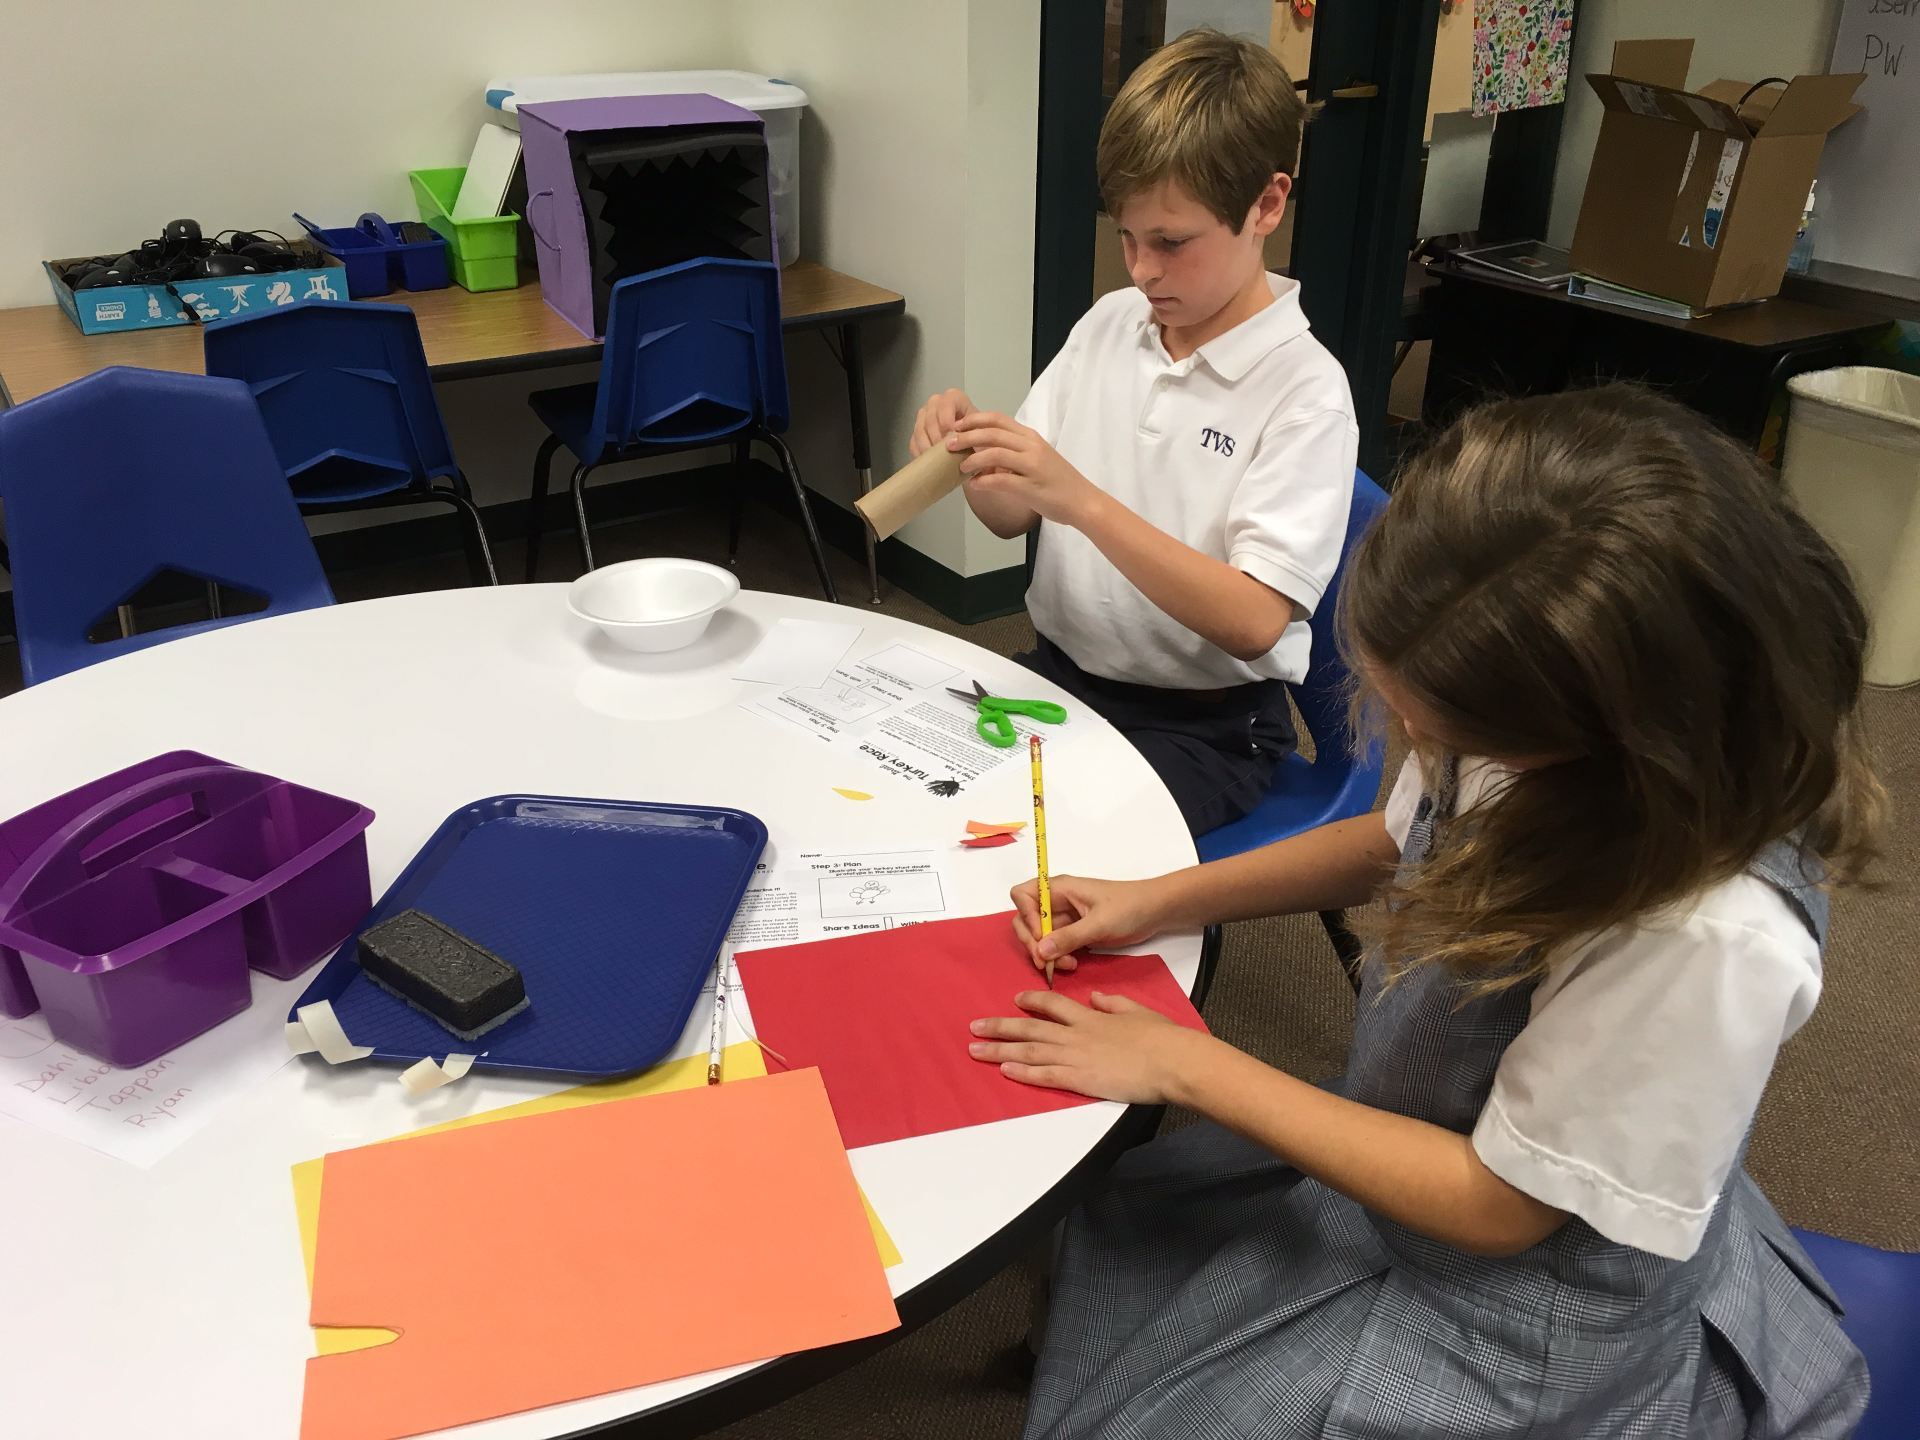
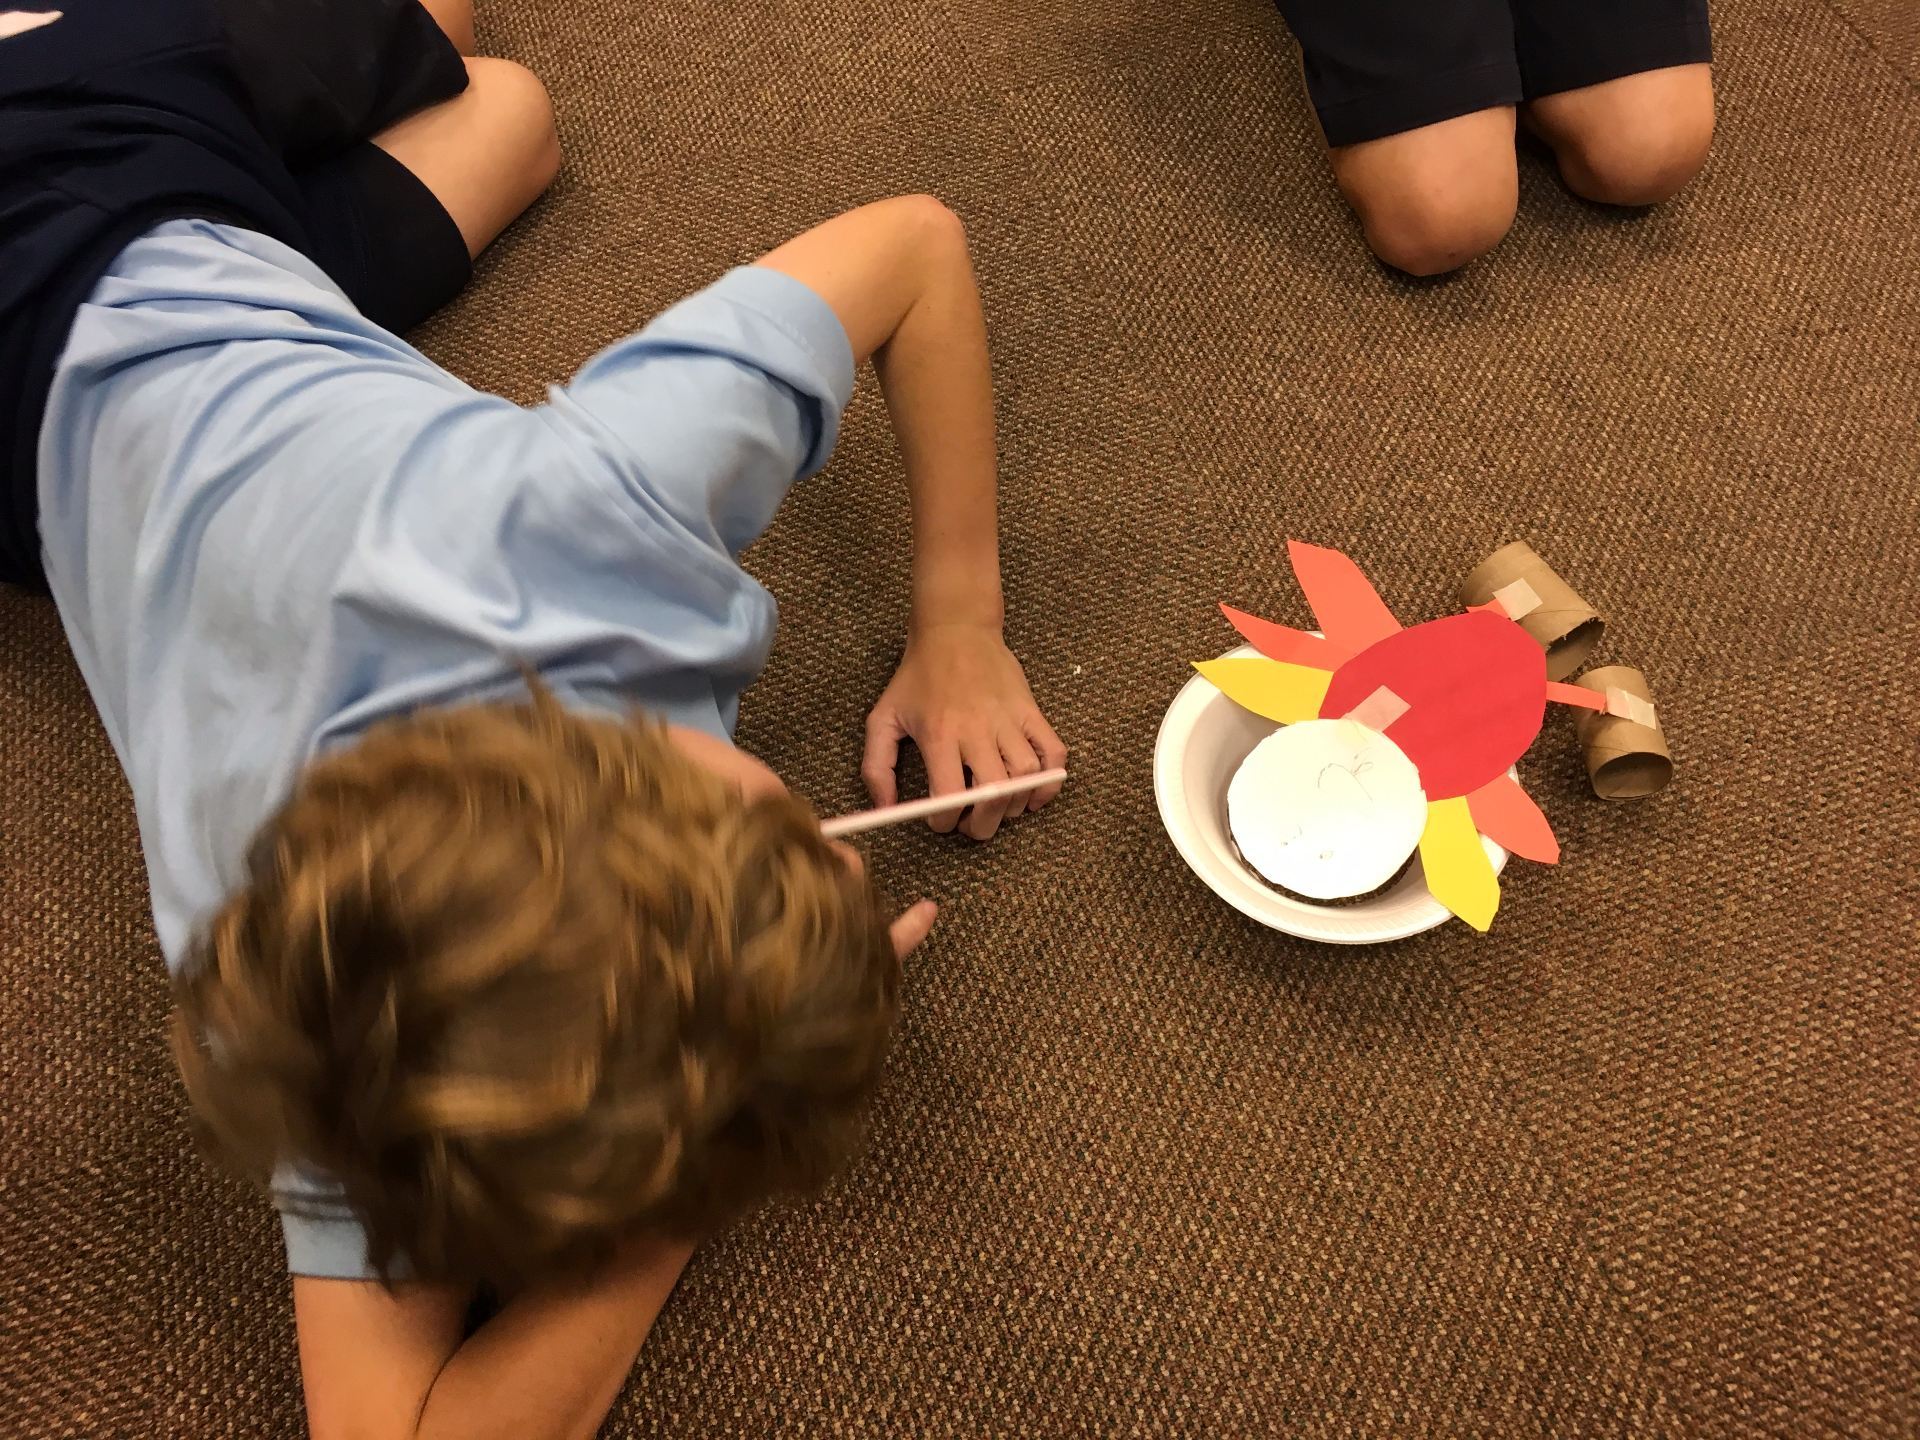
Wanting to do some kind of STEM activity with the 4th graders, I did some research and came across a blog post from Angela Willyerd, titled “The Great Turkey Race.” I did buy her packet and am glad I did – love how the design process is incorporated in the lesson!
The Problem: “Farmer Dave wants to choose the biggest and best turkey for his town’s Thanksgiving Feast. He decides to race them, assuming that the biggest turkey will be the slowest. Well, the turkeys get wind of this and decide to create a double because they don’t want to become Thanksgiving dinner!
The Challenge: The students have to create a turkey “‘double” using some common items such as styrofoam bowls, toilet paper rolls.
Angela has created a fantastic PowerPoint that walks the students through the process so we started with that. I told the class the materials they would have and what had to be included – head, body, feet, and tail feathers. Then, I asked them to sketch what they had in mind. The next step was to decide on a group design – not easy when each person is fond of their own!

The groups set to work creating some of the strangest turkey doubles I’d ever seen!

One group held up pieces of their styrofoam bowl and sheepishly asked if they could have another.
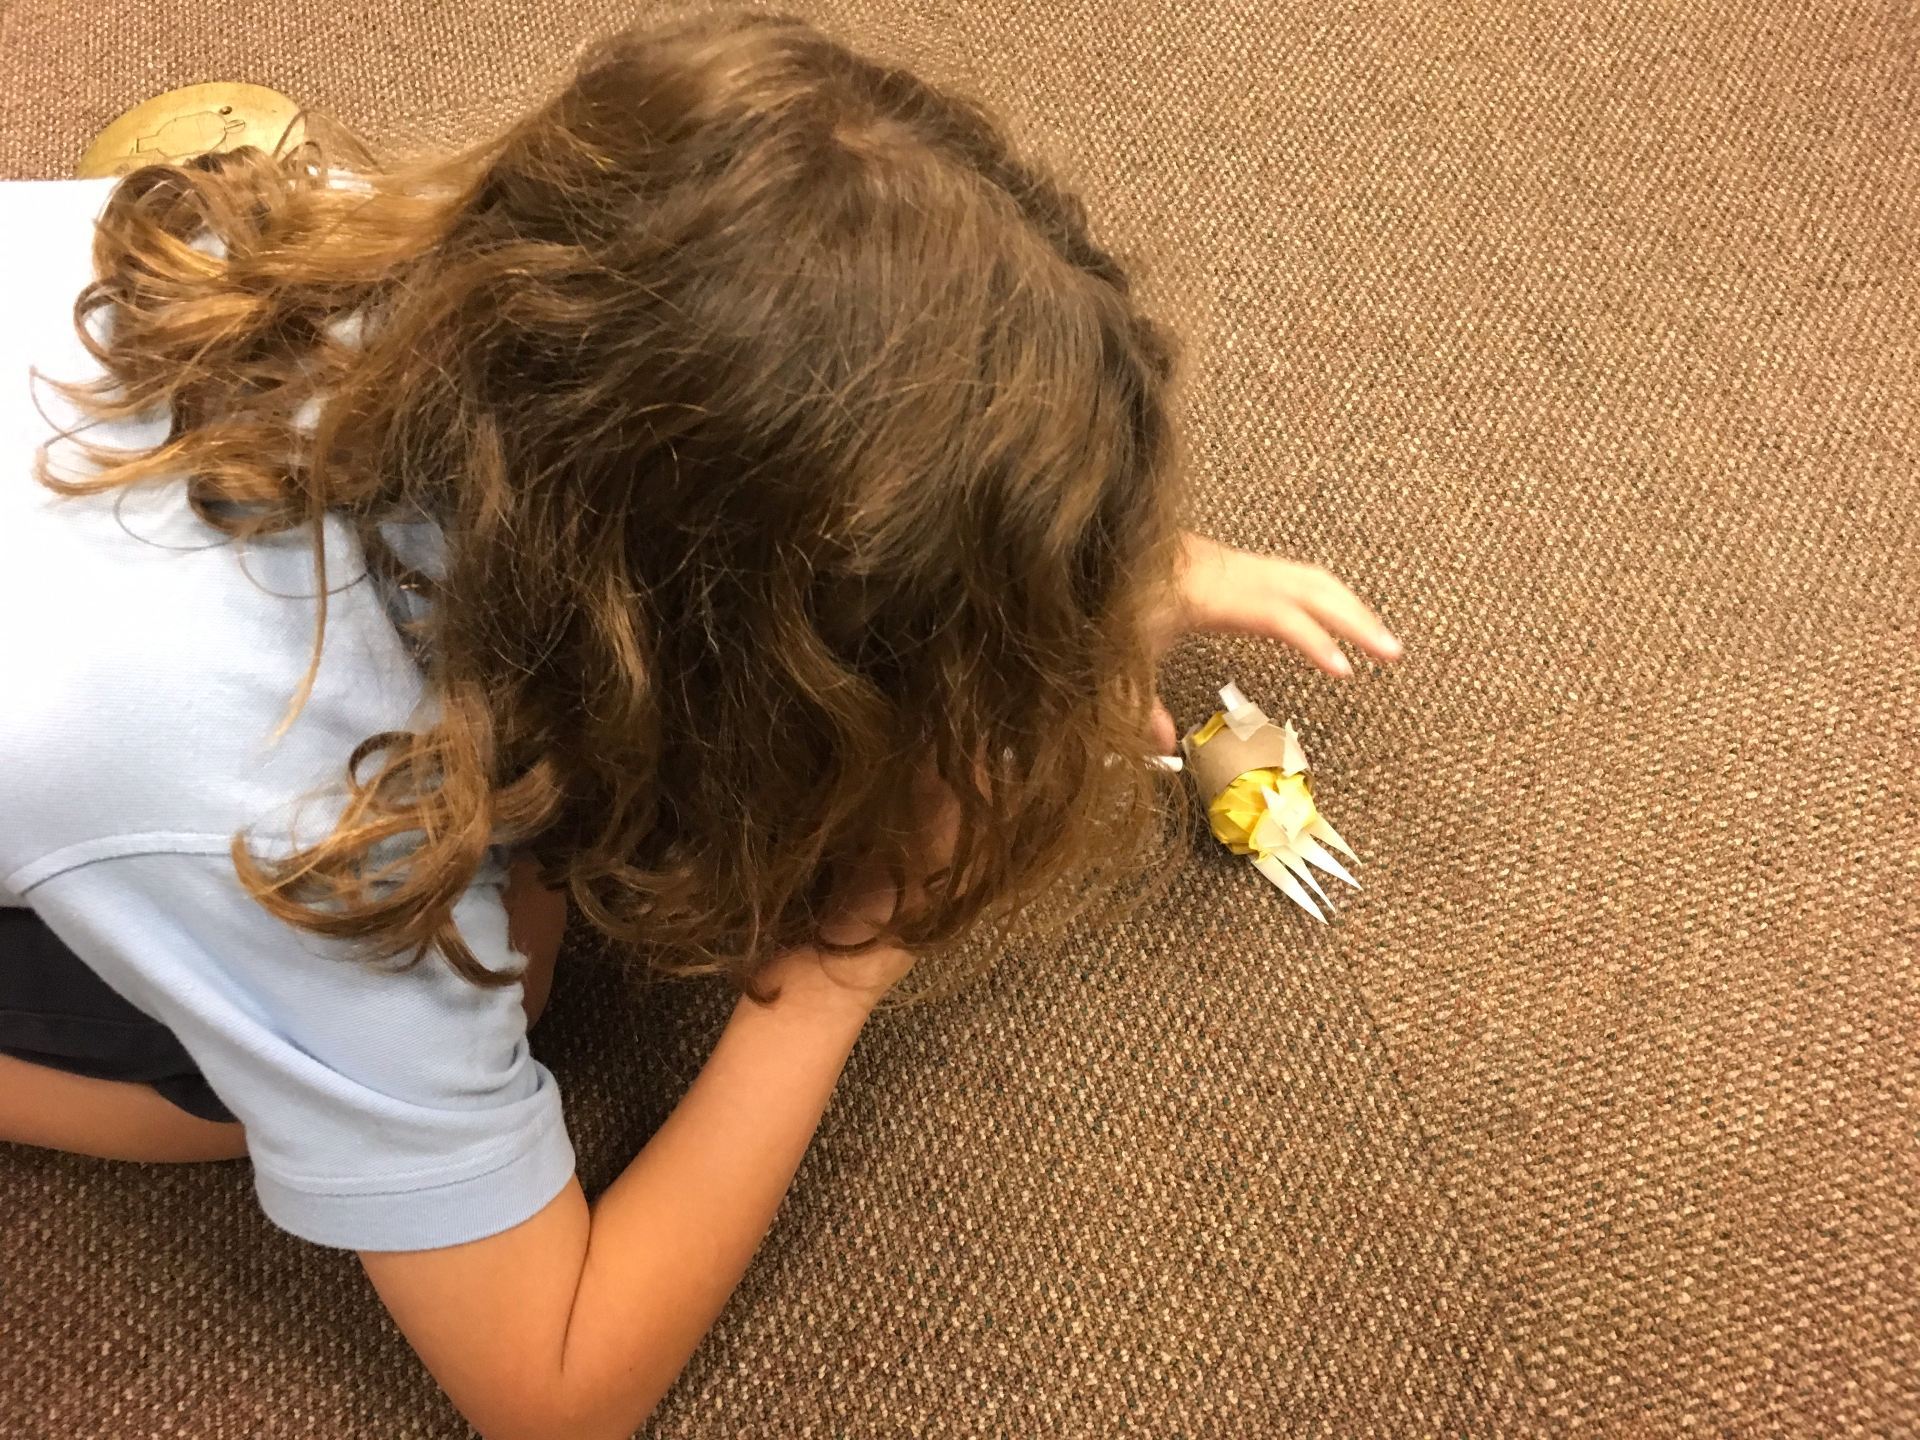
The test track had been marked by masking tape and as groups finished, the asked me to time their turkey.
This one actually rolled quite well but too many turkey parts were missing from the design!

This one was pretty cute but the team couldn’t get it to move.

They changed the design and tried again.
This was such a good challenge for learning that sometimes things don’t work they way you expect and changes need to be made. No one became frustrated; they quickly went back to their place and began to brainstorm how certain changes might affect the outcome.
Was it loud? Oh, my, yes! Were the students learning? Most definitely!
We may just continue Thanksgiving AFTER the break so that other classes have the opportunity to give this a try.
You build a great lesson to get students on their Kidblog account for the first time ever and, as soon as kids start logging in, you realize there’s trouble! Weeks ago, I’d uploaded all the students with their passwords and had logged in as each one to get them in their new class. Well, I forgot one major detail – Kidblog now forces every user to change their password when they first log in! Yes, I understand the reasoning behind it. But, really, for second graders?? What happened to the old days not that long ago when the blog administrator could get everyone set up and ready to go for students to log in seamlessly? Sure made life much easier.
 So, in a quick switch of plans, I pulled out the QR codes for the class to log into Seesaw. This was as the teacher was saying, “We can just forget lab time today.”
Hey, if a tech teacher isn’t flexible, there are many lessons that would never be taught!
The plan had been to write emoji “About Me” stories in Kidblog. We just moved to a different app to do so. Talk about a quick write! But, the students did a fantastic job and I learned a whole lot more about each student while reading their cute stories.

Despite a rough start where nothing worked as planned, all were engaged and successful with the quick change to plan B!

Pic Collage Kids
I came across a fun idea a few days ago that would be a great way to introduce the Pic Collage Kids app to our first graders. Spooky Good Costumes is a cute way to introduce students to several of the tools in an app that is useful across the curriculum.
First, why Pic Collage Kids ($1.99) rather than Pic Collage (free with in-app purchases)? Both have the same interface but there are two very important reasons why I prefer Pic Collage Kids.
- The kids app is rated 4+ while the otheris12+. This is a huge help inavoiding the inappropriate “stickers” and images that sometimes pop up on Pic Collage.
- Even though there is a charge for Pic Collage Kids, it is not that much considering that there are LOTS of free stickers that come with the app. And, younger children LOVE stickers!!
If you want a more detailed comparison of the two, click here.
Back to the project . . . I followed the instructions from the above blog post and, let me tell you, those first graders did a fantastic job! I told one class that we had only 40 minutes to do something that should normally take twice that long.
We opened the app and students had one minute to take a selfie. Really, if you give them longer, they can’t ever seem to take the “perfect” photo and they end up taking way too many!
I was a little worried about the clip tool – would it take too long to “cut” around the head, taking out the background? The kids absolutely loved this! They had so much fun cutting without scissors!

What concentration!

Look at our heads!
Next step – showing the tools for drawing (doodle), changing the background, and adding fun stickers. Students were asked to use stickers to create their name.

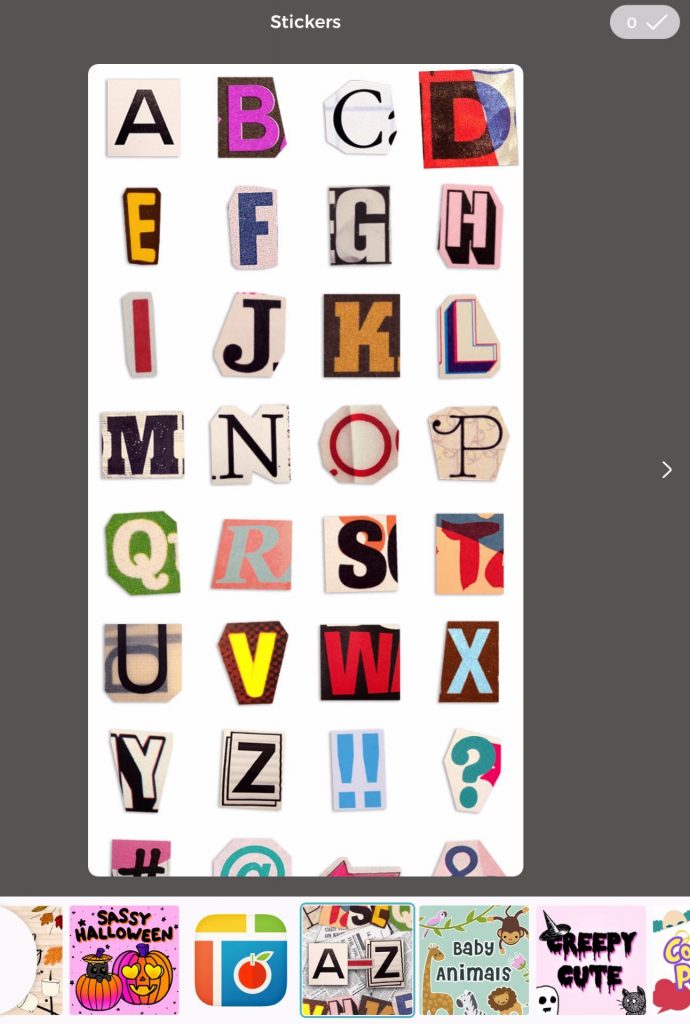
I love these letter stickers for a Halloween collage. I did impose a limit of 5 stickers (excluding the name). Otherwise, there’s a temptation to cover the page with every sticker available!
There was lots of concentration as the students created their collages.

As the students completed their drawings, they airdropped them to me. The first couple of children who finished became “tech helpers” and were they fantastic (not to mention, proud!).
Here’s the animoto video of the costumed first graders. Enjoy!
I love incorporating literacy skills into lab activities and bringing in technology is a fun and effective way to make predictions.
 This year, I discovered the book, What’s Under the Bed, by Joe Fenton. It’s a quick, rhyming book about a boy named Fred who is trying to go to sleep but hears noises under his bed. He finally decides to check it out: “One, Two, Three, Four . . . It’s time to look on the floor!” And, that’s where I stopped!
Before class, I created a template and air dropped it to our shared iPads. When the students arrived, we worked together to add a name to their page and set up the drawing feature. After doing some predicting by discussing the title, I told the children they could illustrate as I read. We read till we reached the page where Fred was about to look under his bed. At that point, the directions were to:
- finish illustrating your prediction,
- write your prediction, and
- record your prediction.
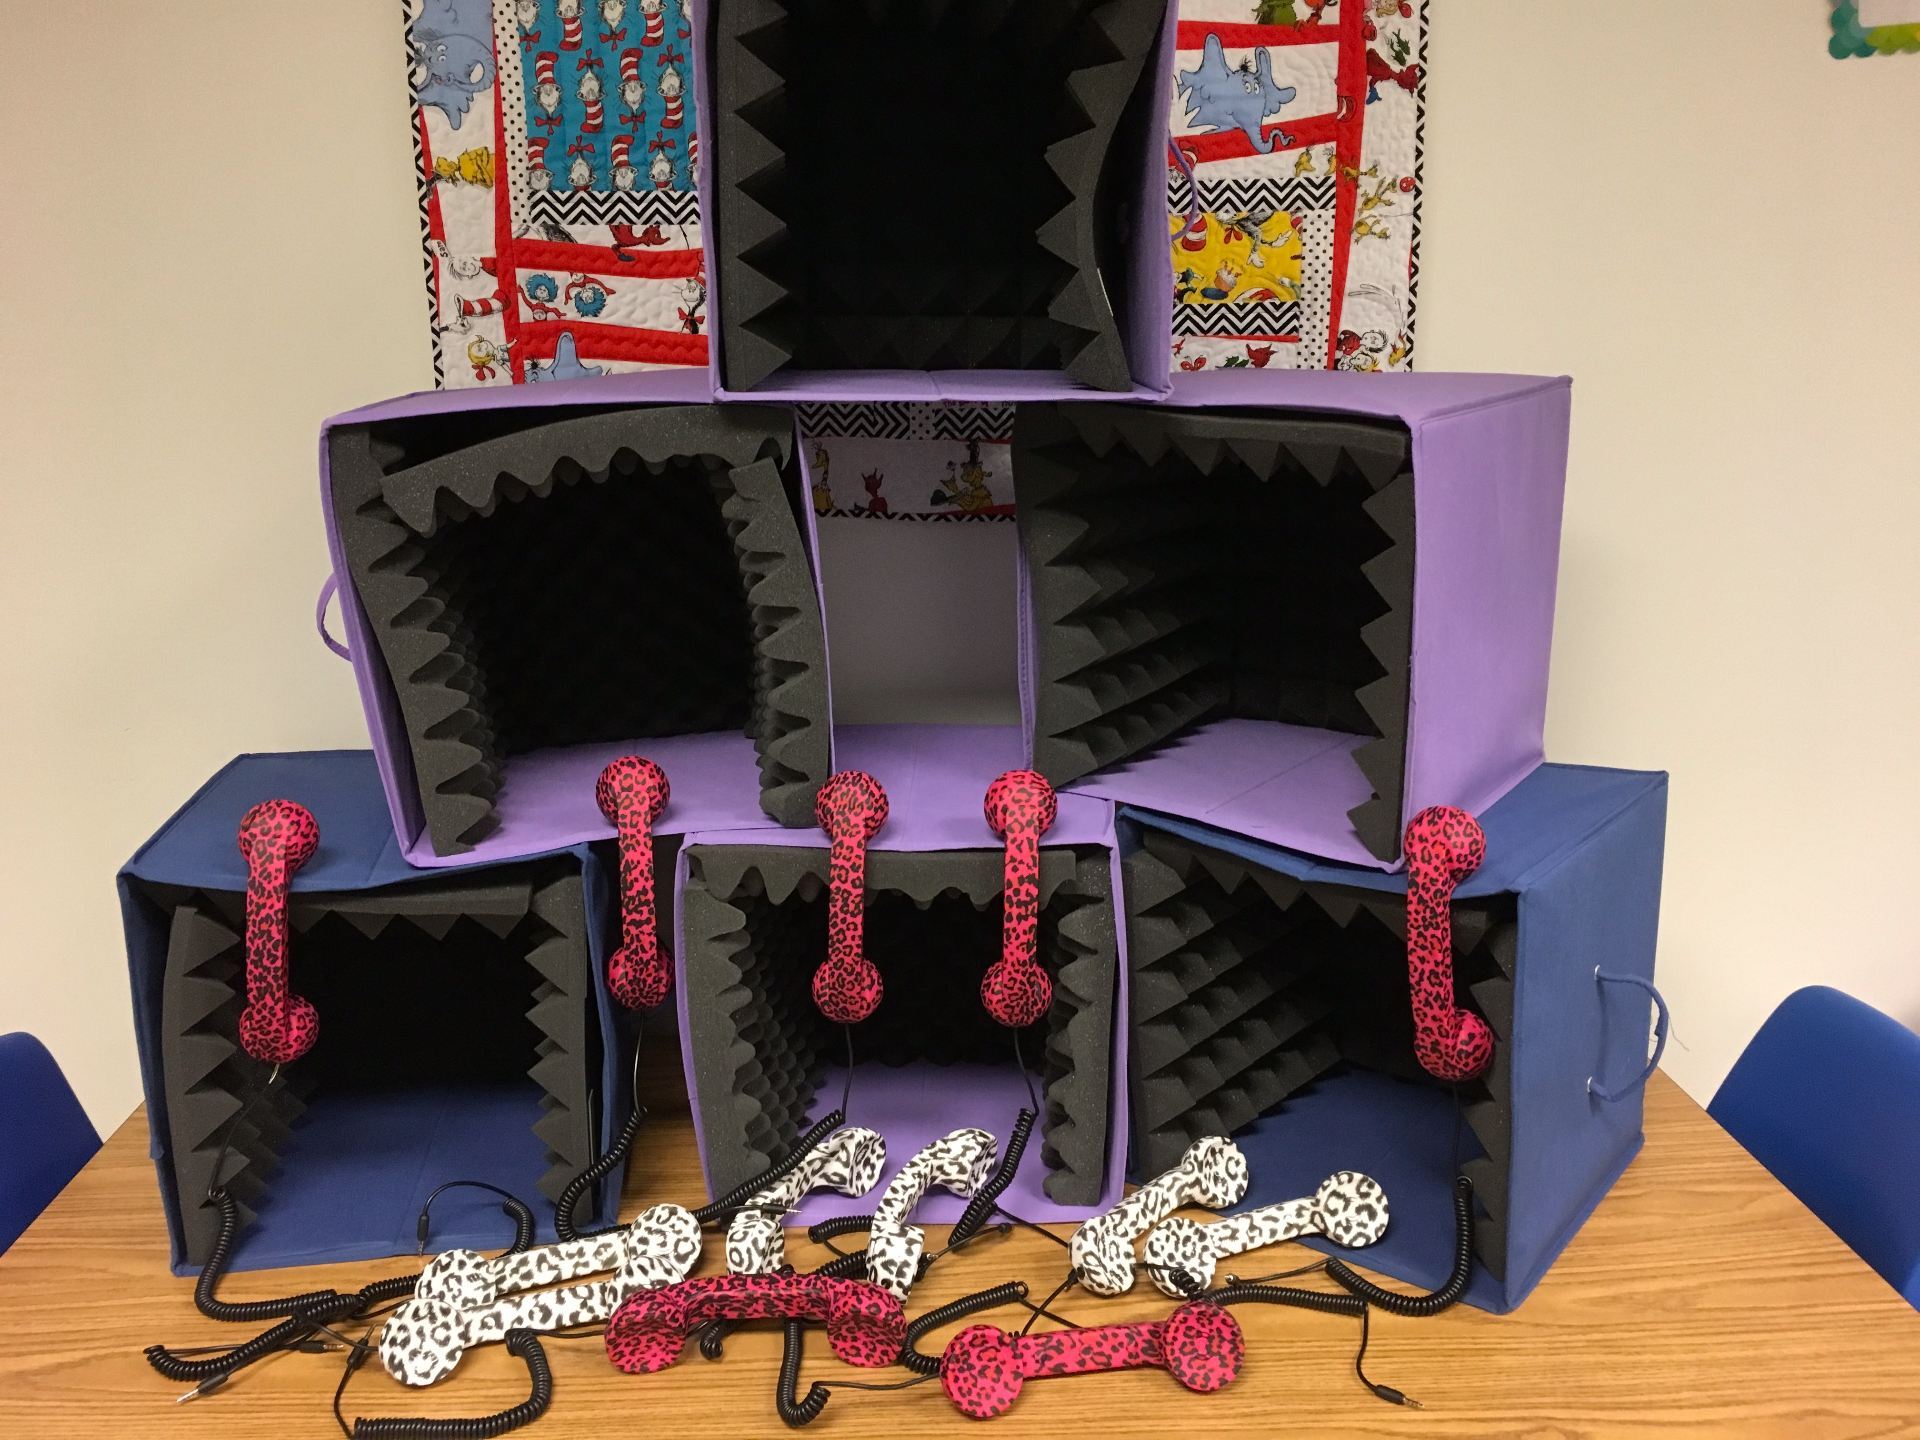
Instead of giving all the instructions at once, the students drew for about ten minutes. As they began to wrap up the drawings, I showed how to record. Soon all were off to various corners of the room, using our “telephone’ mics or the recording cubes.

When everyone had completed their one-page book and air-dropped it to me, we finished reading. What is great about this book is that there are visual clues to what is under the bed. It’s several pages back and you have to watch to catch it. This was a great way to discuss how important it is to look at ALL clues – in the text as well as in the illustrations!
Making Predictions with Second Graders from Trinity Valley School on Vimeo.
The class ebooks can be read on an iOS device (iPad or iPhone) by following the directions below. This eBook will NOT work properly on any other device (i.e. Kindle, Android tablet or phone). However, the books have also been saved as a video that can be seen on any computer or mobile device.
Instructions for Viewing Books and Videos:
If you are downloading the ePub books, remember that you need to click on the book link while on an iPad or iPhone that has the iBooks app. Choose download and open in iBooks.
Click on the word “book” or “video” to view the projects.
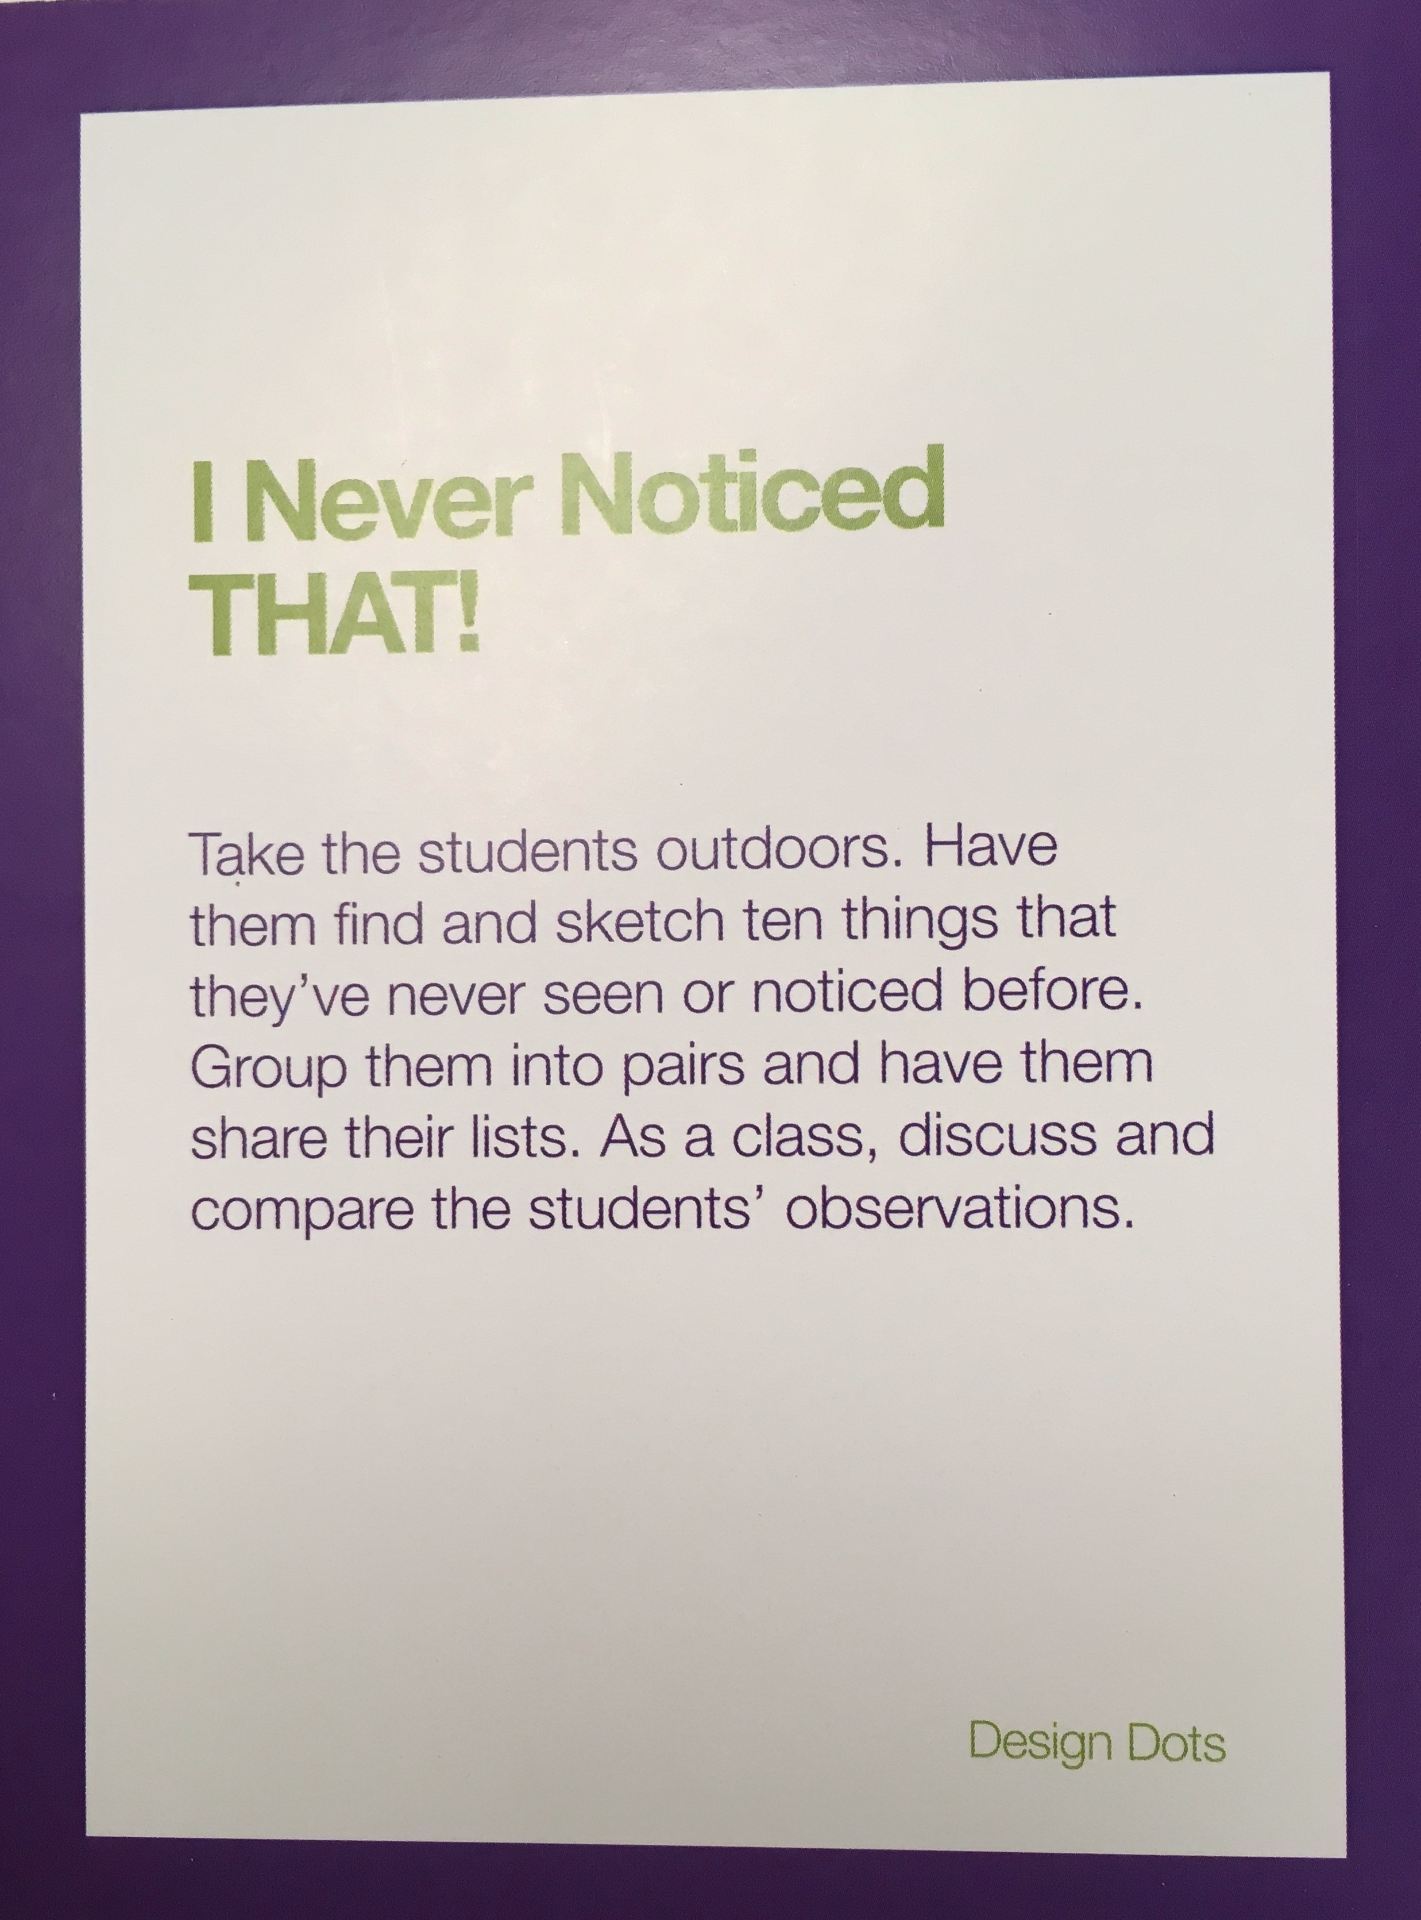
Recently, I purchased Design Dots from Ellen Deutscher. These are Design Thinking activities for grades K – 12.
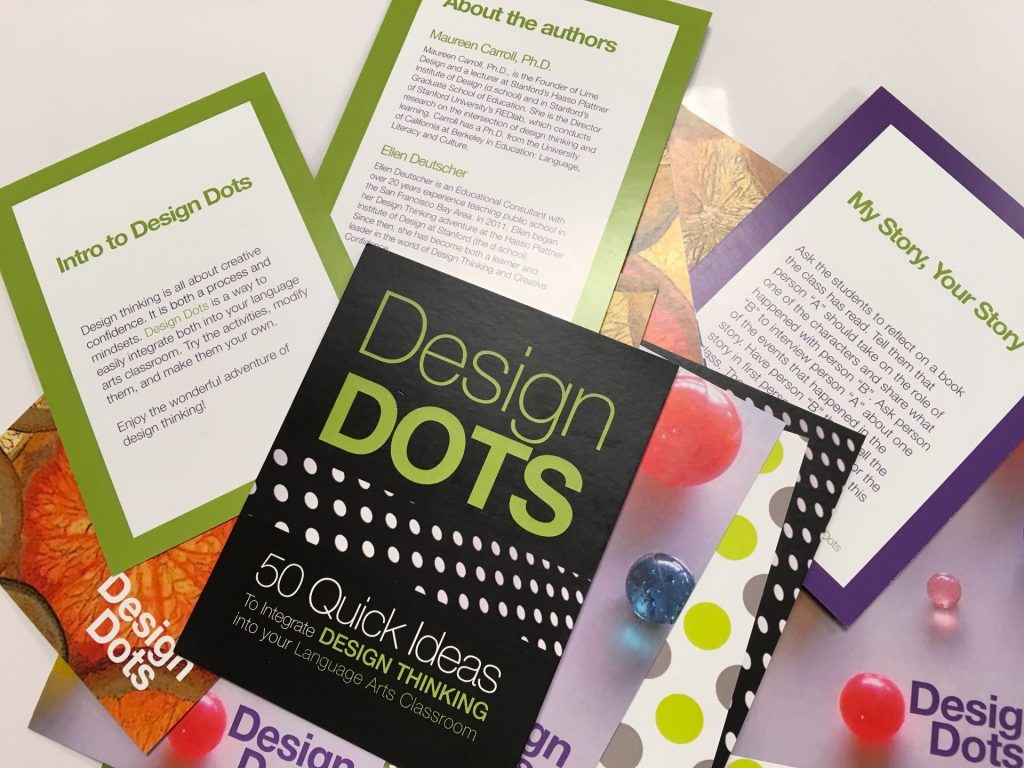
For this activity, I chose “I Never Noticed That!”

I adapted this to include technology by having students search for 6 to 8 items that they had not noticed before OR that they might have seen but had questions about. They were to photograph these, make a video that included their questions or “I wonder” statements, and post to their Seesaw (digital portfolio) journal.
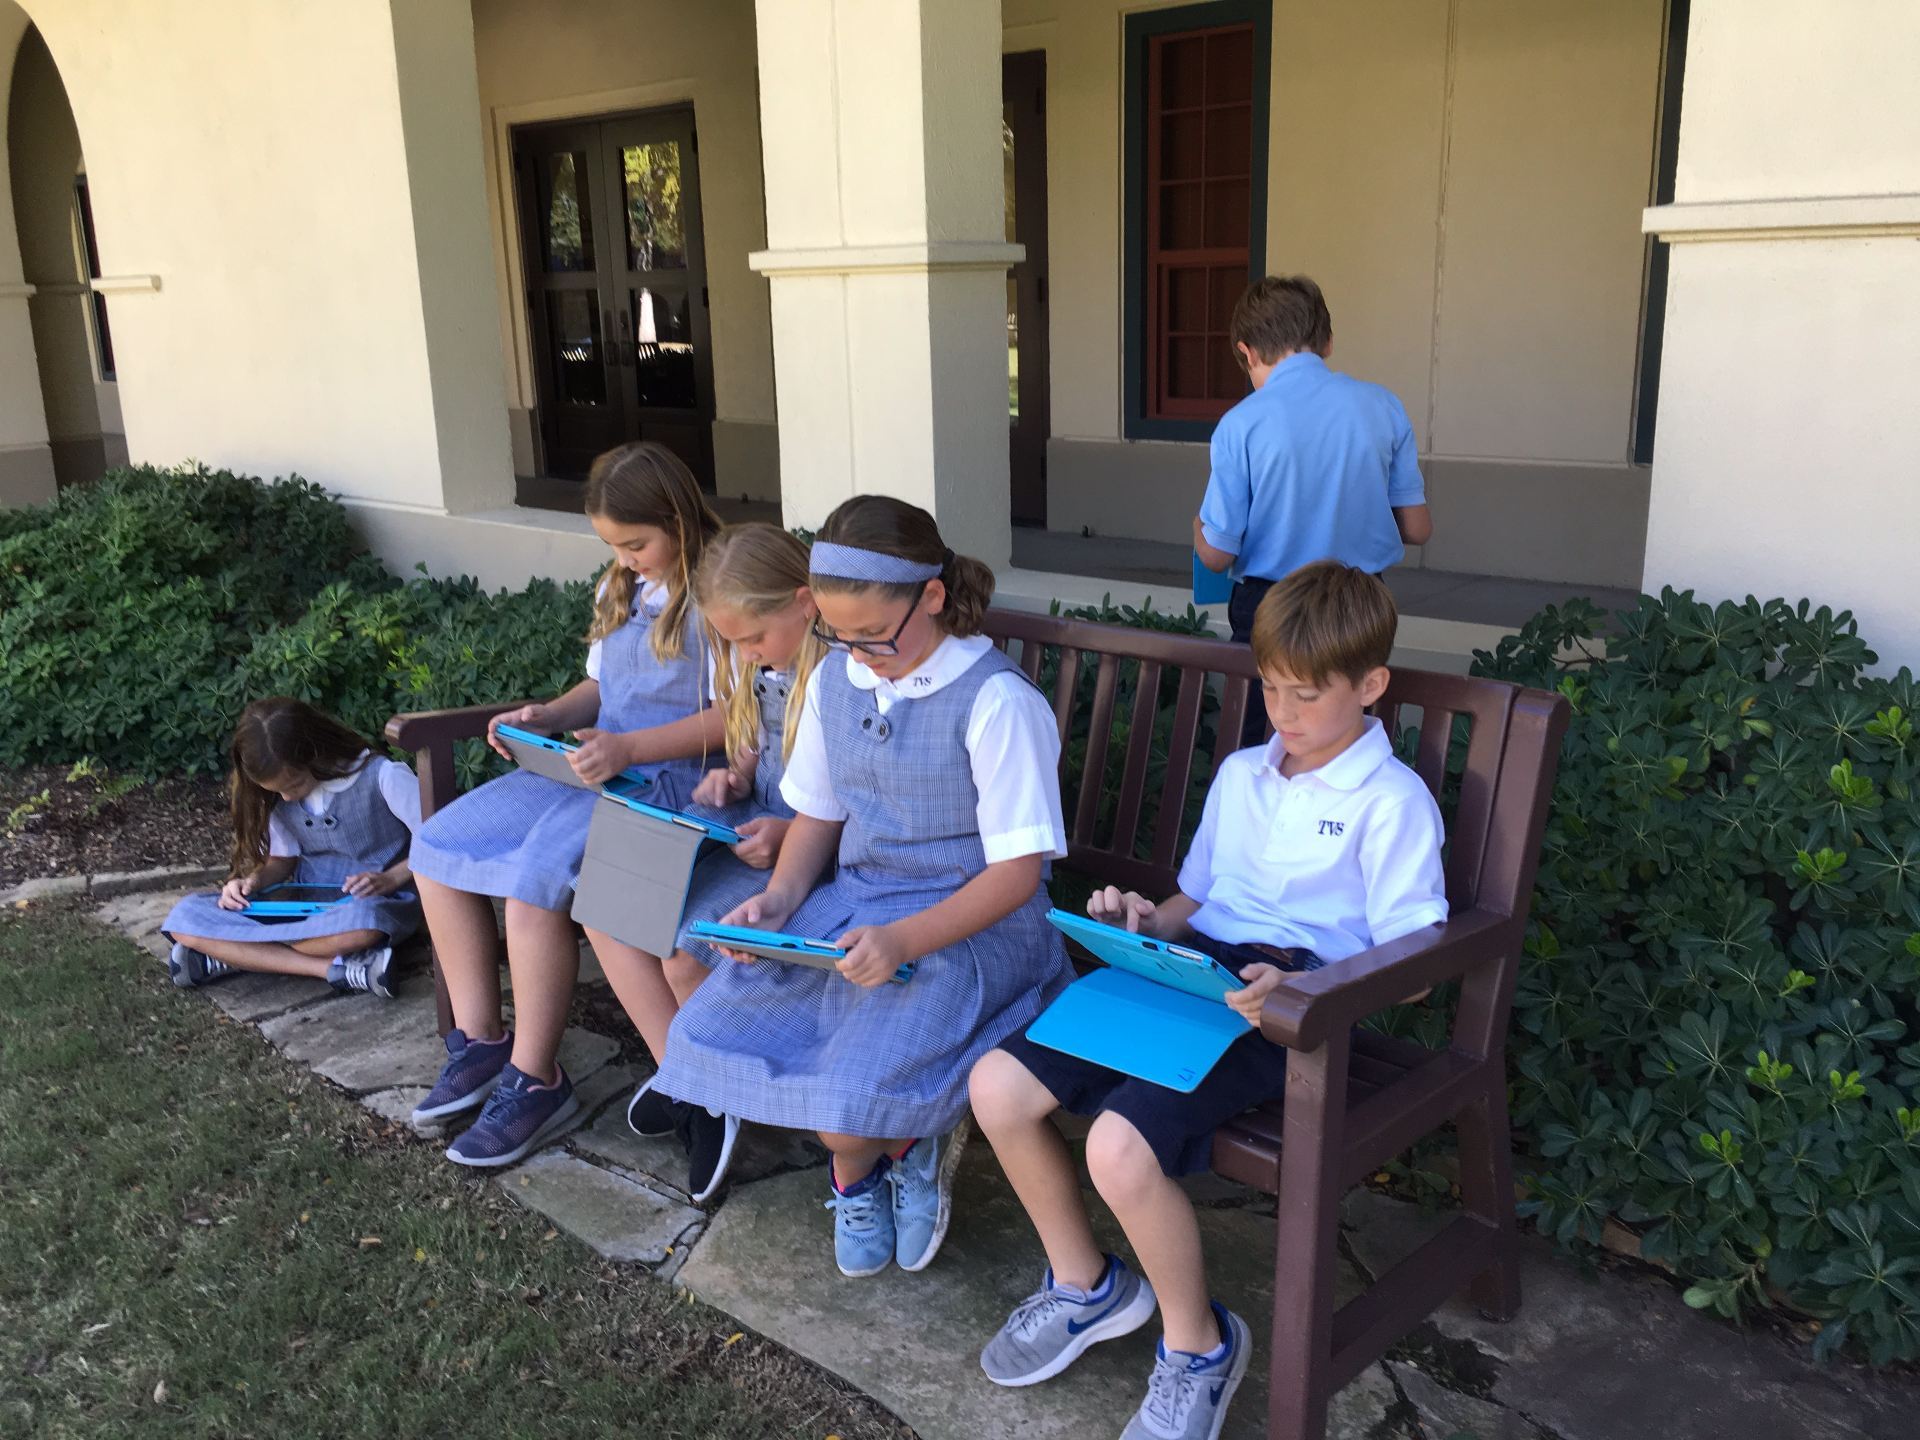
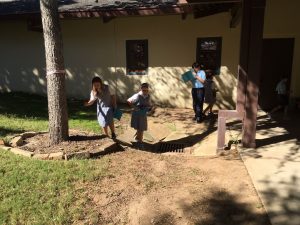
Telling the students this was an individual search for the unusual, we headed outside. With about 10 minutes to take 6 to 8 photos, they wandered around, searching for just the right object.
Once they completed the search, they were to start cropping their images. Many discovered the new feature in iOS 11 that allows the user to draw on photos.

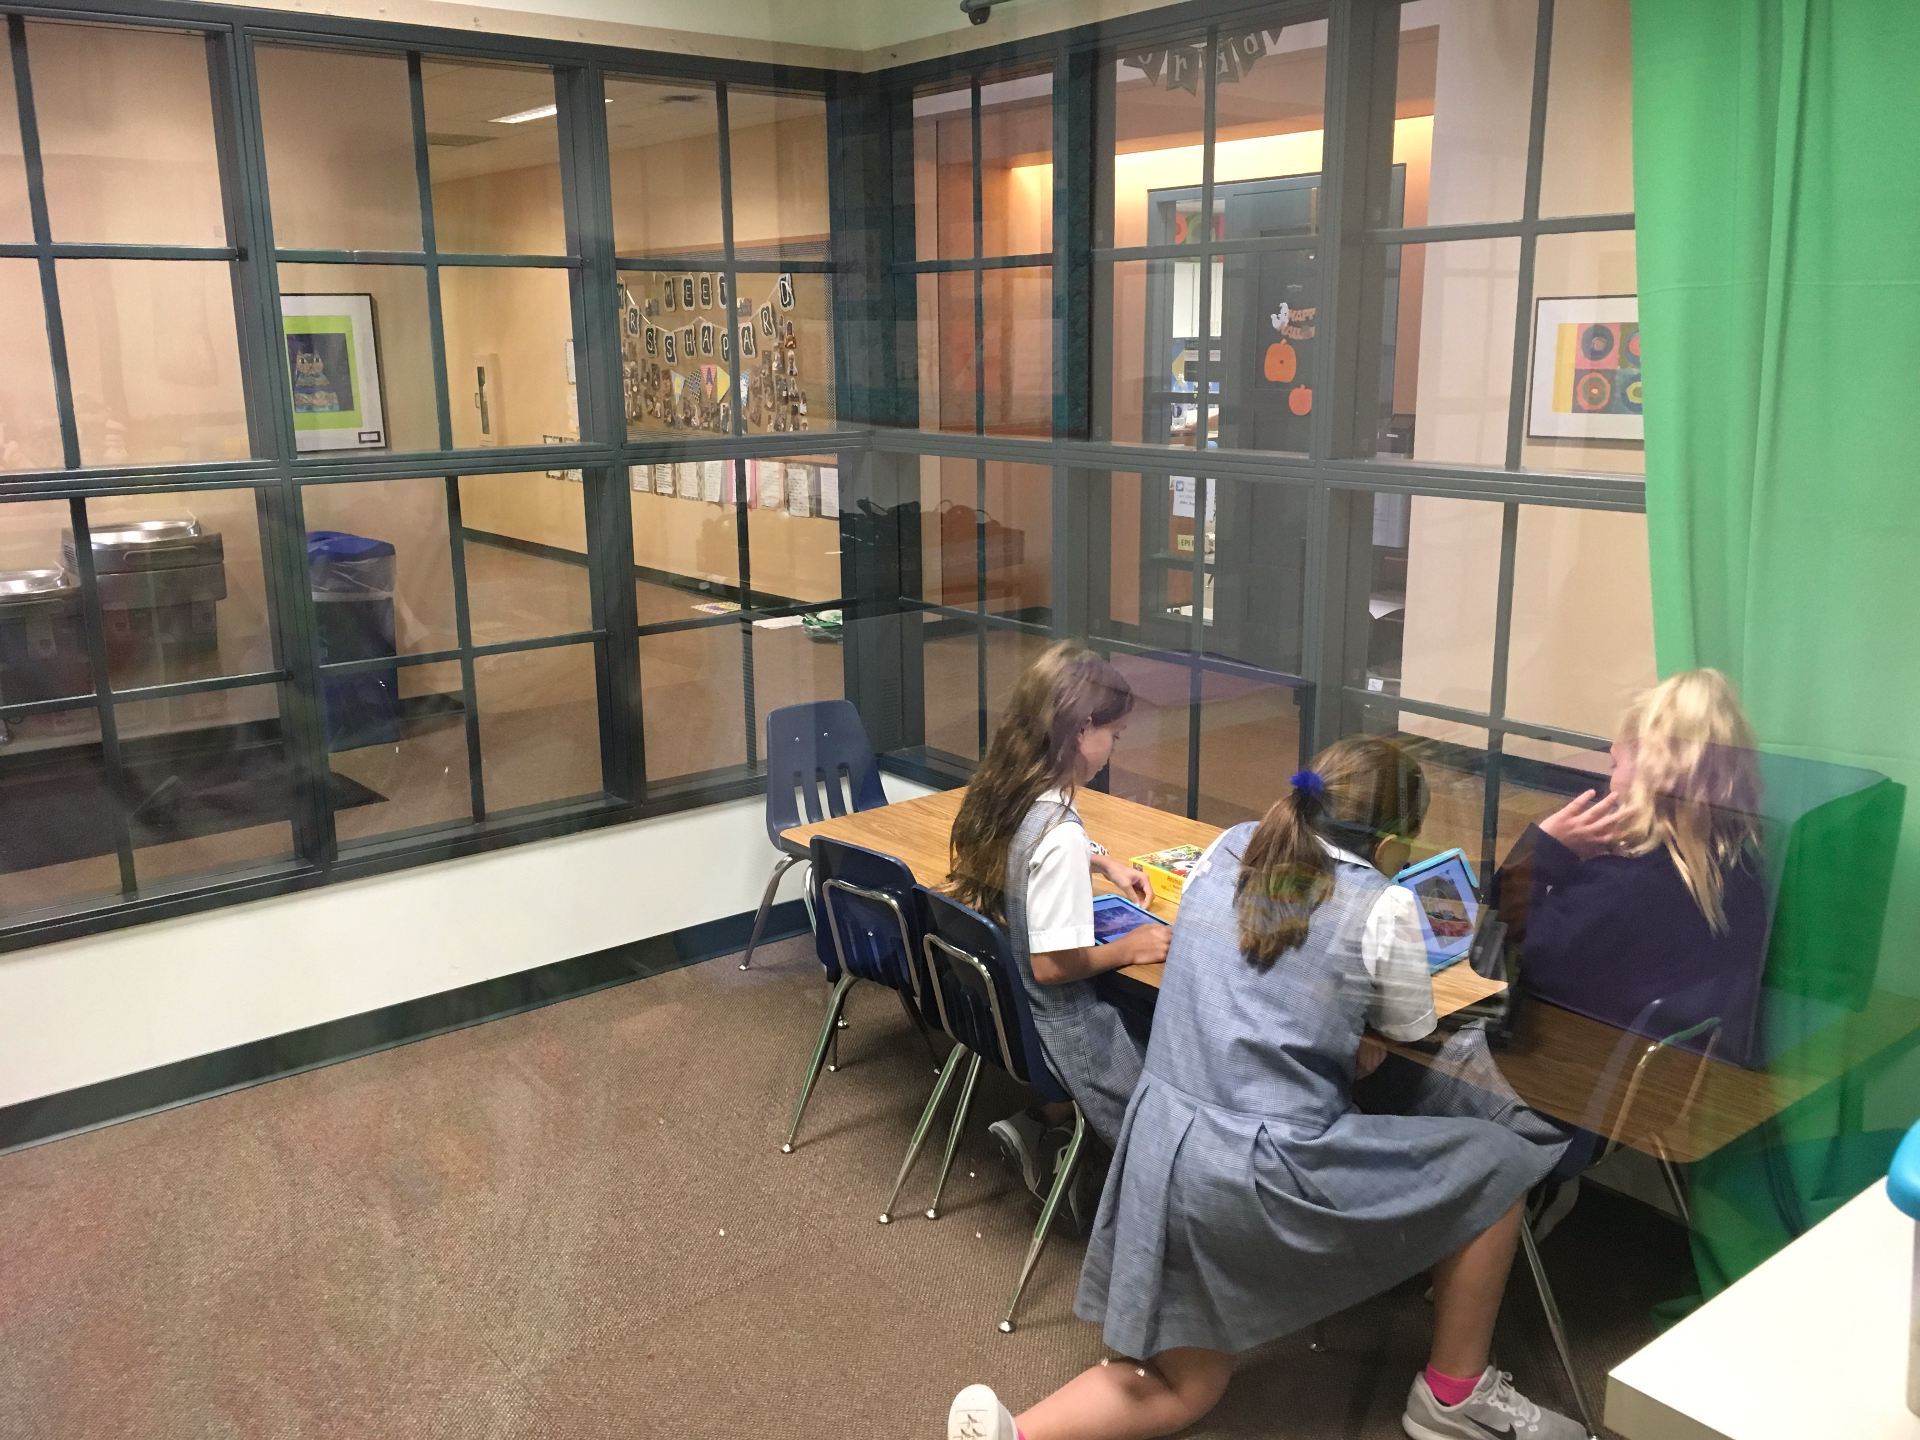
I’d thought we could complete taking the photos, cropping, and uploading to Shadow PuppetEDU in one 40 minute session. It turned out that the group had such a good time exploring things they’d never seen before, that we were lucky to finish just the photography and the cropping! But, the activity was designed to focus on observation skills so that was fine.
The following day, I introduced the free Shadow PuppetEDU app; a video-creation app in which narration, text, and music can be added. (*Be sure to get the EDU version of Shadow Puppet which is licensed for educational use.) This app works seamlessly with the Seesaw app which we are now using in the Lower School, so I had students sign in to that before we started working with Puppet EDU.
We then worked together to add photos. I demonstrated how to record, save, tap the Seesaw icon, and automatically upload to their Seesaw journal. Before dismissing the students, I shared expectations: They were to ask thoughtful questions about the objects they found OR create “I Wonder” statements.

Below are some sample recordings.
To wrap up, students shared with their table groups what they’d discovered. The area we explored isn’t that large so there were many who had similar or the same photos. It was fun listening to the children as they participated in their own brainstorming session, trying to determine the purpose of some of their findings!
Perhaps this appears to be a “simple” activity for 4th graders. Before heading outside, some of the students stated, “I’ve been out there a lot and already know exactly what is there. I won’t find anything new.” Guess what? They did! That is, once they decided to really search! Were all of the videos what I’d hoped to get? No, some were silly but, some of the students did ask great questions!
Learning to observe is an important skill that we sometimes assume students have no trouble doing. After all, little ones are very observant. Think about the never-ending questions from toddlers and pre-schoolers. However, it seems that the older we get, the less we question. This activity was a fun way to get children to go back to their observing and questioning days that they first thought they were too “old” to do! We’ll definitely do an adaptation of this again.
Click on the picture to access our October newsletter. Enjoy!

Today we did Book Talks with one of the 4th grade classes using Flipgrid. I asked the children to choose a picture book, read it, then post a 30 second review on Flipgrid. We’ll share these with our younger children to help them discover new books to read.
Here are some samples:
I LOVE flipgrid! What a quick way for students to share content, books, what they’ve learned, and so much more with others. I purchased the paid version so that I could have different grids. If you discover that you’ll be using this often, that is the way to go!

 I love bringing out Ozobots for Hour of Code! There are so many things you can do with them – draw paths and codes on paper using markers and predetermined code combinations, make paths and insert codes using the Ozobot Draw app, and drag and drop programming with Ozoblockly. There’s something for all ages!
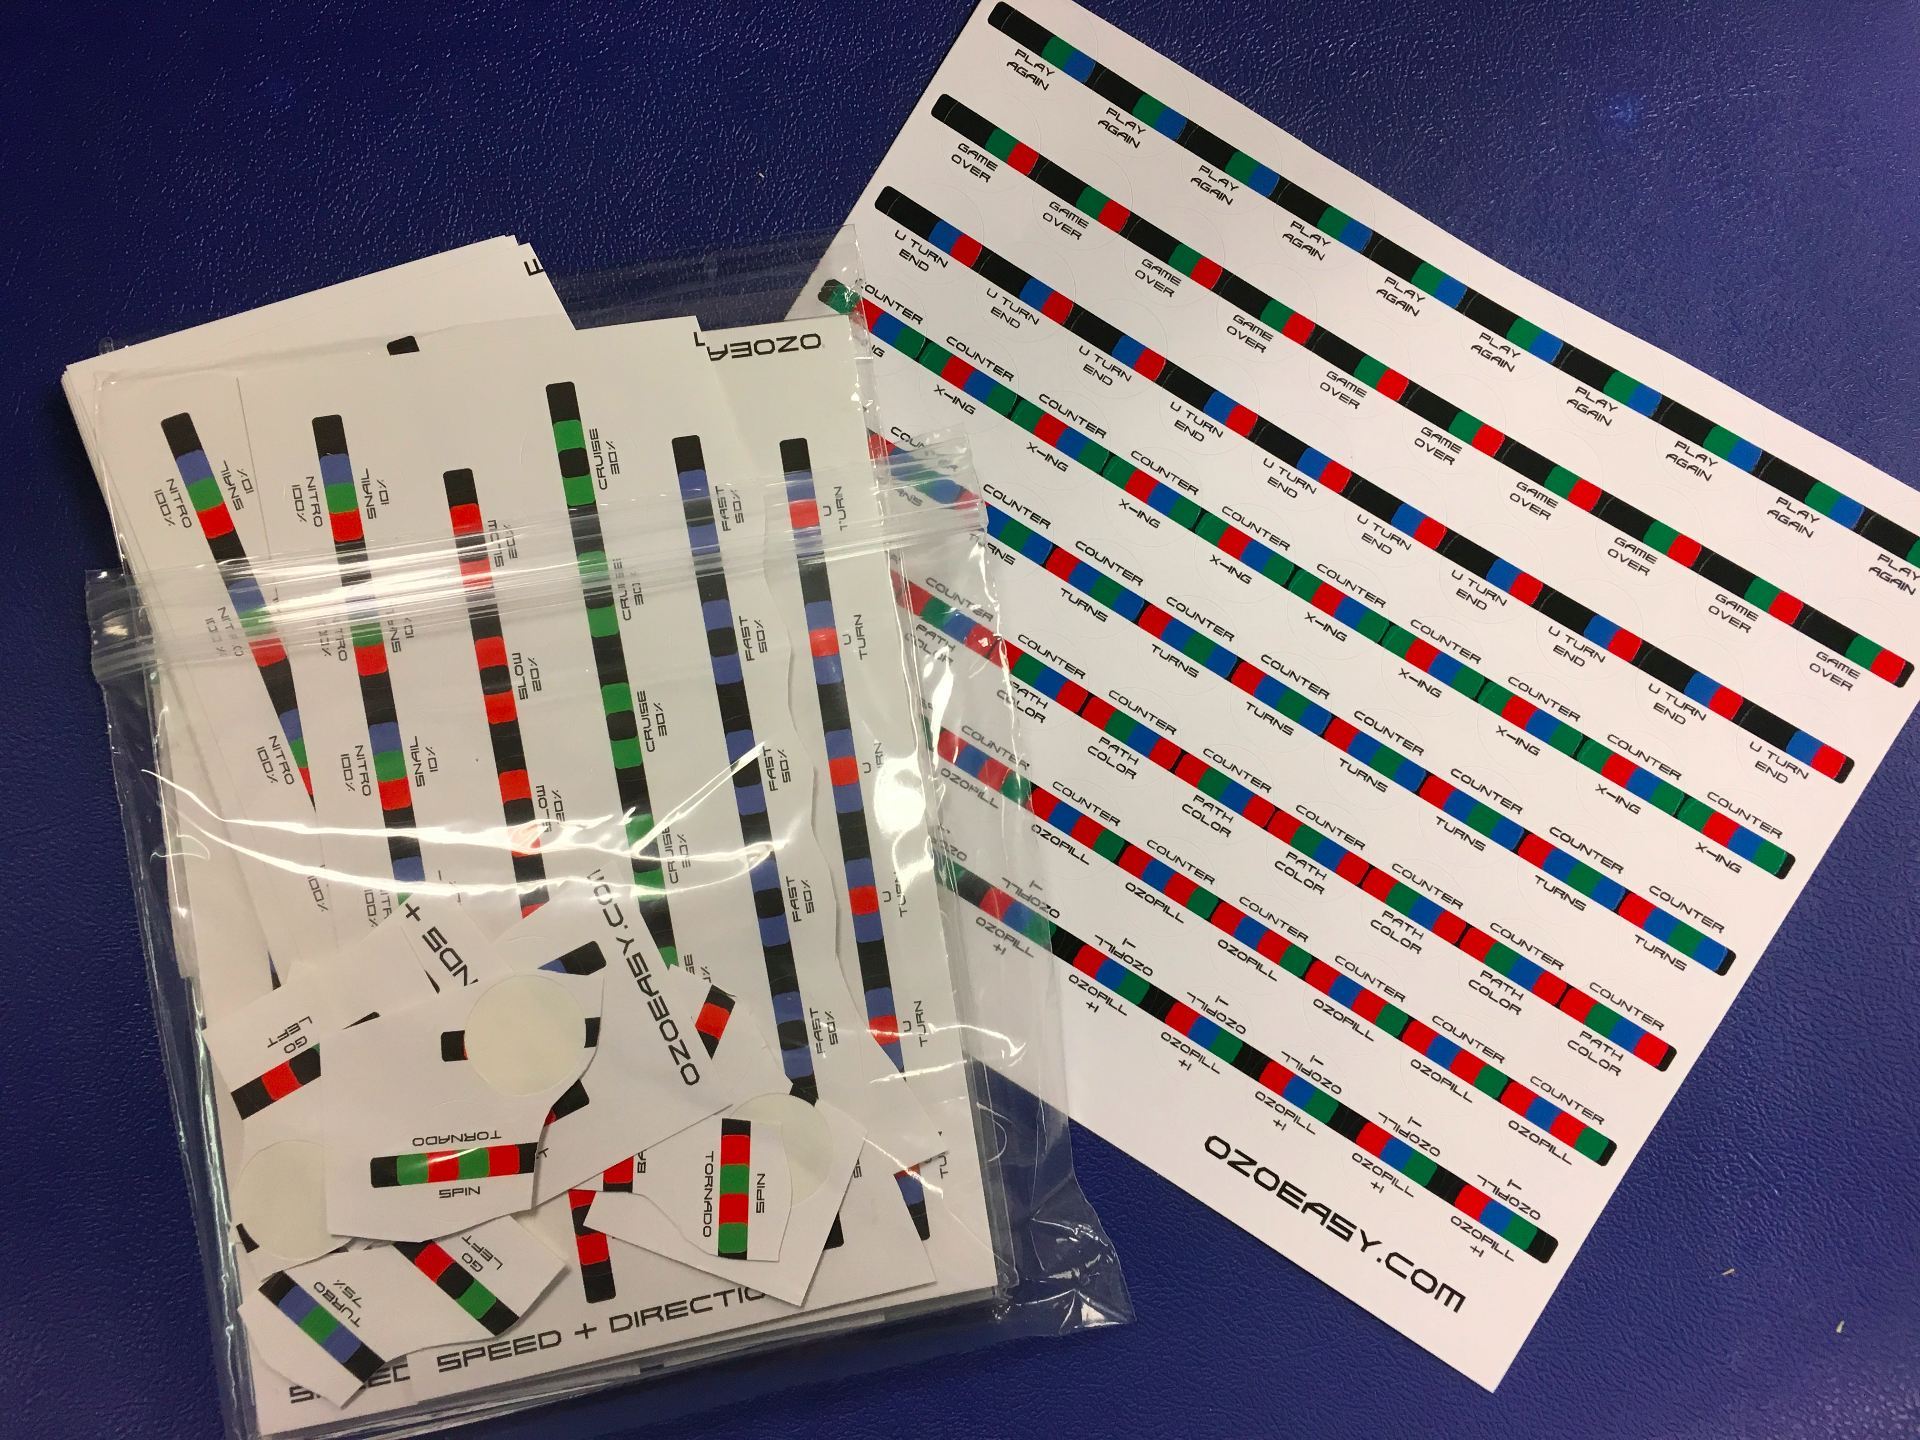 Until I discovered OzoEasy sticker codes, asking kinder and 1st graders to draw their own codes was just a bit tricky. As I tell the students, Ozobot is like Goldilocks – every code has to be just right! Just as Goldilocks tasted the porridge and determined one was too hot, another was too cold, but one was just right, Ozobot likes those color combinations to be close to perfect! In fact, we even started calling the little robot “Ozolocks” when something didn’t go as expected!
 Each child also received 4 stickers. These were the “special moves” like tornado, backwalk, spin. They loved those!
 It was SO much fun watching the kindergartners interact with the Ozobots. The look of awe on their sweet faces was priceless! I wonder how many children requested these for Christmas!