Children are taught from a very young age about keeping safe – let an adult know where you are, don’t talk to strangers. The same thing applies to the internet. Common Sense Media has an excellent lesson on this topic called Going Place Safely (You do need to register to download materials but it’s free). This particular lesson is designed for grades K-2 and I used it with first graders. The three rules that children should understand are:
Always ask your parents or teachers before going on line!
Only talk to people you know!
Stick to places that are just right for you!
Common Sense Media does a very good job creating a lesson plan that is easy to implement. To start, the discussion focuses on traveling places with your parents or going on field trips. What are rules you need to follow? The students quickly respond with such answers as:
Stay close to the adult.
Always ask if you need to go somewhere else.
Always go with a grown-up.
Don’t talk to strangers.
Following that discussion, I told the students we’d be taking a long field trip today – without leaving the technology lab! Of course, there were oohs and ahhhs until someone realized, “Oh! We’re going on the internet!” We then related their previous responses with keeping safe on the internet. We talked about how it’s important to get parental permission before going online. I asked who had Skyped and lots of hands went up. My next question was, “Do you Skype with someone you know? “Oh, yes,” was the response. We talked about how sometimes we’d be Skyping with teachers and students we don’t know but as long as an adult is in charge, that’s alright. The next step was to visit several sites that were “just right” for children. This lesson recommended New York’s Modern Art Museum and the San Diego Zoo. I added the San Francisco Symphony for Kids and Colonial Williamsburg.
The students explored these sites for several minutes then were given a sheet of paper where they drew their favorite site. Rules were reviewed about how to keep safe.
It was a fun lesson that helped children make connections between safety rules they’ve heard all their lives and making safe choices online.
I will preface this by saying that paper blogging is not my idea! It’s one of those, “Wow! Why didn’t I think of that!” activities.
A couple of years ago, desperately wanting to take student blogging to a level past the “Hi. How are you? What are you doing?” stage, I started searching for ideas – and came across a wealth of information!
The following resources introduced me to paper blogging.
Who would have thought that students coming to a computer lab would become so engrossed in writing that they never once asked when they would get on the computers! Now, even though the students have blogged for the past few years, I always start with this unit – just to make sure students refocus on the intent of our blogs: To share their learning in a positive and meaningful way.
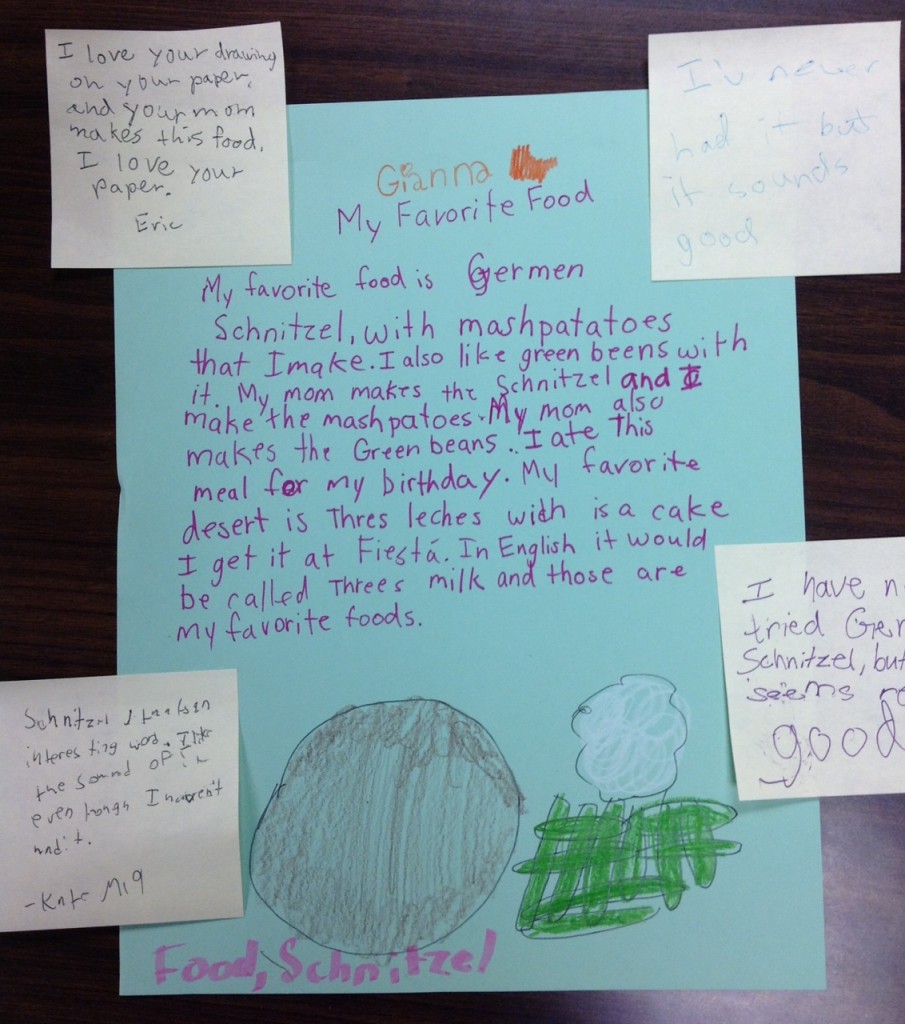
Taking the food idea from Leonard Low’s Workshop Activity: Paper Blogs, I asked students to raise their hand if they liked to eat. Of course, that brought an enthusiastic response! I told them that they would be writing a blog post on paper and the following day would be spent writing comments using sticky notes.
The instructions were to write about a favorite food – it could be from a restaurant or something made by parents, relatives, or anyone else. They needed to write something that would paint a picture for the reader – use details! Pictures always spruce up a post so illustrations were strongly encouraged.
The paper was distributed and we worked together to include the basics of a post:
First name at the top (good place to talk about keeping personal information private; no last names)
Tags – This was a good review for students. What is your post about? Everyone could add “food” as a tag. As you write, you’ll think of other tags to add that would help readers find all posts about specific subjects . . .
Title – every post needs a title!
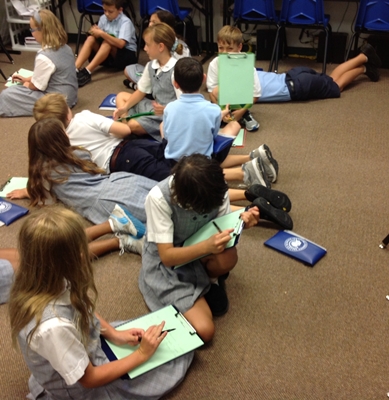
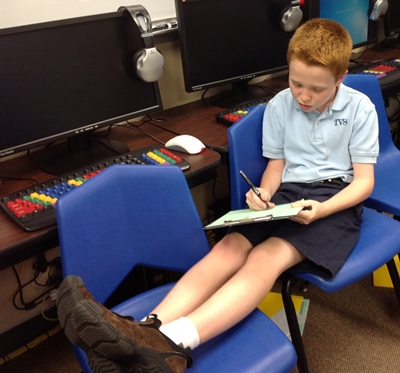
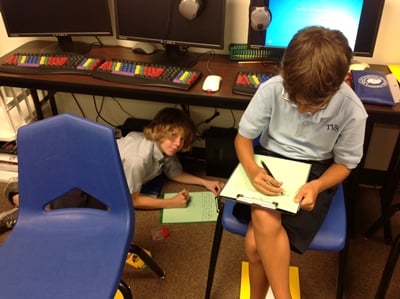
Then the students scattered in the small room to find a space to write. At first there were murmurings about their topic and how delicious their chosen food was (and how hungry they were becoming just thinking about it . . .), but soon all you could hear were pencils and pens scratching across the paper.
The next day was commenting day. I had folders on the keyboards and 6 sticky notes on the folders ready for students when they walked in. Using information from Mrs. Yollis’ third graders on How to Write Quality Comments, we discussed what kinds of comments would encourage a conversation as opposed to those that would stop the discussion. We discussed how important it is to avoid comments such as: Cute! Wow! That’s awesome! because these didn’t further the conversation.
I am pretty sure that the idea of penny and dollar comments comes from Silvia Rosenthal Tolisano and we use this often. (If not, I sincerely apologize and ask that you let me know!) This is where you compare a penny to a comment – you can’t buy anything with just one penny so it’s basically worthless. On the other hand, you ARE able to buy a few things with a dollar simply because it’s worth more.
That’s the way comments are. Penny comments are pretty much worthless. They really don’t tell you anything. They are often just a word or two OR they are completely unrelated to the post. But a dollar comment offers so much more! It acknowledges the author, asks questions, gives details, relates to the writer. In this day and time, though, we don’t just talk about dollar comments. With inflation, our students decided that $20 and up comments were much better than a measly dollar!
After the discussion, instructions were given. Students were to leave their paper blog at their computer but take the sticky notes with them. I had them stand behind their chair then told them to count 4 chairs clockwise. They were to stop at that spot, read the blog and write a comment (being sure to put their first name on the sticky note).
When finished with the first comment, students were told that from now on they would need to read the post AND all comments. It’s important to do that so that they don’t repeat someone else’s responses.
We continued to make the rounds until there was only one sticky left. At that point, students were instructed to return to their own blog, read all comments, and then choose one to write a response.
After that we regrouped to reflect. Some things that were brought up included:
Legibility – Of course, handwriting can be hard to read at times but even when writing on the computer, colors and font need to be considered. Can it be easily read?
Anonymous comments – It’s more meaningful to know who is doing the writing. (Besides, I don’t approve anonymous comments!) Even though students were told to write their names on the sticky notes, some forgot – perfect teaching moment.
Penny vs more valuable comments – Without telling who wrote comments, students shared ones they thought weren’t helpful to furthering the conversation. They also shared the dollar and up comments they received.
I have to say this is my all-time favorite activity! The students really get into paper blogging and I have NEVER had anyone complain that they came to the lab but never got on the computer! This is such a worthwhile activity to do to prepare students for online blogging. I can’t wait to get them going in KidBlog!
Blogging Guide from Silvia Rosenthal Tolisano – Silvia is one of the most creative and knowledgeable people I’ve come across. She has an amazing ability to create flyers and write posts filled with the most awesome and helpful information!
I absolutely love what our K-2 Spanish teacher did with her second graders!
Sra. Ross had her students write about what they might find in their backpacks.What a fun way to practice Spanish vocabulary for school items!
But Sra. Ross didn’t stop there – she photographed each student’s illustration and uploaded it to the Fotobabble app on her iPad. Next the students recorded themselves reading their text in Spanish. Sra. Ross then decided to share the work by adding QR codes that linked to the students’ Fotobabbles to the paper backpacks and posting them on a bulletin board. Parents and visitors can now visit the board, scan the QR codes and listen to the children speak Spanish!
Here is just one of the Fotobabbles (flash version):
Here is a non-flash version:
The project took awhile since it’s a bit hard to get everyone recorded with one iPad but it was well worth it – a wonderful way to share what students are learning with parents!
Our first graders were introduced to their class blog on Wednesday. We use KidBlog, an excellent blogging platform because of its ease of use. I love the new feature added this year that allows students to either upload a picture for their avatar or choose from one offered by KidBlog. We spent most of our lab time letting the children choose an avatar from the choices provided (they loved doing that!).
After that came writing a comment to a post that I made for the students.
We talked about how to write a comment, reminding students to sound out words as best they could. The main concern for children always seems to be how to spell words but we assured the students that we wanted their thoughts and to do the best they could. It was fun watching them help each other with spelling.
I absolutely love reading what first graders write (or say for that matter). They are completely honest and it is so exciting to watch the growth in their spelling throughout the year.
Don’t you just love Blaine’s choice for what he’s thankful for?!
For first time blogging, I thought that these young children did a fantastic job. They were very excited and engaged in the process. Next steps – introduce how to write a post. Then we’ll practice writing strong comments to each other.
It’s that rare activity that excites students so much that they ask to skip recess to work on a project! The “Welcome to the Web” webquest created by Mark Warner is definitely one of those! Mr. Warner has obviously spent a great deal of time coming up with a fun and effective way for 7-11 year olds to learn about how to navigate the World Wide Web. The webquest has 7 parts and students receive a secret code after answering questions at the end of each section. The codes are needed for the Challenge, where participants become detectives using what they have learned to catch a person trying to unleash a computer virus.
Getting Started Online – teaches children about the basic concepts involved in the Internet (World Wide Web, Hyperlinks, Back button etc). This introductory lesson also gives valuable practice in visiting and navigating around web sites.
Staying Safe – encourages pupils to keep themselves safe online by following the SMART rules. Also tests their understanding using interactive activities and fun quizzes.
Using Your Browser – helps people to learn more about their web browsers… what are the different features and how are they used?
Searching Online – teaches children how to search effectively, and keep themselves safe when doing so. Also identifies search engines which are particularly suitable for children to use.
Trying Top Tricks – finding information on the net is great, but it is also important to know how that information can be used. This section explains about printing, using the Find tool to locate specific information within web pages, copying and pasting text, and saving images from the web. Also includes information about copyright and why it is important to credit others when you use their work.
The Welcome to the Web Challenge – When the children have completed all of the sections of Welcome to the Web, they can complete this exciting challenge. It requires them to use all of the skills which they have learnt to catch the creator of a destructive computer virus!
When the students have completed the challenge, they are able to print a certificate.
I’ve been using this webquest with our 4th graders for the past four years and it has been a huge hit! This year I even had a student ask if she and her partner could work on it over the weekend. “We live close by each other so we could get together and do it.” The funniest part is when a group reaches the point where they determine the name of the culprit who is trying to unleash the virus – frantic whispering begins because they don’t want anyone else in the class to figure it out. This is a closely guarded secret!
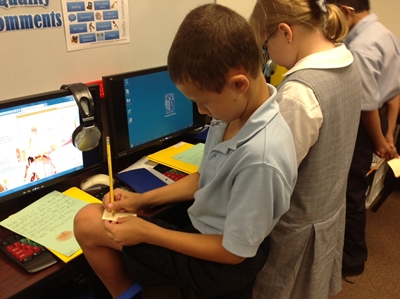
writing the secret code after finishing a section
This is one of the best activities for helping students learn all kinds of information needed to effectively navigate the web. Mr. Warner has developed excellent resources (worksheets and secret code sheet) to use with the webquest. I will say that the students tend to get so excited about exploring the quest that they often forget to fill in answers!
A huge thanks to Mark Warner for sharing this fabulous resource!
What a fun day (and week) we have had celebrating International Dot Day! Music, art, library, and computer classes participated along with a couple of homeroom teachers. Every K-4 student received a certificate and a Dot candy (which was excitedly accepted!!). Here are just a few of the highlights.
Melissa Black, our creative art instructor, had fourth graders use Pointillism to make their mark on Dot Day. They loved using a variety of colors and tiny dots to make their paintings. First, second, and third graders chose a paper dot that was glued to drawing paper. Mrs. Black told them to use that dot as part of a bigger picture. Not everyone finished but I was amazed at how creative the students were!
Here’s what Judy Holloway wrote about music classes. “We are doing Sound Dots in music. As part of learning rhythmic patterns and melodic patterns, students write what they perform on instruments; sometimes called rhythmic or melodic dictation. Third graders made colorful rhythmic patterns and second grade wrote Do Re Mi on staff paper. First grade will take colored markers and respond to music that is staccato (dots!) and legato by drawing designs on the whiteboard.”I was able to visit a second grade class (Mrs. Shapard’s group) as they played a variety of instruments and sang a dot song that had been written by another class.
Jane Cooper’s 2nd grade class “dotted” the equator and prime meridian on their international maps as they talked about latitude, longitude, and other map skills. Allison Shapard’s 2nd grade class used brightly colored dots to discuss arrays in math.
In the computer lab, the students are using Paint for Windows 7 to see where their dot takes them. I first asked, “Who thinks you are an artist.” Almost all first and second graders raised their hands. As we moved to third and fourth grades, fewer hands went up. That was interesting! Once we started talking about different types of “artists” the children realized the term could cover all kinds of areas – music, photography, sports, even lego-building!
Next, we read The Dot (the big screen, interative version – I highly recommend this one!) then brainstormed what a dot could be with lots of creative answers thrown out. Then the creativity began! Very few finished so we’ll continue next week. I was absolutely amazed at the drawings!
A couple of weeks ago, a few of Mr. d’Auteuil’s students finished their computer lab assignments and wanted to know what they could do. I suggested that they form small groups and come up with a video to teach our younger students what makes an effective comment or a strong post on a blog.
A few students absolutely took off with the idea, giving up recess for a week to write and practice their ideas. One group of boys finished today! Jitesh, Bryson, Jake, Luke, and Kishan came up with a few ideas that they thought were important to share with others. It’s under a minute long but that’s okay! This is their first production of what I hope will be many more.
After reviewing how to log on with their “grown-up” usernames, our first graders were ready to go on an internet field trip. Using a lesson from Common Sense Media called “Going Places Safely” we first discussed real-life field trips. Some of the questions asked:
Have you ever heard your parents or teachers say, “Don’t talk to strangers?” Why would they tell you this?
Do your parents or teachers find interesting and safe places to take you?
When you go on a trip, do your parents or teachers ask you to stay close by? What do you do if you want to see something else? Don’t you get permission?
Next, we compared the answers to being on the internet. We talked about the importance of going online with parental/teacher approval, staying on approved sites and not wandering off to other sites, and only talking online to people we know.
Using the “Going Places Safely” student handout provided by Common Sense Media, the children next wrote the favorite place they visited, what they saw, and drew a picture inside the monitor outline on the the handout.
Illustrating the favorite “field trip”
It was interesting to see who chose what! Choices were fairly evenly divided between the Philharmonic Kidzone, Destination Modern Art, and the National Zoo (watching the webcams was a favorite). I think the “Ology” site had just a bit too much reading to keep students’ interest.
Showing off the finished drawings!
I really like the lessons offered by Common Sense Media. There are excellent resources for grades K – 12 covering the following topics:
What a surprise last week in Boston when I discovered an email from Jerome Burg, creator of Google Lit Trips. I’ve followed Jerome’s Literature Trips for Google Earth for a few years now and was excited to hear him speak at the Google Geo Teachers Institute I attended last fall in Washington DC. So, I was thrilled that he had come across my collection of resources used for the summer class I taught in June called, Around the World with Google Lit Trips. Jerome said he would like to offer support while I worked on Google Lit Trips and mentioned that he was interested in publishing lit trips that weren’t already on his site. I had worked up a lit trip for a book called, A Walk in London, by Salvatore Rubbino and mentioned that.
A week later, with excellent guidance and help from Jerome, I now have a Lit Trip published on his website! Here is the link to A Walk in London lit trip. Below is the video that Jerome made to preview the lit trip.
In celebration of Seuss week, we have done a variety of activities in the computer lab. First graders read Wacky Wednesday, by Dr. Seuss and created a “wacky” self-portrait in MS Paint. For silly sock day, the 2nd graders illustrated their colorful socks or their sock monkey. After reading My Many Colored Days, the 3rd graders wrote their own color poems and added clip art.
The 1st and 2nd grade pictures have been combined and converted to ePub books which can be opened in iBooks (free app from iTunes store) or Adobe Digital Editions software (free download for PC and MacOS). If you have a Nook reader and Adobe Digital Editions, you can transfer the books to the Nook (the formatting isn’t perfect but it still works). The ePub books will not work on a Kindle.
The 3rd grade poems have been saved in PDF files which should be able to be opened on any computer.
You will need to have either iBooks or Adobe Digital Editions on your iPad (or other iOS device)/computer in order to open and read the ePub books. If you have an iPad or iTouch with the iBook app, you should get a message asking if you want to open in iBooks. If you are on a PC with Adobe Digital Editions, the ePub book will open in that software and you can then plug your Nook into the computer’s USB port and drag the book to the Nook. You can also read the book straight from Adobe Digital Editions software.


")
")


