Winter has been long and hard around the country this year but we are finally seeing signs of spring. In fact, we’ve enjoyed 80+ degree weather the past few days!
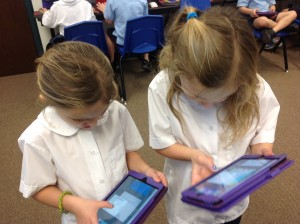
The first graders came to the lab today and drew spring pictures. I haven’t seen such concentration in quite awhile – they were obviously glad that spring has arrived!
Enjoy their illustrations.
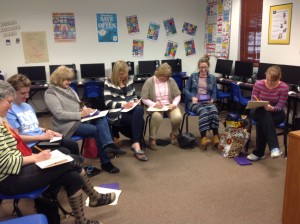
 Another “Apps in a Flash” workshop took place yesterday afternoon.
We didn’t have as many participants but that’s okay. It’s a hectic time of year!
Our topic this week was the Tellagami app (free from the App Store and Google Play). Tellagami lets the user create a short (30 second) animated video called a “Gami.” An avatar is created that “moves” with the narration. There are some free backgrounds plus the option to buy others. What I prefer doing is to upload images from the camera roll.
You are able to save the finished “Gami” to the camera roll where you can use it in other apps (such as iMovie). Or the “Gami” can be emailed – that gives a link to where it is stored on the Tellagami site. From there, you are able to get an embed code for blogs.
Here is a PDF tip sheet for the app: Tellagami
There are all kinds of educational activities that can be done with Tellagami.
- Draw a self-portrait and record a bio-poem. Embed in a blog or combine all to form a class video.
- Add your own Tellagami to your blog as an introduction to your class.
- Students can use it to introduce themselves at the beginning of the year.
- Add images of landforms and describe.
- Our kindergarteners make a display of a planet during their solar system unit. They could take a photo of their project then tell what they have learned. Combine into a class video.
- Use for foreign language practice – take picture of vocabulary learned and tell about it in another language.
These are just a few ideas. What have you done with Tellagami? We would LOVE additional thoughts!
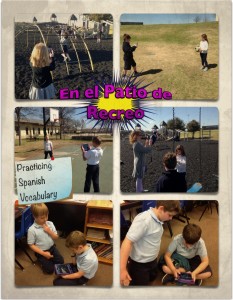
Señora Ross teaches playground vocabulary to her second graders. Last year she recorded the students speaking about the different parts of the playground but never really did anything with her video.
This year, she wanted to make sure that the students’ work was posted somewhere. How exciting for parents to be able to hear their children share their Spanish knowledge with others!
Her idea was to have students work in pairs to take two photos each: one of a specific playground item by itself; the second with their partner on or next to the equipment.
In preparation, Señora Ross assigned partners and the item that would be photographed. Before starting, we discussed how to take a non-blurry photo (these were not to be action shots!). Next, we handed out their assignment cards and an iPad. Then we trekked out to the playground.
The students quickly took their photos (only had one instance where video was taken rather than stills) and gathered back together to go to the computer lab to finish the project.
 There are many apps that would work for importing images and recording narration. For this project, I suggested we try Pixntell EDU. I hadn’t used the app with a class but felt like it would be easy for the students to upload images and record on each photo. Once finished, the user is able to save the work as a video file. Our goal was to collect all projects to combine into a class video using iMovie.
The app worked quite well for this project. It was easy for the students to use. Once the user saves, the video automatically saves to the photo roll where it can be air dropped to the teacher iPad.
Quirks of Pixntell EDU:
- Can’t listen to recording till it is saved. If you want to redo after that, it appears that all photos must be re-recorded.
- When images are added, there is no check mark to indicate which pictures are selected. This is fine for adults but harder for children. We had LOTS of extra images but they are easy to delete!
Señora Ross and I had quite an assembly line going – she helped with the Spanish vocabulary then sent the students to me so they could air drop their video.
Next, Señora Ross pulled all videos together in iMovie, added a quick title page created in Explain Everything, uploaded to our Vimeo account, and the work was ready to share!
Mrs. Garcia’s Class
Mrs. Cooper’s Class
Mrs. Shapard’s Class
This was a fun project – the students quickly learned the app and really did a great job saying their sentences in Spanish. And we are so glad that parents can get a glimpse into what their children are learning!
Mrs. Garcia, one of our second grade teachers, came to me a couple of weeks ago and asked that her students be introduced to the Explain Everything app. The other two classes had already used the app during a science unit and she had seen how powerful it is.
We talked for a bit, tossing around ideas and then Mrs. Garcia mentioned homophones, asking if that might be something that students could share using the app. What a perfect idea! The students were in week 2 of a two week spelling unit on homophones. We decided that the children would draw directly in Explain Everything, label the homophones, and record a sentence (and definitions for Mrs. Garcia’s class). Our other two second grade teachers also decided to have their students use the app to share knowledge of homophones.
Process:
Before coming to the lab, the students were assigned a homophone pair (or trio). They wrote a sentence using the words and sketched a drawing on paper of what they would do in the app.
When the students came to the lab, we set up the new Explain Everything page, starting with their name and then saving. Because we have shared iPads, I have the students save this way: Class # + Teacher’s Initial + student name + project name. It seems long but really isn’t! (i.e. 21G Karen homophones)
Next we discussed how to draw – how to change the pen tip and width as well as the pen color.

Illustrating the homophones
As the students completed their drawings, they were asked to label the homophones.
Next, we talked about the how-to of recording and re-recording if necessary. However, before recording, we discussed the laser pointers. We wanted the students to use these to highlight the correct homophone as the sentence was read.
Recording went fairly smoothly. Some students discovered it’s a bit tricky to read, record, and highlight; all at the same time. But, they easily solved that issue – they asked another student to work the laser as they read the sentence!
After recording, the children learned how to save the video to the camera roll then they air dropped it to me. I combined the videos into class movies using iMovie and uploaded to Vimeo.
Mrs. Garcia’s Class
Mrs. Cooper’s Class
Mrs. Shapard’s Class
Tips and Other Things I Learned!
- Use the students for peer tutoring – the child appreciates the opportunity to help and it is an invaluable aid to the teacher!
- The “add page” icon is right under the select symbol in EE and is very easy to hit, especially on the smaller iPad minis. We had to really watch to make sure the students had only ONE page! I think the record number of blank pages was 7!!
- Note to self: Remember to tell the students to use the laser pointer as they record! I completely forgot to do that with one class so we had a do-over.
- I do NOT recommend the “light saber” pointer. Wow – does that make a lot of noise!
The students did a fantastic job with this project and enjoyed sharing their knowledge in a new way.
 Dr. Seuss week at our school is a HUGE undertaking! Our librarians design some wonderful activities that certainly excite our students! But, it doesn’t stop with the library – Dr. Seuss is celebrated across the curriculum and we definitely have creativeness shining in the lab.
We started the week with Crazy Hat Day. The second graders and one third grade class visited the lab to draw their rather interesting hats using the Microsoft Paint program.
On Wednesday, some very wacky first graders (and teachers) arrived. We read Wacky Wednesday, by Dr. Seuss and discussed how we could draw our own wacky pictures. This was the first time our little ones had used Microsoft Paint but we ended up with some wacky pictures!
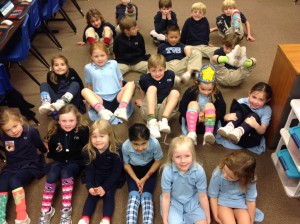
Silly Sock Thursday arrived along with our kindergartners. Since it had been such a wacky week, the students used a wonderful website from the Bronx Zoo called, Build Your Wild Self. The funny thing was that the website didn’t quite work as expected. Students would click on an item to add to their wild self and they would get something completely different! We decided it was just a wacky thing happening since it had been a wacky week.
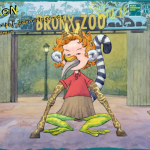
Look at our silly socks!


Throughout the week the fourth grade classes rotated between the computer lab, music, and art. In the lab, we read Oh! The Thinks You Can Think! by Dr. Seuss. The students were asked to think of an invention of any kind (a new animal, a different food, something that could help them in some way . . .). The pictures were drawn in MS Paint (We prefer this over apps for our more detailed drawings). I uploaded the illustrations to my Picasa account because we wanted to use the Book Creator app to make a class book and we had to get their pictures to the iPads.
The next step was to choose the book size (we used landscape for this) add the picture, text, and narration to the app. Once each child had finished their book, it was emailed to me. I combined all into class books.
Mr. d’Auteuil’s Class Book of Inventions
Mrs. Malone’s Class Book of Inventions
Mrs. Wright’s Class Book of Inventions
Be sure to open the links on an iOS device with the iBooks app (free) installed. Click on the book link above (while on an iOS device). Download and choose Open in iBooks.
The book can be read on a Mac or PC but you must use the Google Chrome browser with the Readium app. (Instructions on Reading ePub Books with the Google Chrome Readium App)
Friday arrived with students forgetting to dress in their uniforms! Oh, yes . . . pajama day! Dr. Seuss’s Sleep Book was the focus for the day. Two third grade classes came to the lab and, after looking at some quite unusual beds, they designed their own dream bed.
What a busy but fun week!
(*We had several absences when I saw the students so if you don’t see your child’s work, that would be the reason!)
Our second “Apps in a Flash” 15 minute session featured the Draw & Tell app. I had used this about a month ago with first graders explaining fact families so a few of the teachers were familiar with it.
This is a simplified screen casting app for younger children. The user is able to draw a picture or upload from the photo roll. What I like is the easy recording aspect and the fact that students can manipulate stickers and “highlight” parts of the image with a laser-like pointer. The recording can be saved to the photo roll and from their emailed to parents, uploaded to the student blog, etc.
 After a quick overview of the app, I used one of Kristen Wideen‘s Ready to Go iPad Centers – “Making One Dollar 4 Different Ways.” Each teacher received a copy of Mrs. Wideen’s dollar organizer and a bag of play money. By going through the process, the teachers were able to experiment with the app while doing an activity that their students could do.
As we wrapped up, I again asked for an “exit” ticket listing ideas on how to use the app with their students.
Brainstorming!
Ideas from Our Teachers:
- Use for making arrays.
- Use for fractions when explaining a fraction of a group.
- Fact families
- Money
- Give kids a paper with sentences (no punctuation) and ask them to punctuate. Take a picture and explain the punctuation that was added. Or use for capitalization.
- Pretend you are a teacher and teach someone else how to add, subtract, show place value.
- For art: Draw the elements of design and describe (i.e. Create repetition with stamps or variety with stamps.); Create variety of lines.
- While studying addition and subtraction, the kids could create an addition/subtraction story using stamps and the pencil tool. Then they can tell us about the story they have written.
- In math, take pictures of a concept learned and explain.
- Stamps would be good for showing multiplication and division.
- In Language Arts, design then explain a story.
- In Kindergarten – Make addition/subtraction sentences using the stamps. Use with our money unit. For penmanship, trace letters (take a picture of a worksheet).
- Spanish: Illustrate spoken sentences. Have kids draw picture then explain what is happening while touching corresponding sections of picture.
- Spanish: Identifying Vocabulary – make vocab sheet, take picture then have child record and highlight words.
Thanks to Amy, Melissa, Kay, Kate, Harriett, Leslie, Gail, and Jane for sharing their thoughts!
Draw & Tell Handout
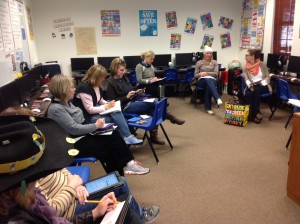
Knowing how busy our teachers are but wanting to provide professional development, I started “Apps in a Flash” as a quick way to introduce an app to the Lower School faculty. The promise was a 15 to 20 minute look at an app and how it could enhance learning.
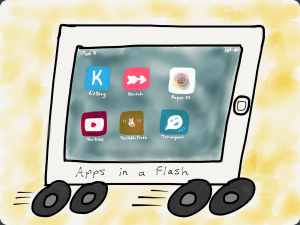 I tried my artistic (or rather inartistic) ability using the Paper app to create a logo to hopefully generate interest.
Our first session featured Tell About This and Write About This. I had no idea how many teachers would come to the workshop so I was thrilled when 9 showed up! It was fast talking to fit everything into 15 minutes as promised! Before leaving, the teachers were asked to fill out an “exit ticket” to provide ideas on how they might use the apps with their students.
Here are their fantastic thoughts!
Tell About This:
- You could load a picture of money and ask the kids to tell you how much is there and how they counted it.
- With our Lucy Calkins program – Brainstorm for writing assignments such as beginning, middle, end; “small moments”
- Have pictures of objects and list adjectives.
- Seasons (pics of trees) – explain weather in picture
- Use to explain science, math, social studies concepts, etc
- Create an illustration based on a story you just heard – take a picture and tell about it.
- Children build something with geometric figures and describe shapes used.
- Positive Actions – Pictures of Pix It & Nix It and explain a specific scenario.
Write About This:
- Use this as a journal. After teaching a certain convention (i.e. commas) tell the children you will be checking their writing for correct usage of commas.
- A child could first record their idea. Then, have the child transcribe their story.
- Use vocabulary to have students create a sentence and then discuss the meaning.
- Use this app to demonstrate ability to write and use it along with other things for use in student portfolios and student-led conferences.
- Take a photo of favorite artwork done so far and write about it.
- Take a picture of an element of design (example: value) and discuss it.
- Science: Science research/drawings; lab reports; scientist of the week
- Social Studies: Take photos of campus and write about locations.
- Record special events (such as Seuss week) and write a “news” story each day.
- Write and explain regrouping (i.e. 32-17)
- Flat Stanley – Write and share pictures of where he’s been and what he did.
- Literature: Upcoming unit on Boxcar Children, retell the story using the map.
A huge thanks to Allison, Jane, Leslie, Carol, Amy, Diane K, Gail, Kim, and Diane M for sharing their thoughts about the apps!
Handouts:
Tell About This
Write About This
Our third graders have been discussing bullying behavior and leaders – how leaders can be good or bad. Bad leaders try to get people to follow them in making poor choices that hurt others. Bullies can be leaders but they are not the kind of leader a person should follow! The students took sticky notes and wrote what makes a strong, positive leader.
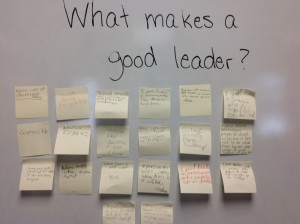
Here are some of the attributes and qualities of a good leader according to third graders:
- A good leader encourages people to stand with her or him. A good leader is very kind.
- A good leader is someone who is respectful and does not bully.
- A good leader is a person who follows the rules and stands up to the bullies.
- Someone who makes a good leader is someone who stands up for others.
- A good leader is someone who helps others in hard times.
- A good leader is someone who tells the teacher and stands up to the bullies. Everybody says not to be a tattletale but you need to be the one to tell if someone is being bullied.
- A person who helps someone when they are hurt or bullied is a good leader.
- A leader is a good person who tells other people to do good things.
- Good leaders are kind, honest, brave, courageous, and responsible.
- Good leaders take care of others.
- A good leader is someone who does the right thing and makes good choices.
- A leader is generous, makes good choices, helps other people, is not mean, does not pick on other people, and doesn’t do what bullies do.
- A good leader is someone who cares a lot about living things.
Two students even listed classmates who they considered to be positive role models.
- John is a leader because he sets an example for the class.
- A good leader helps his people and stands up for others. Arvin is a very good leader because he helps people.
I love to see children recognize leadership qualities in their peers!
What better way to illustrate understanding of math concepts that to apply that knowledge creating word problems? That’s exactly what Mrs. Shapard’s second graders did using the Book Creator app!
Toward the end of the fraction unit, Mrs. Shapard asked her children to write a story using the concept they had just learned. As I rolled the iPad cart into their room, the students were busy handing out manipulatives to use with their stories. There were cubes and teddy bear counters and pattern blocks and more. Of course, these had to be played with before we could even begin rewriting their stories!
The students received their iPad and opened the Book Creator app. We chose the Landscape design in order to have enough space for pictures and text. Each student would create two pages. Page one (the cover) would have the story problem typed along with an illustration drawn using the Pen within the app. The second page would provide the answer using text. Our original plan was to use manipulatives to represent the answer. That proved to be a bit tricky. They could draw their answer but when asked to transfer that knowledge using a different medium, there was slight confusion.
- “How do we put these together?”
- “What should I use to show my answer?”
- “I can’t make the blocks look like my drawing.”
The students’ comments and questions were valid – the blocks, bears, etc did NOT look like some of their illustrations so this part wasn’t making sense to them. Therefore, we slightly changed the original plan to offer a choice – represent the answer by either manipulatives OR drawing with the pen tool.
The students are becoming experts with the Book Creator app. As soon as they completed their drawings, they immediately found a quiet corner to record.
Since we decided to create a class book, the students were to email their book to me. (Since my iPad is an older version, I don’t have the luxury of being able to Air Drop – An awesome feature!).
Once I received the books from the students, it was a quick and easy process to combine each into the one class book. (One thing to remember – there may be extra blank pages that will need to be deleted. Since we were limited on class time, I deleted the extras after putting the book together. Students could very easily do that step.) I then uploaded the book to Dropbox so that it can be downloaded by others (see directions below).
Mrs. Shapard’s Class Book: Fraction Word Problems (Read the directions below to download to an iOS device or to a computer using the Chrome browser.)
Below is a video of the process (this is also included in the back of the class book).
Directions to download book to your iOS device (iPad, iPhone, etc):
- You will need the iBooks app (free) installed on your iOS device.
- Click on the book link above (while on your iOS device).
- Tap on the download button.
- Choose Open in . . . and then choose Open in iBooks
- The book is now in iBooks on your iOS device.
Directions to read the ePub book on a computer:
It Could Have Been Worse by A. H. Benjamin is a fantastic book to help students with the skill of predicting! It is a delightful story about a mouse on his way home who escapes all kinds of predicaments that he knows nothing about – however, he thinks that he is having a terrible day due to many falls and tumbles as he unwittingly escapes danger.
I read part of the book to our first graders and asked them to predict what might happen next. We talked about using picture clues to help with predictions. Once they had an idea in their minds, I told the students that we would be using the Book Creator app to make a class book of all the predictions.
iPads were handed out and the book was set up for their predictions. We used the square format, added a name, and wrote a sentence or two about what they thought would happen next. Then I showed the children how to draw right in the book with the pen choice. I love this feature – yes, tools are limited; there is no fill bucket but it is SO easy to draw directly in the app!

The students then recorded their narration and were guided in emailing the book to me. Two of our classes were extremely fortunate to have several TCU students visiting that day. The college students were a tremendous help to the first graders. In fact, I had planned two 40 minute sessions to complete the book but, with all the grown-up help, the children were finished in one period!
This was the students’ first experience with creating their own page in Book Creator and I guarantee, it won’t be their last!
Enjoy their class books:
Mrs. Hutchinson’s Book
Mrs. Kee’s Book
Mrs. Orehek’s Book
Directions to download books to your iOS device (iPad, iPhone, etc):
- You will need the iBooks app (free) installed on your iOS device.
- Click on the book link above (while on your iOS device).
- Tap on the download button.
- Choose Open in . . . and then choose Open in iBooks
- The book is now in iBooks on your iOS device.
Directions to read the ePub book on a computer:


