Posts Tagged ‘2nd grade’
What is a glyph? Well, one definition is where students answer questions and make something according to how they answer those questions.
For the past few years, I’ve had second and third grade students do a fun glyph activity where they create a snowman (or snow person☺). I found this idea several years ago but am so sorry that I don’t remember who it’s from so I’m unable to properly credit the original creator. Questions include:
- Have you every built a snowman? For yes, draw 3 snowballs for the body; for no, draw 2. (Yes, there really are students living in Texas who have never built a snowman!)
- What is your favorite sport? Third graders were given 4 choices and then drew a scarf that was decorated according to their answers.
- What is your favorite season? Second graders colored their scarf according to their answer.
Click here to see the second grade glyph.
Click here to see the third grade glyph.
This year when I presented the activity to the third graders, I heard the following response from a few students:
- “This is my favorite activity of the whole year!“
I can tell you – that makes a teacher feel really good!
Here is the animoto of the third graders’ glyph drawings.
The second graders used their illustrations to make class ePub books. They wrote and recorded haiku poems to go with their drawings. If you don’t have an iOS device to open the eBook, the work has also been saved as a video.
Mrs. Garcia’s Snow Pals Book and Video
Mrs. Shapard’s Snow Pals Book and Video
Mrs. Zabriskie’s Snow Pals Book and Video
Directions to download books to your iOS device (iPad, iPhone, etc):
- You will need the iBooks app (free) installed on your iOS device.
- Click on the book link above (while on your iOS device).
- Tap on the download button.
- Choose Open in . . . and then choose Open in iBooks
- The book is now in iBooks on your iOS device.
Directions to read the ePub book on a computer:
 I love International Dot Day! September 15ish is the day to celebrate Peter H. Reynold’s wonderful book, The Dot. In the book, Vashti is asked to draw a picture in art class but can’t think of anything to illustrate. Her teacher encourages her to “just make a mark and see where it takes you.” Vashti jabs the paper with her pencil to create a tiny dot but the next time she comes to class, she discovers her teacher has framed it. From there, Vashti determines that she really can make better dots! At the end of the book, Vashti pays forward what her teacher has done for her by encouraging a little boy who believes he can’t draw a straight line with a ruler. This book has two wonderful themes:
- Every person is creative in their own special way.
- Each of us can find a way to “make our mark” by helping and encouraging others.
This year, celebrating Dot Day was a bit difficult for me. I worked part-time till Sept. 15 due to back surgery over the summer. But I had a wonderful sub, Jane Cooper, who worked tirelessly with many classes to start our Dot Day celebrations. I returned full-time on September 15 to continue the activities – by the end of the day I was completely exhausted but it was a fantastic day to return! Below are descriptions of how our teachers and students “made our mark.”
Kindergarten
Our kinder teachers gave each student a dot and a “swirly gold framed” paper. The students created a picture from their dot.
 Click here for more pictures from kindergarten.
First Grade
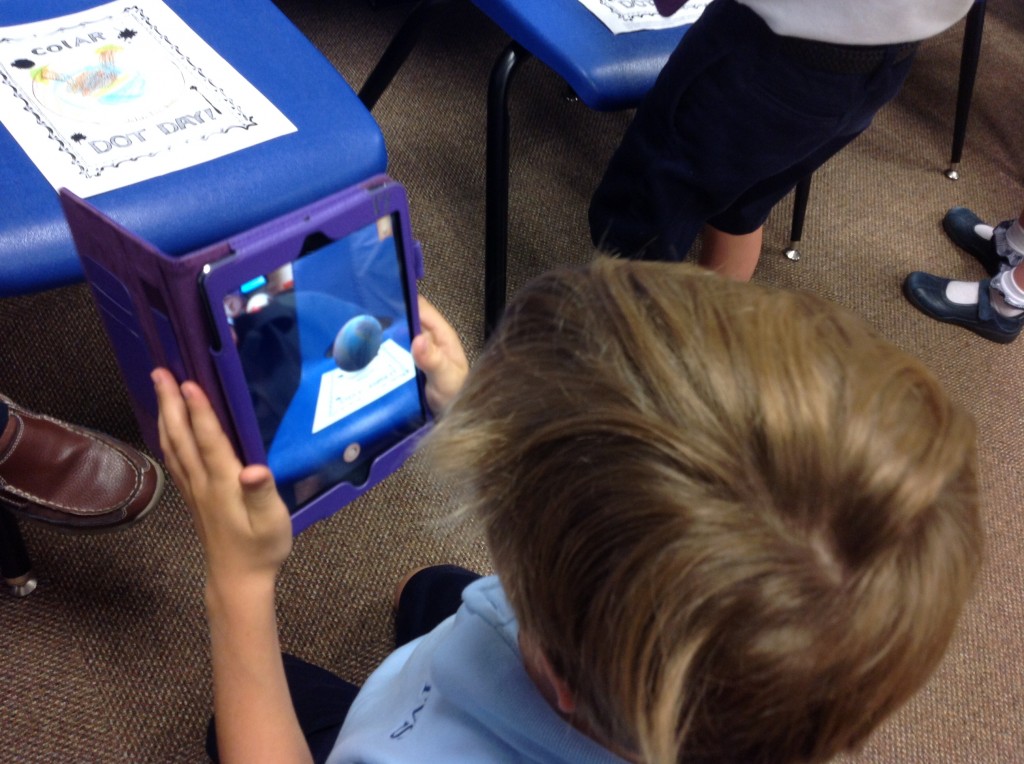
The first graders had a two-part lesson. Mrs. Cooper introduced the students to making their creative mark by reading The Dot. The children were then given the dot coloring sheet for use with the ColAR app (free in the App Store and Google Play). Lots of colorful illustrations were made as the students were told that the following week they would see something magic happen to their dots. When the first graders returned to the lab, I showed them how to use the ColAR app. Amazed “oohs” and “aahs” were heard as my dot became 3-dimensional! The students were thrilled to see their own dots come to life.
 View Animoto videos of each class:
Second Grade
Mrs. Cooper worked with the second graders to create a dot using the Drawing Box app. She explained to the students that, just as people are unique, their dots would be different from their classmates. But, when joined together, they would create a tapestry of colors. The children discussed how they were individuals but each unique person was needed to make a successful group – just as each dot they drew was important to the overall tapestry.
Third Grade
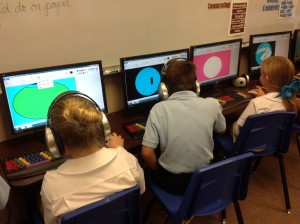
I asked the third graders to combine their creativity and a desire to “make a mark” on others by illustrating a picture in Microsoft’s Paint program. The students were asked to think about how they could make a difference – in a person’s life (a classmate, family member, friend . . .), by doing a task to help their community, or thinking about something they could do in the future. The students wrote a short description then illustrated their idea. I combined their thoughts and drawings in Animoto videos
Fourth Grade
Because of time constraints, I was only able to work with two of our three fourth grade classes (the third class participated in Dot Day in Spanish).
In one class, I asked the students to create a PowerPoint slide that included their name written in Braille and clip art that represented some of their interests. The students used the Braille Bug website to convert their name to Braille. They then used the shape tool and duplicate shortcut to create dots to form their Braille name. After adding clip art, I asked the students to save their slide as a jpeg (at this point I hadn’t decided how we would share their work). I ended up creating one slideshow with their images.
For another class, I thought I would give coding dots a try. The students had been learning JavaScript with our headmaster, Gary Krahn (see post) so they already had some practice. I asked them to use the ellipse code to create dot pictures. They eagerly set to work and programmed some absolutely amazing images! I loved watching them problem-solve with each other as they worked on placing their dots. When finished, they took screen shots of their work and I combined them into a slideshow.
Co-Curricular Classes
Of course, Dot Day wouldn’t be complete without music, art, and Spanish and those teachers led some very creative activities!
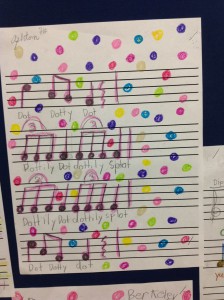
Mrs. Holloway had her music classes practicing musical note writing as they composed Dot songs.
First graders in Mrs. Black’s art classes used watercolors to beautifully decorate coffee filters.
Click
here to view more art and music pictures.
Our Spanish teachers were busy with a variety of activities. Sra. Ross’s first graders learned the
Mexican Hat Dance (a circle dance). Her second graders designed Mexican mirrors. Sra. Nedrelow’s third graders created colorful Aztec calendars while her fourth graders constructed Costa Rican Ox Carts. (See more detailed descriptions of the mirrors and ox carts by clicking
here.)

Click
here to view more images from our Spanish classes.
We are proud to be part of International Dot Day 2014 but our creativity doesn’t stop in September. We will continue to make our mark all year!
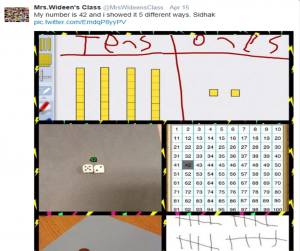 Thanks to a tweet from a student in Kristen Wideen’s class telling how the children were representing 2-digit numbers, our 2nd grader teachers decided to incorporate this fantastic idea into their math lesson. Discovering this tweet was perfect timing as our students are moving into place value for 3-digit numbers!
 The first thing I did was tweet Mrs. Wideen’s class to find out the app they used for place value blocks. The response was Number Pieces, a free app!
After talking with the 2nd grade teachers, we decided to do the following to have students show ways to represent a 3-digit number:
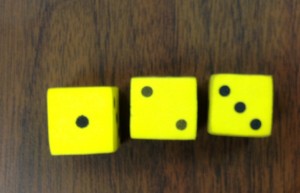 Regular Dice – take a photo. What we discovered was some students put the dice together backwards. In other words, 123 was shown as 321. When they realized that, we discovered an easy fix was to rotate the image!
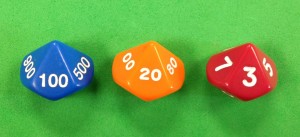 Place Value Dice – take a photo. These are fantastic dice in that students can see the precise value of each digit.
Wh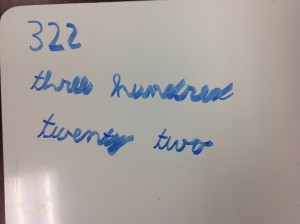 iteboard Writing – take a photo. Students were to write the numerals for their number then write it out in words.
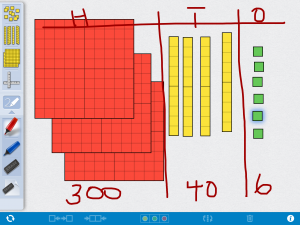 Number Pieces app – take a screen shot. This has an amazing number of features for a free app! We had the students draw the place value chart and put the blocks in the correct category. What was discovered is that it is extremely difficult to fit more than 2 or 3 hundreds on an iPad mini! The children had to get pretty creative in stacking the blocks so that they could still be seen. Some of the students wanted only their work to show; not the tools of the app so that provided a perfect opportunity to show how to crop photos.
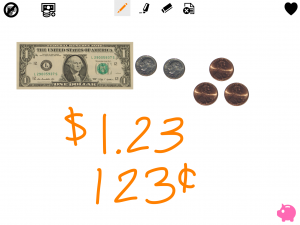 SchoolKit Math: Money – take a screen shot. To show the number representation with money, we used the SchoolKit Math app (free). Besides money, this app has a hundreds chart, number line, tens frame, fractions, and more – very useful tools. Working with money to show a number was more difficult than the other ways. It was tempting, for example, to show 1 dollar, 2 pennies, and 3 pennies for 123. We had to review that the 2 is in the tens place so we would need something to show 20.
 To pull everything together, we used the Pic Collage app (free).

The next step was to share the work. The students added their images to their blog and wrote a description of what they did. They would love comments!
Mrs. Cooper’s Class Blog
Mrs. Garcia’s Class Blog
Mrs. Shapard’s Class Blog
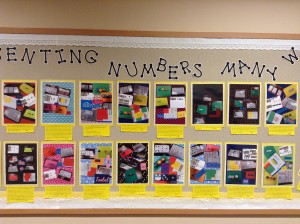
Bulletin Board – with pics and blog post copies
Señora Ross teaches playground vocabulary to her second graders. Last year she recorded the students speaking about the different parts of the playground but never really did anything with her video.
This year, she wanted to make sure that the students’ work was posted somewhere. How exciting for parents to be able to hear their children share their Spanish knowledge with others!
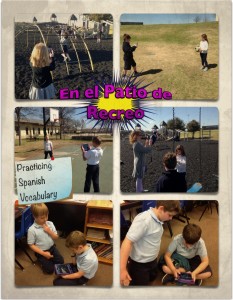
Her idea was to have students work in pairs to take two photos each: one of a specific playground item by itself; the second with their partner on or next to the equipment.
In preparation, Señora Ross assigned partners and the item that would be photographed. Before starting, we discussed how to take a non-blurry photo (these were not to be action shots!). Next, we handed out their assignment cards and an iPad. Then we trekked out to the playground.
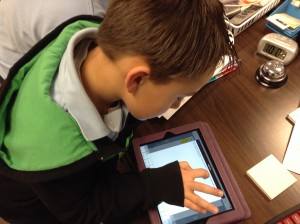
The students quickly took their photos (only had one instance where video was taken rather than stills) and gathered back together to go to the computer lab to finish the project.
 There are many apps that would work for importing images and recording narration. For this project, I suggested we try Pixntell EDU. I hadn’t used the app with a class but felt like it would be easy for the students to upload images and record on each photo. Once finished, the user is able to save the work as a video file. Our goal was to collect all projects to combine into a class video using iMovie.
The app worked quite well for this project. It was easy for the students to use. Once the user saves, the video automatically saves to the photo roll where it can be air dropped to the teacher iPad.
Quirks of Pixntell EDU:
- Can’t listen to recording till it is saved. If you want to redo after that, it appears that all photos must be re-recorded.
- When images are added, there is no check mark to indicate which pictures are selected. This is fine for adults but harder for children. We had LOTS of extra images but they are easy to delete!
Señora Ross and I had quite an assembly line going – she helped with the Spanish vocabulary then sent the students to me so they could air drop their video.
Next, Señora Ross pulled all videos together in iMovie, added a quick title page created in Explain Everything, uploaded to our Vimeo account, and the work was ready to share!
Mrs. Garcia’s Class
Mrs. Cooper’s Class
Mrs. Shapard’s Class
This was a fun project – the students quickly learned the app and really did a great job saying their sentences in Spanish. And we are so glad that parents can get a glimpse into what their children are learning!
Mrs. Garcia, one of our second grade teachers, came to me a couple of weeks ago and asked that her students be introduced to the Explain Everything app. The other two classes had already used the app during a science unit and she had seen how powerful it is.
We talked for a bit, tossing around ideas and then Mrs. Garcia mentioned homophones, asking if that might be something that students could share using the app. What a perfect idea! The students were in week 2 of a two week spelling unit on homophones. We decided that the children would draw directly in Explain Everything, label the homophones, and record a sentence (and definitions for Mrs. Garcia’s class). Our other two second grade teachers also decided to have their students use the app to share knowledge of homophones.
Process:
Before coming to the lab, the students were assigned a homophone pair (or trio). They wrote a sentence using the words and sketched a drawing on paper of what they would do in the app.
When the students came to the lab, we set up the new Explain Everything page, starting with their name and then saving. Because we have shared iPads, I have the students save this way: Class # + Teacher’s Initial + student name + project name. It seems long but really isn’t! (i.e. 21G Karen homophones)
Next we discussed how to draw – how to change the pen tip and width as well as the pen color.

Illustrating the homophones
As the students completed their drawings, they were asked to label the homophones.
Next, we talked about the how-to of recording and re-recording if necessary. However, before recording, we discussed the laser pointers. We wanted the students to use these to highlight the correct homophone as the sentence was read.
Recording went fairly smoothly. Some students discovered it’s a bit tricky to read, record, and highlight; all at the same time. But, they easily solved that issue – they asked another student to work the laser as they read the sentence!
After recording, the children learned how to save the video to the camera roll then they air dropped it to me. I combined the videos into class movies using iMovie and uploaded to Vimeo.
Mrs. Garcia’s Class
Mrs. Cooper’s Class
Mrs. Shapard’s Class
Tips and Other Things I Learned!
- Use the students for peer tutoring – the child appreciates the opportunity to help and it is an invaluable aid to the teacher!
- The “add page” icon is right under the select symbol in EE and is very easy to hit, especially on the smaller iPad minis. We had to really watch to make sure the students had only ONE page! I think the record number of blank pages was 7!!
- Note to self: Remember to tell the students to use the laser pointer as they record! I completely forgot to do that with one class so we had a do-over.
- I do NOT recommend the “light saber” pointer. Wow – does that make a lot of noise!
The students did a fantastic job with this project and enjoyed sharing their knowledge in a new way.
What better way to illustrate understanding of math concepts that to apply that knowledge creating word problems? That’s exactly what Mrs. Shapard’s second graders did using the Book Creator app!
Toward the end of the fraction unit, Mrs. Shapard asked her children to write a story using the concept they had just learned. As I rolled the iPad cart into their room, the students were busy handing out manipulatives to use with their stories. There were cubes and teddy bear counters and pattern blocks and more. Of course, these had to be played with before we could even begin rewriting their stories!
The students received their iPad and opened the Book Creator app. We chose the Landscape design in order to have enough space for pictures and text. Each student would create two pages. Page one (the cover) would have the story problem typed along with an illustration drawn using the Pen within the app. The second page would provide the answer using text. Our original plan was to use manipulatives to represent the answer. That proved to be a bit tricky. They could draw their answer but when asked to transfer that knowledge using a different medium, there was slight confusion.
- “How do we put these together?”
- “What should I use to show my answer?”
- “I can’t make the blocks look like my drawing.”
The students’ comments and questions were valid – the blocks, bears, etc did NOT look like some of their illustrations so this part wasn’t making sense to them. Therefore, we slightly changed the original plan to offer a choice – represent the answer by either manipulatives OR drawing with the pen tool.
The students are becoming experts with the Book Creator app. As soon as they completed their drawings, they immediately found a quiet corner to record.
Since we decided to create a class book, the students were to email their book to me. (Since my iPad is an older version, I don’t have the luxury of being able to Air Drop – An awesome feature!).
Once I received the books from the students, it was a quick and easy process to combine each into the one class book. (One thing to remember – there may be extra blank pages that will need to be deleted. Since we were limited on class time, I deleted the extras after putting the book together. Students could very easily do that step.) I then uploaded the book to Dropbox so that it can be downloaded by others (see directions below).
Mrs. Shapard’s Class Book: Fraction Word Problems (Read the directions below to download to an iOS device or to a computer using the Chrome browser.)
Below is a video of the process (this is also included in the back of the class book).
Directions to download book to your iOS device (iPad, iPhone, etc):
- You will need the iBooks app (free) installed on your iOS device.
- Click on the book link above (while on your iOS device).
- Tap on the download button.
- Choose Open in . . . and then choose Open in iBooks
- The book is now in iBooks on your iOS device.
Directions to read the ePub book on a computer:

Mrs. Garcia’s Dream Catcher Bulletin Board
Mrs. Garcia’s second grade class discussed dreams and how they would try to accomplish them. However, what children wish for doesn’t magically occur. The students researched possible ways to make those dreams come true.
When the students came to the lab, they drew their dreams on the iPad using the Drawing Box app. (I like the paid version because there are more tools,) When finished, the children learned how to save the drawing to the camera roll so that it could be used for the second part of the project.
The next step was to create a new book in the Book Creator app. This is one of my very favorite apps! It is simple to use for all ages. Students can email books to me and these can be very quickly combined into a class book. Love it!!
The students easily inserted their photo into Book Creator, recorded their narration, and then emailed the book to me. I compiled the individual books into one class book which was uploaded to Dropbox so that it could be shared with parents. (See below for instructions.)

Apps used to create and publish the class book.
Chasing Our Dreams Class Book
Directions to download books to your iOS device (iPad, iPhone, etc):
- You will need the iBooks app (free) installed on your iOS device.
- Click on the book link above (while on your iOS device).
- Tap on the download button.
- Choose Open in . . . and then choose Open in iBooks
- The book is now in iBooks on your iOS device.
Directions to read the ePub book on a computer:
Jane Cooper, one of our second grade teachers signed up for a fantastic collaboration project that Kristen Wideen (a teacher in Winsor, Ontario) initiated. The Global Community iBook Project asks teachers from all over the world to contribute a couple of pages about their community.
The information is written in the Book Creator app for iPad and then uploaded to Kristen’s Dropbox account. She will then combine all the pages into one book.
Mrs. Cooper’s class has learned a LOT about Fort Worth but quickly discovered that it was really difficult to squeeze everything into two pages! After much brainstorming, they were able to choose just a few topics. On Tuesday, they worked together to begin the process of adding pictures and descriptions to their book.
Here is a brief look at the process:
There may be another book in the works – the students have so much information to share that they are seriously considering creating their own book about Fort Worth. We’ll see what transpires!
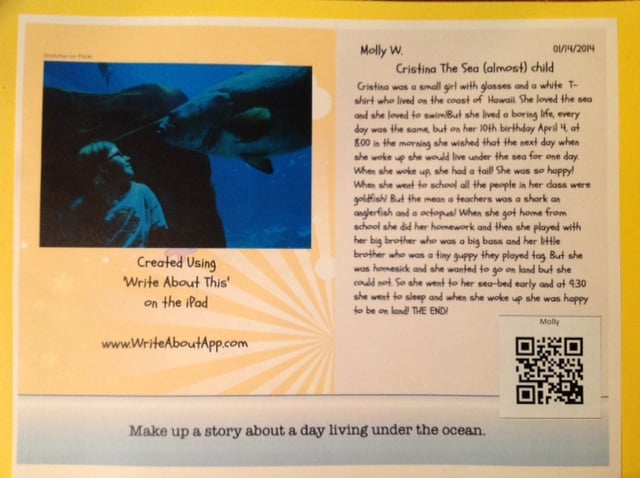
 Our second graders explored the Write About This app last week in the computer lab. The app offers visual writing prompts; students can write a story and record their narration (which saves as a QuickTime movie). There is a free version with limited prompts or, for $3.99, several prompts appear per category. For each visual there are 3 levels which allow for differentiation. Images can also be uploaded to create your own prompts.
I asked the students to go to the categories and look through them.
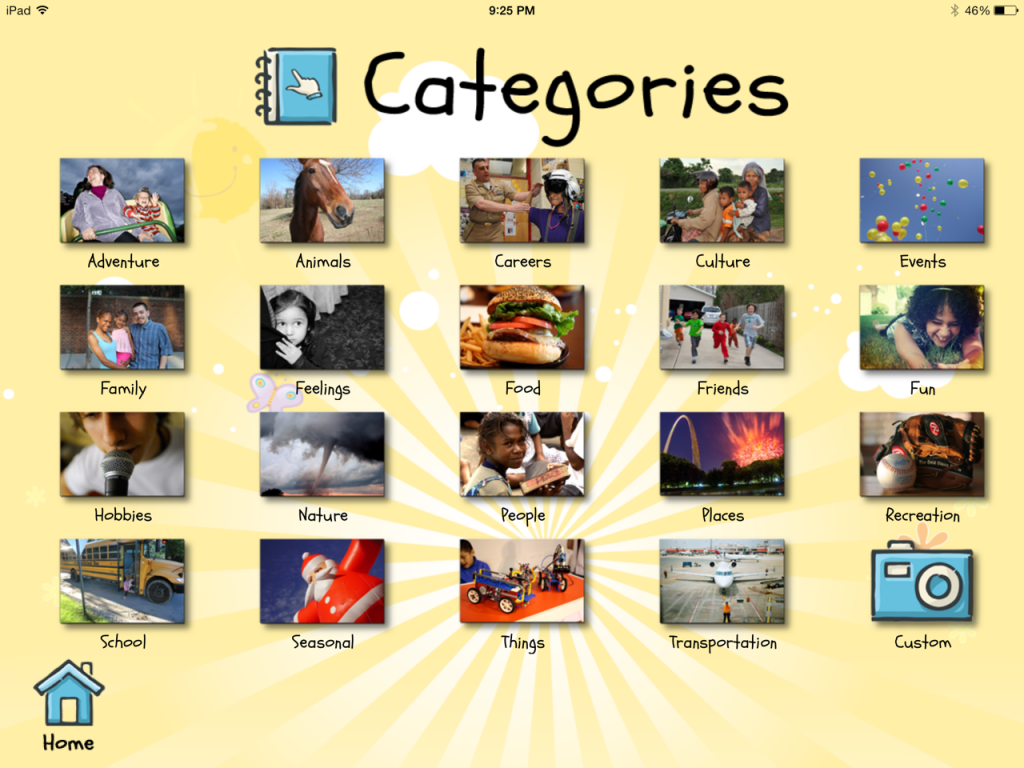 Since I only have the students for 40 minutes, they had to choose a picture quickly. Once that was accomplished, the students started their writing.
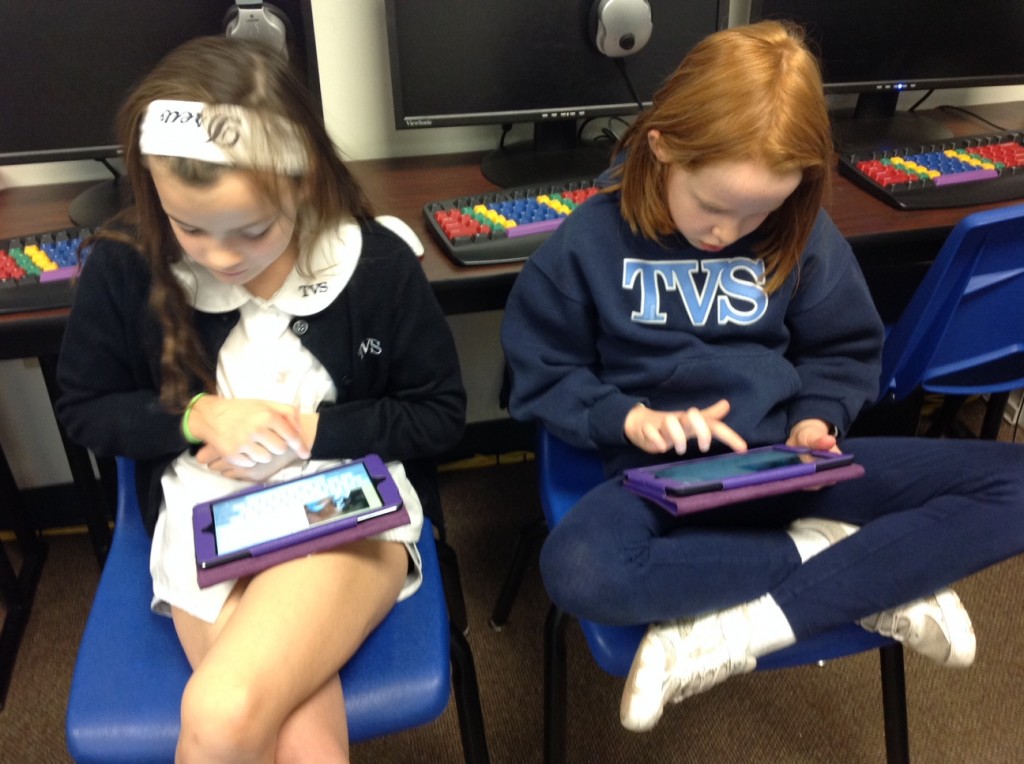
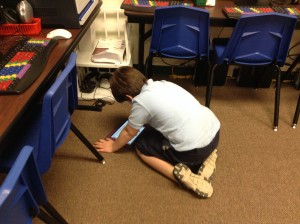
Mrs. Cooper’s students writing their stories
In the classroom, I would expect students to spend more time with the writing process but this was a “quick write” due to time constraints. We did go over our allotted time, but the children were able to write, record, and email their Write About to me.
One of the second grade teachers, Mrs. Cooper, mentioned that she liked to have work on the bulletin board outside her classroom that parents could view on parent/teacher conference day. That started me thinking – could we upload the student’s narration somewhere and create a QR code so that parents could scan and listen to their child reading?
For me, the easiest way was to upload all Write Abouts to our FTP server. Once that was done, I used a QR code generator to create the code. The one I used this time was QR Stuff because I could also choose to shorten the URL at the same time the code was being generated. The codes were saved to a Word Document and labeled by child’s name. I printed them on a full-page label so all I had to do was cut them out and stick them onto the Write Abouts that had previously been printed.
 Since the Write About narrations are saved as a QuickTime movie, they could be uploaded to Vimeo or YouTube. QR codes could be created as above.
The students loved the Write About This app. We don’t recall hearing anyone say, “I can’t think of anything to write!”
By the way, the same people who created Write About This have just released the Tell About This app. Visual prompts are provided that encourage children to focus on their oral language skills as they tell stories. I can’t wait to work with the younger grades!
It doesn’t snow much in Texas – our last major blast of winter weather resulted in the worst ice storm this area has had in many years. Unfortunately, you can not build a snow man from ice!

Looks like snow but it was thick, slick, solid ice!
So, we did the next best thing – we “built” snowmen (and snow women) using Microsoft’s Paint program. The students drew their snow people by answering questions on a Snowman Glyph 2014. (This is adapted from a glyph I saw years ago. Unfortunately I don’t remember where it was found.)
What surprised me is that their were several students who had never built a real snowman! But, if you don’t travel to snowy places, you often have to wait several years before we have enough snow in Texas to build even a miniature snowman!
After the snow people were finished, I uploaded the illustrations to animoto. Enjoy the videos.
Second Grade Snow People:
Third Grade Snow People:
Fourth Grade Snow People:
Two of our second grade teachers wanted to take the project a step further by incorporating writing. They had their students write cinquain poems which they copied into the Book Creator app. (As a side note, this is an AWESOME app and super easy to use!).

Typing the Poem
Since the pictures had been drawn on computers, I had to upload them to my Picasa account so that the students could save the image to the iPad. They had no problems at all doing this.
Once the pictures and text were in the app, each student recorded their poem, then emailed it to me.

Recording
One of the best features of Book Creator is that books can be combined if they are created in the same format. We chose landscape for this project. All of the individual books were then easily combined into one book. I did have to delete some blank pages – quick and easy though.
Finally the books were uploaded to DropBox – ready to share. Directions for reading the books on your iOS device or through the Google Chrome browser are listed below.
Mrs. Shapard’s Snowmen and Snow Women Cinquain Poems
Mrs. Cooper’s Snow People Cinquain Poems
Directions to download books to your iOS device (iPad, iPhone, etc):
- You will need the iBooks app (free) installed on your iOS device.
- Click on the book link above (while on your iOS device).
- Tap on the download button.
- Choose Open in . . . and then choose Open in iBooks
- The book is now in iBooks on your iOS device.
Directions to read the ePub book on a computer: