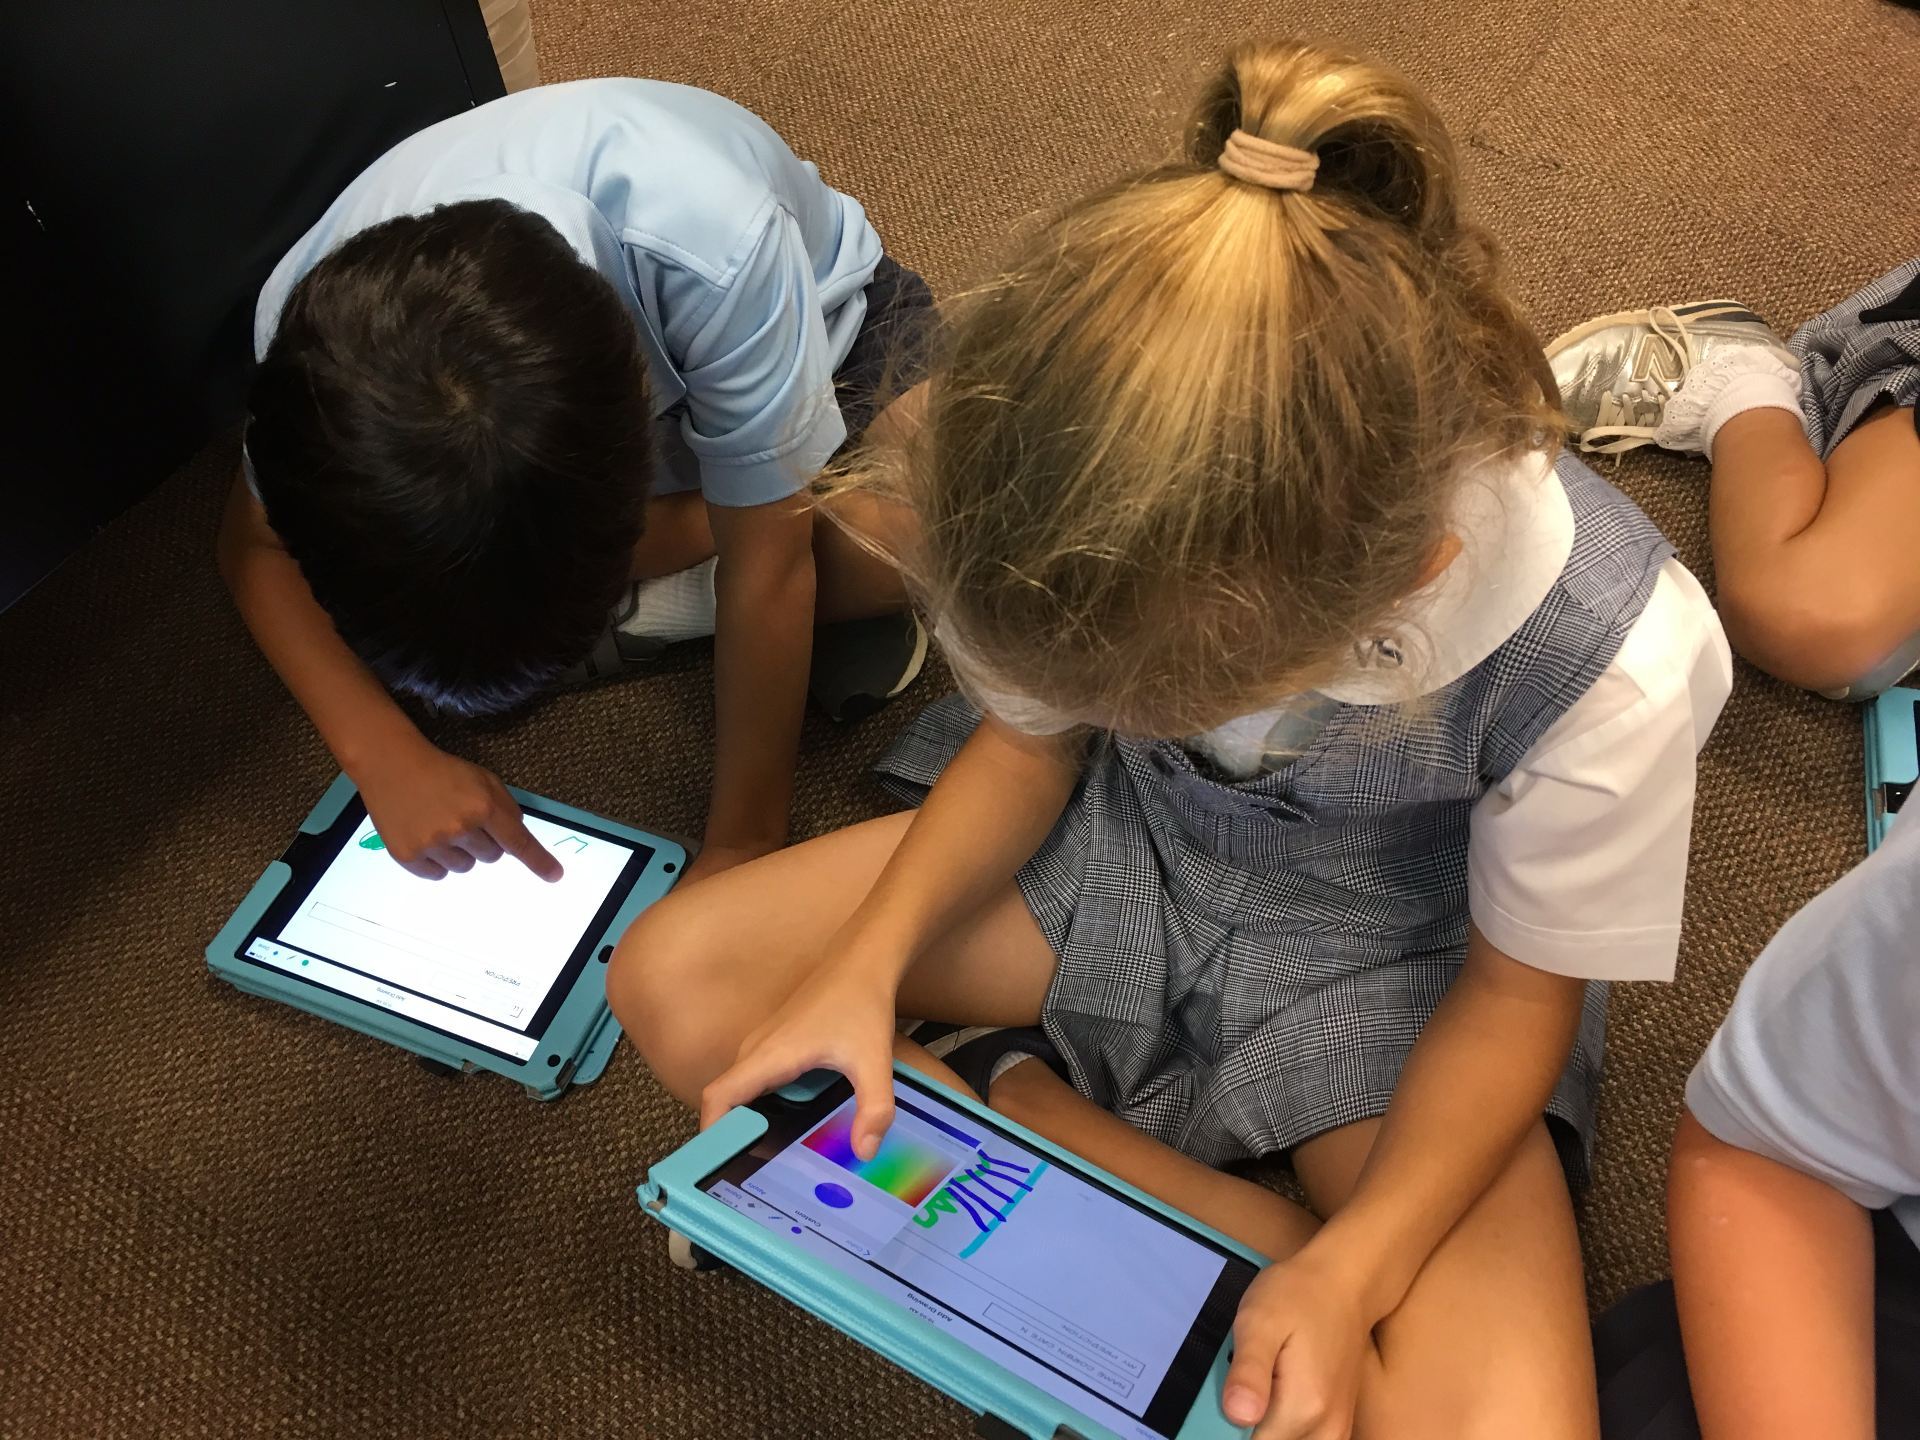
I’ve never started making books so early in the year with our kindergarteners but, as Book Creator was perfect for what I wanted to do with them, I was eager to give it a try. My challenge was: Have our littlest ones illustrate AND record using an app they had never seen before, all in a 30 minute session! Challenges don’t scare me! Although, I have to admit, I did warn the teachers that I had no idea how this would turn out!
I’ll just say, children never cease to amaze me! These young students did a fabulous job in their creations and I am very proud of all that they accomplished! Here’s what we did . . .
I came across the book, I Need My Monster, by Amanda Noll. It’s about a child who creates a “comfortable” monster that lived under his bed; one that helps him overcome his fears. One day, the boy discovers a note from his monster saying that he’d gone fishing and would be back in a week. The little boy goes through a series of “substitute” monsters before his returns.
I thought the story would be perfect for a class book about silly monsters and how we wish they might help us. With only 30 minutes with students, it was important to do as much preparation as possible before class. Since we have shared iPads, I created a template and airdropped to each of our iPads, one for each class. Often, I’ll go ahead and add each child’s name to the name of the book but this time I color-coded the books so that each student just had to find the color of the “name” box that matched their class. For example, Mrs. Monroe’s class looked for the green box.
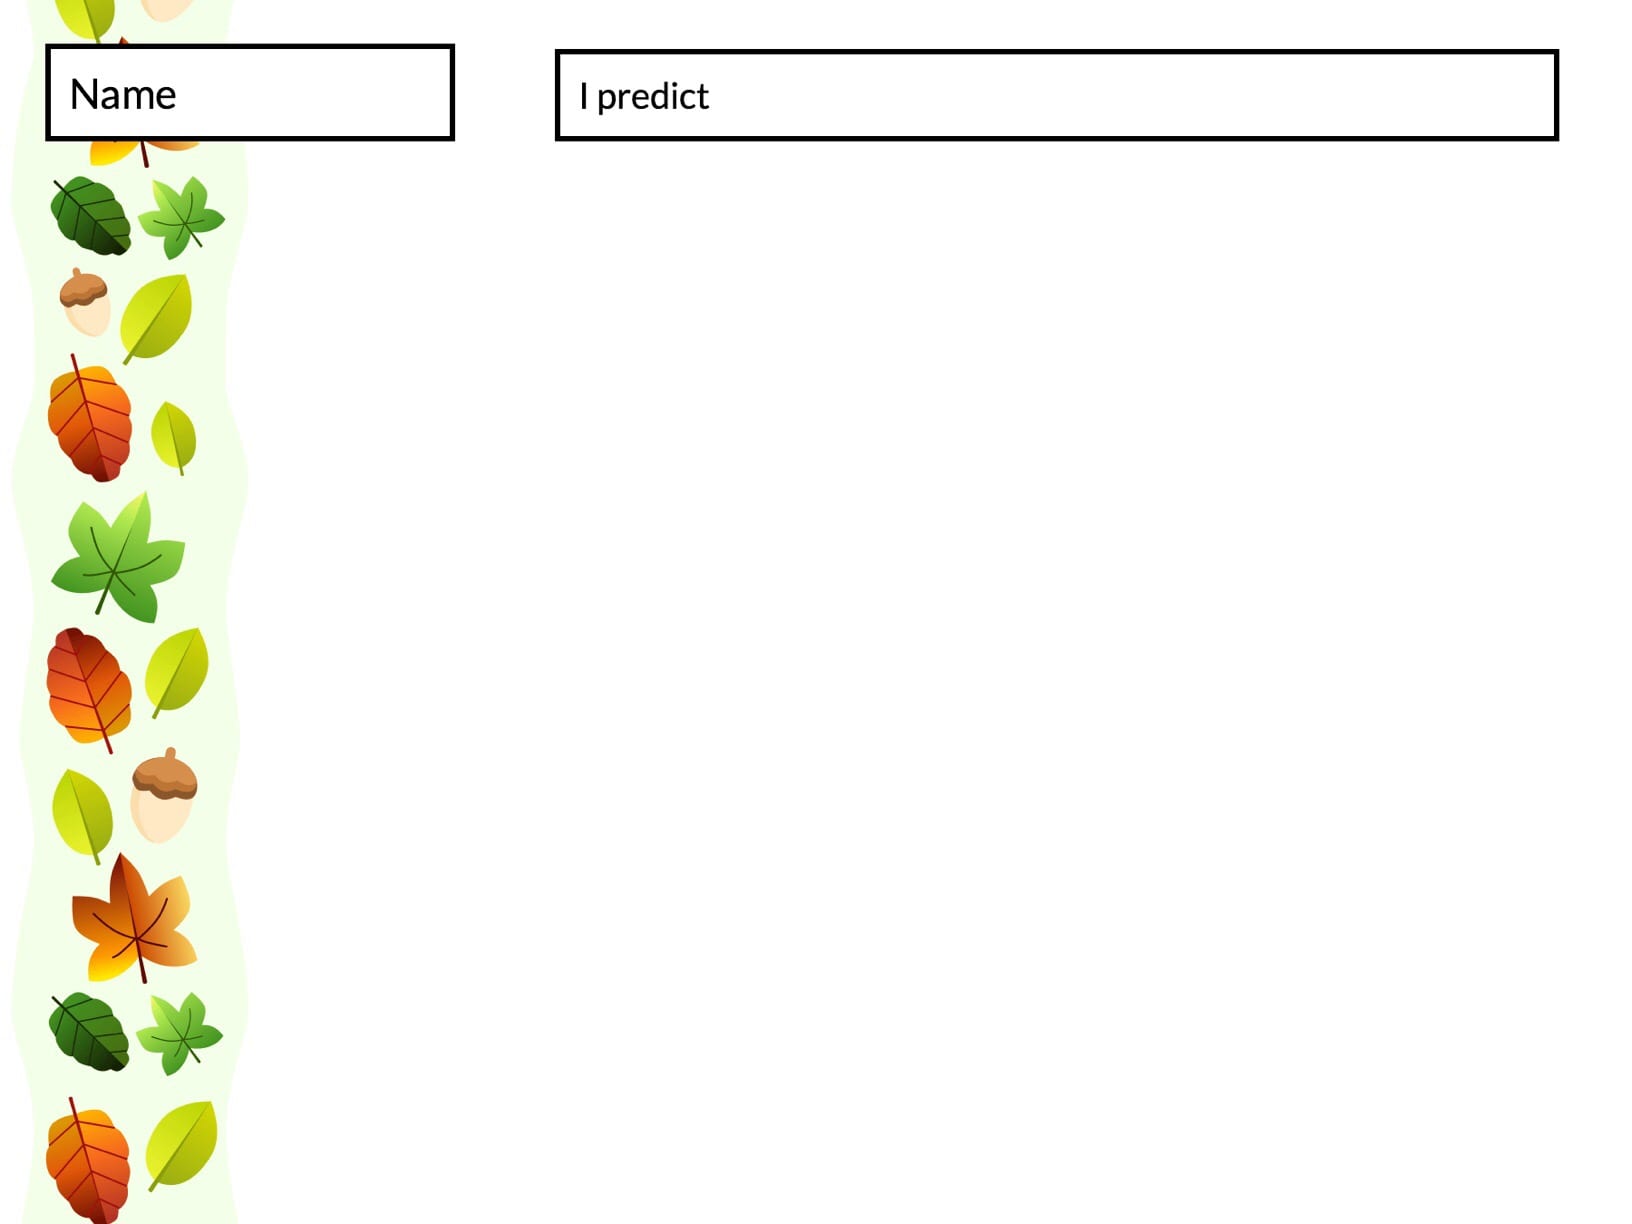
I absolutely LOVE combining literature and technology when students visit the lab! One of my favorite books is, It Could Have Been Worse, by A.H. Benjamin. It is a one of the best books for making predictions! The book is about a little mouse who is on his way home when he encounters some difficulties. Little does he know that he is being followed by other creatures such as a cat, snake, fish, and more. Mouse ends up falling into holes, sliding down hills, getting a few bumps and bruises along the way. What he doesn’t know is what happens to those animals trying to catch him!
I read the book and stopped just as an animal was about to catch the mouse. The goal was to have the first graders illustrate their what they thought would happen next, write a sentence about their prediction, and record their voice telling what their prediction. Then, I would make a class book for the students.
There are many ways to do this but my go-to app is Book Creator. I air-dropped a template to each iPad (I’m loving the new backgrounds and borders Book Creator has added). With only 40 minutes with each class, I do as much as I can before students arrive!
our template
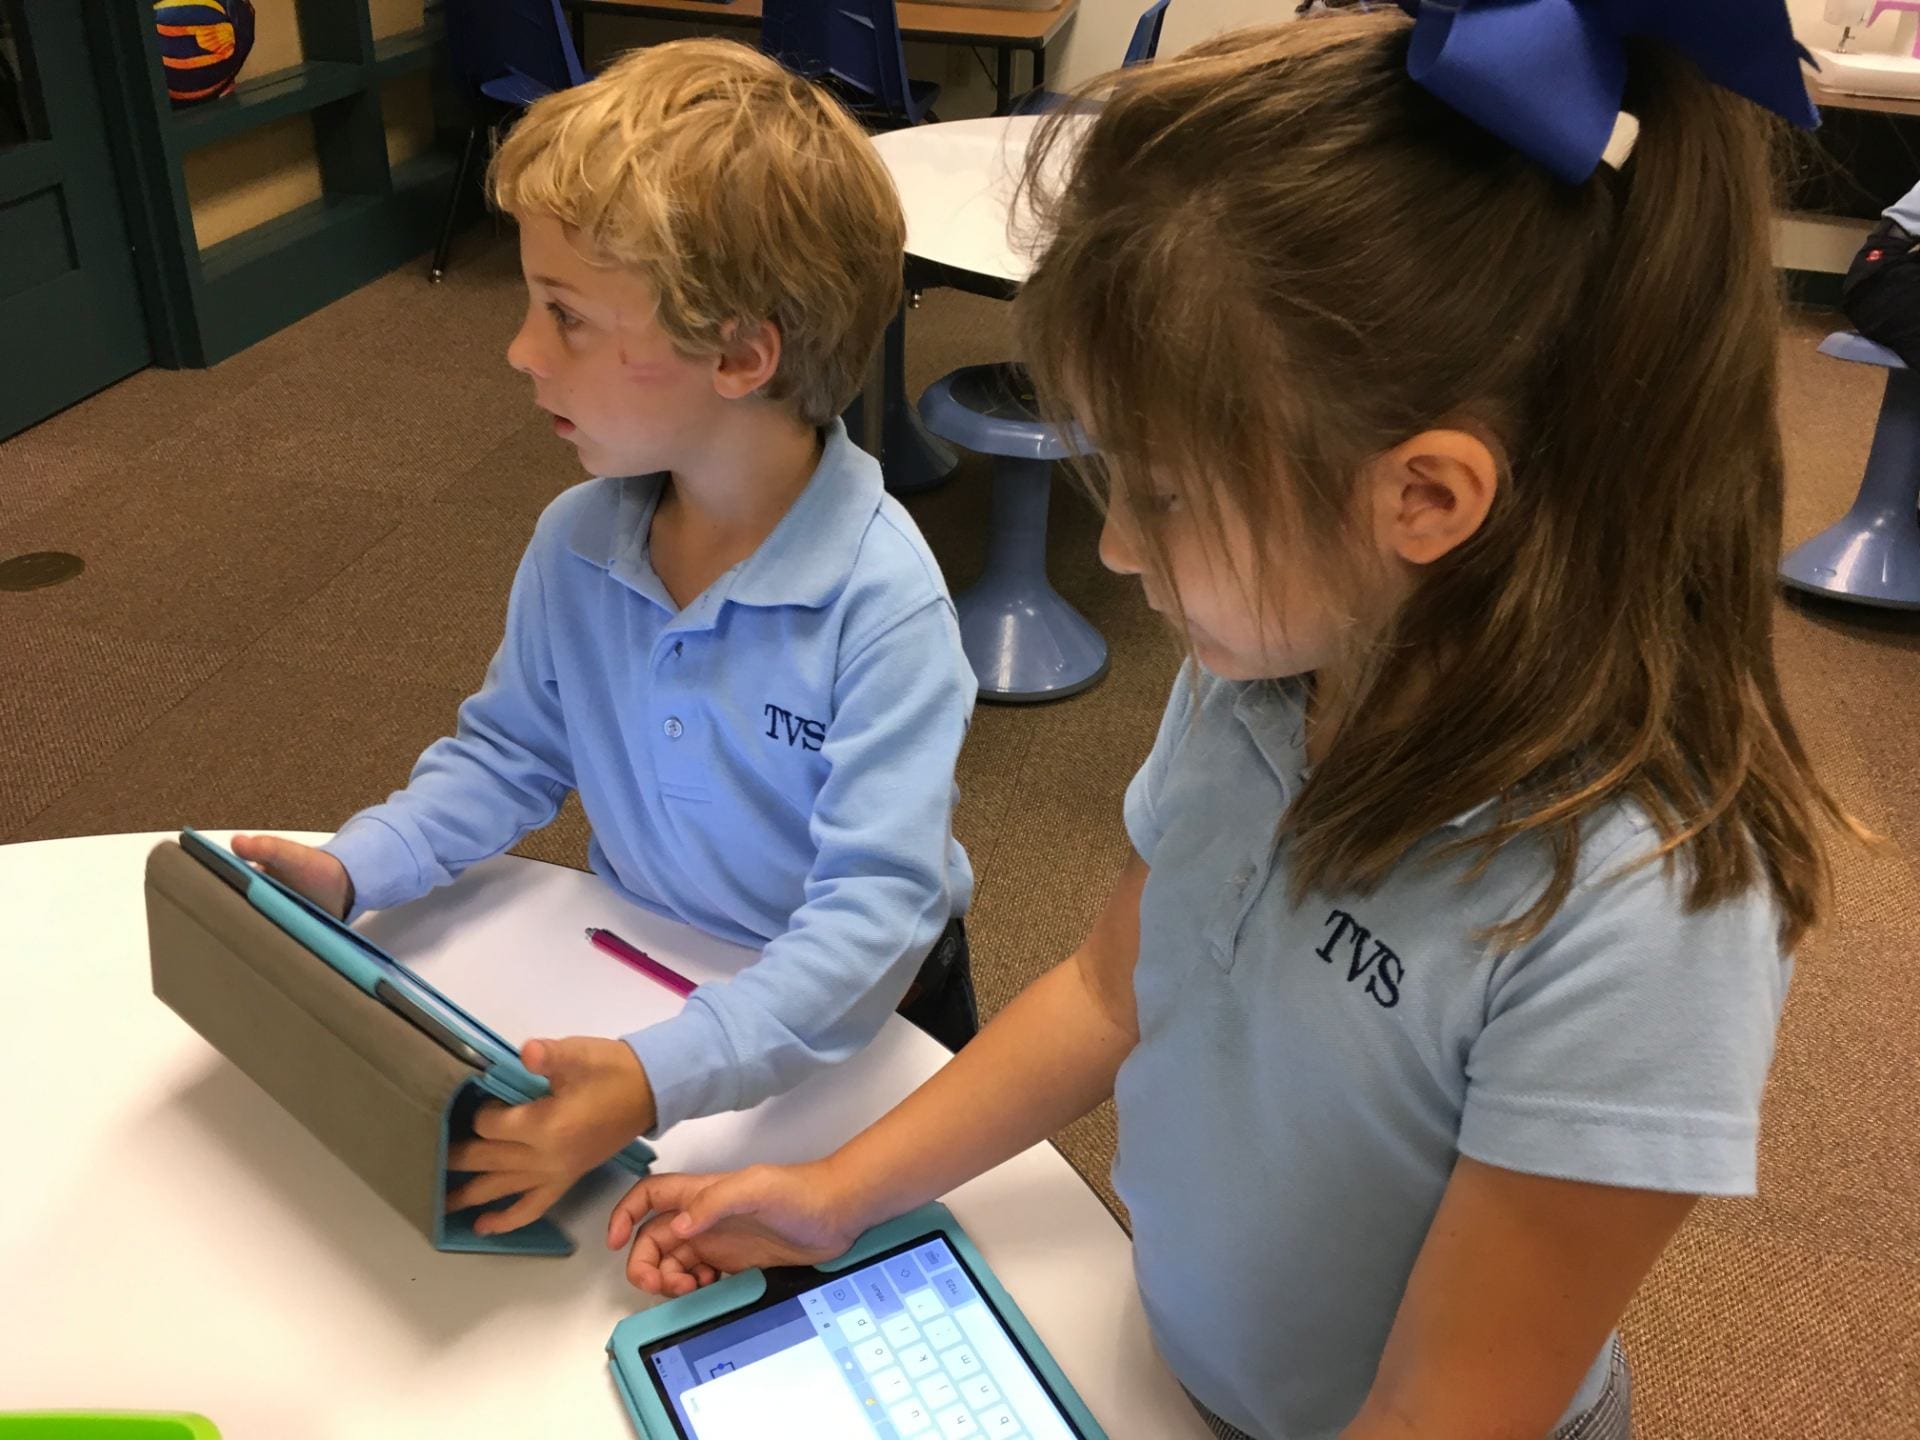
When the students arrived, we set up the book by adding their names. I was amazed at how much the students remembered from using the app last year so set up went quickly.
As I started reading, the children began drawing. When I reached the stopping point (different for each class), the students really got busy!
The directions were:
Illustrate
Type sentence
Record
Air drop to Mrs. Arrington
As students completed the steps, they became helpers – showing classmates what to do. The homeroom teachers were invaluable helpers as well!
I enjoy taking photos of the process which are made into a short video and added to the end of the books. The children (and parents) really enjoy that!
More than you think! I drew a squiggle in the Book Creator app, added an “About the Illustrator” page and airdropped the book template to each student iPad. When finished with their creations, the children airdropped their books back to me so that I could combine them into class books.
The directions were simple: Look at your squiggle. What could it become? You can rotate it and copy it if you want. Make something recognizable from your squiggle.
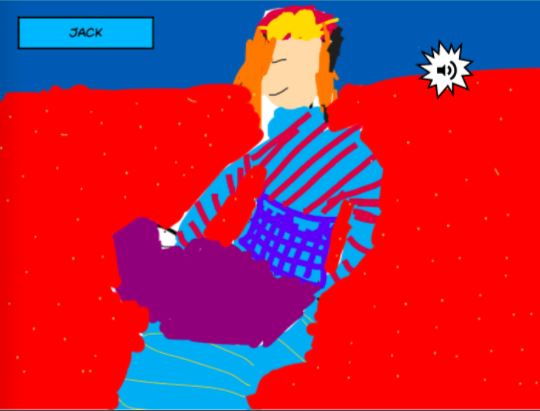
The students provided so many interesting and creative interpretations of their squiggle! I love this one from Jack, a 4th grader, who used what he had learned in art to create an illustration based on an artist named Mary Casssett from the 1800s who painted mothers and children. (To hear his narration, listen to Mrs. Wright’s class book.)
For the 4th graders, I told them they could resize and rotate their squiggle. A few children made the squiggle so tiny that it is barely recognizable! I made the mistake of not telling students to make sure the original squiggle could be seen. In several of the 4th grade illustrations, it’s very hard to tell what and/or where the squiggle was.
As a result, I changed the directions for the 3rd graders. They could rotate the design but they couldn’t resize. I also told students to make sure the squiggle could be identified.
Some of the designs were created from making copies of the squiggle. Those turned out really well!
I asked that the squiggle be seen in the picture. Some did that but others covered it up with another color.
It’s helpful to lock the squiggle once it’s decided where it will be on the page.
I used to do this all the time when I was little (on paper, of course!). It’s fun to watch the students create digitally!
Mrs. Garcia’s class has done an in-depth study of Fairy Tales. They have created a latch to keep Goldilocks out of the 3 Bears’ House, written blog posts, compared and contrasted numerous fairy tales, and learned the elements of these fun stories.
Taking what they have learned, the students worked in groups to write and illustrate a spin-off of a well-known fairy tale. To better share these, we decided on using the Book Creator app. The students used paper and crayons for the illustrations, took photos of each, then added them to the app. Because our school year finishes Thursday, instead of typing their stories into the app, the students recorded narration to match the illustrations.
Individual books were combined into one class book. Enjoy their stories!
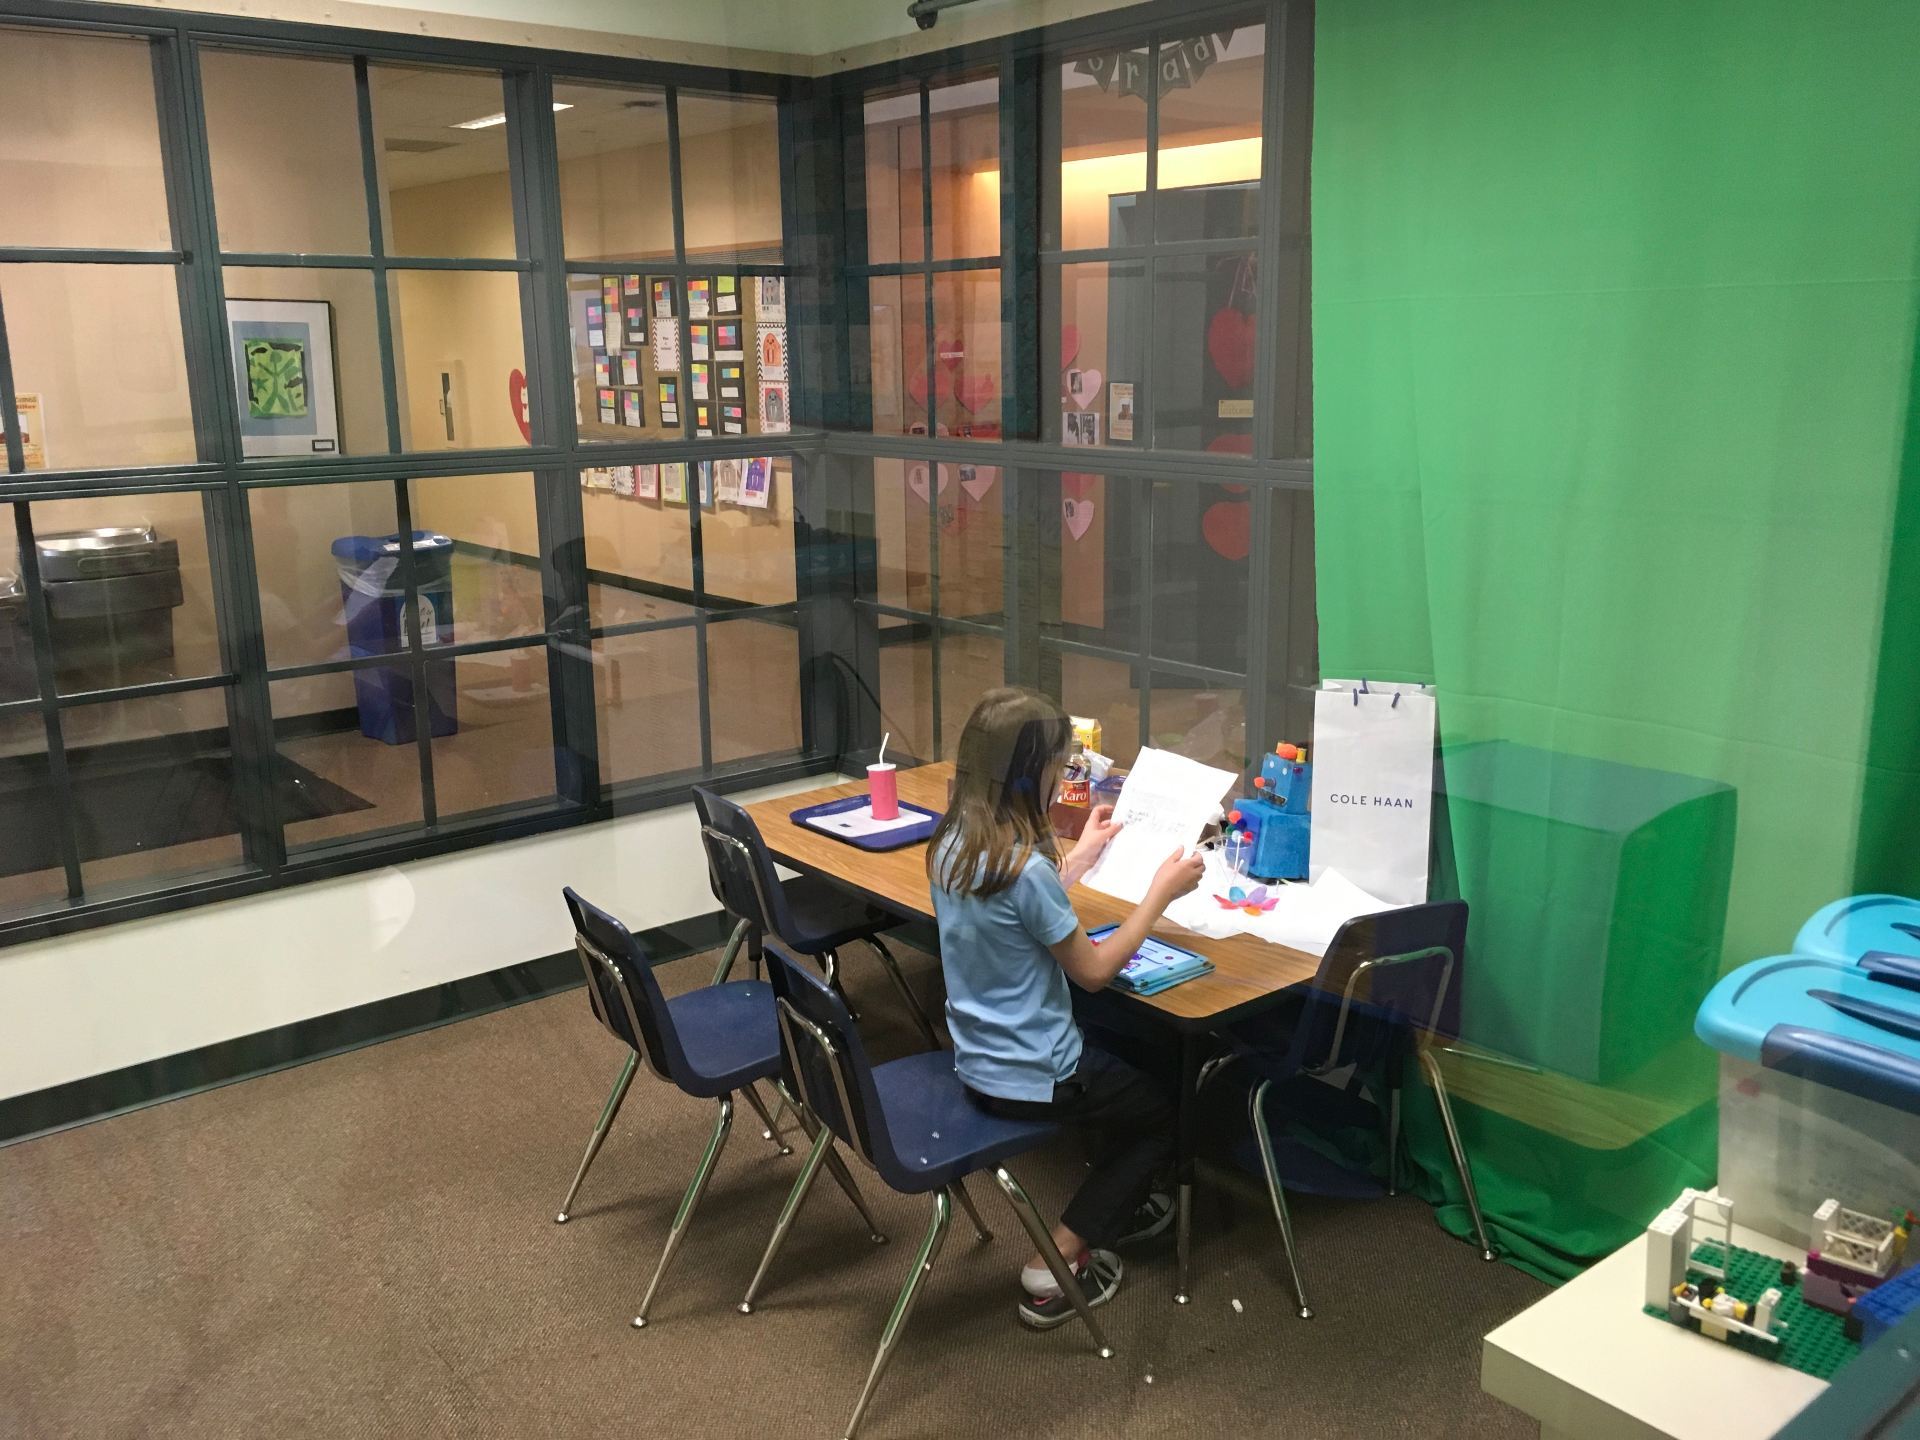
After a couple of weeks learning all kinds of fantastic animal information, I asked the little ones to illustrate and tell about their favorite animal. Since they had learned about classifications, I also asked that they tell what the animal was and whether it was a mammal, fish, bird, etc and why.
We used the Book Creator app for this project. It’s the perfect app for students to illustrate, write, and record – all in one place. To show how intuitive this app is, this was the first time the kindergarteners had used Book Creator. In a 30 minute session, they were able to learn the basics, draw their picture, record, AND airdrop their book to me! Pretty amazing!
After deciding that dinosaurs and unicorns weren’t the best choice for this particular book, the students began their illustrations. They did such a fabulous job filling up the page with their animal and adding details that showed its habitat.
As students finished drawing, they scattered to find a quiet place to record. Some even wrote a script before recording!
The final step was to airdrop to me so that I could combine all individual books into one class book.
As I listened to the pages, I couldn’t help but chuckle at some of the recordings. Did you know that, “A pig is the most rare animal in the world?” and “Humpback whales can weigh over 300 million pounds?” One boy remarked, “My cow looks orange and they are supposed to be brown and actually black. I know that but I couldn’t find the brown. I’m sorry. So let’s just deal with it as a cow! Okay?” So, not all the facts are quite correct but they really had LOTS of information in their heads and shared it the best they could! 🙂
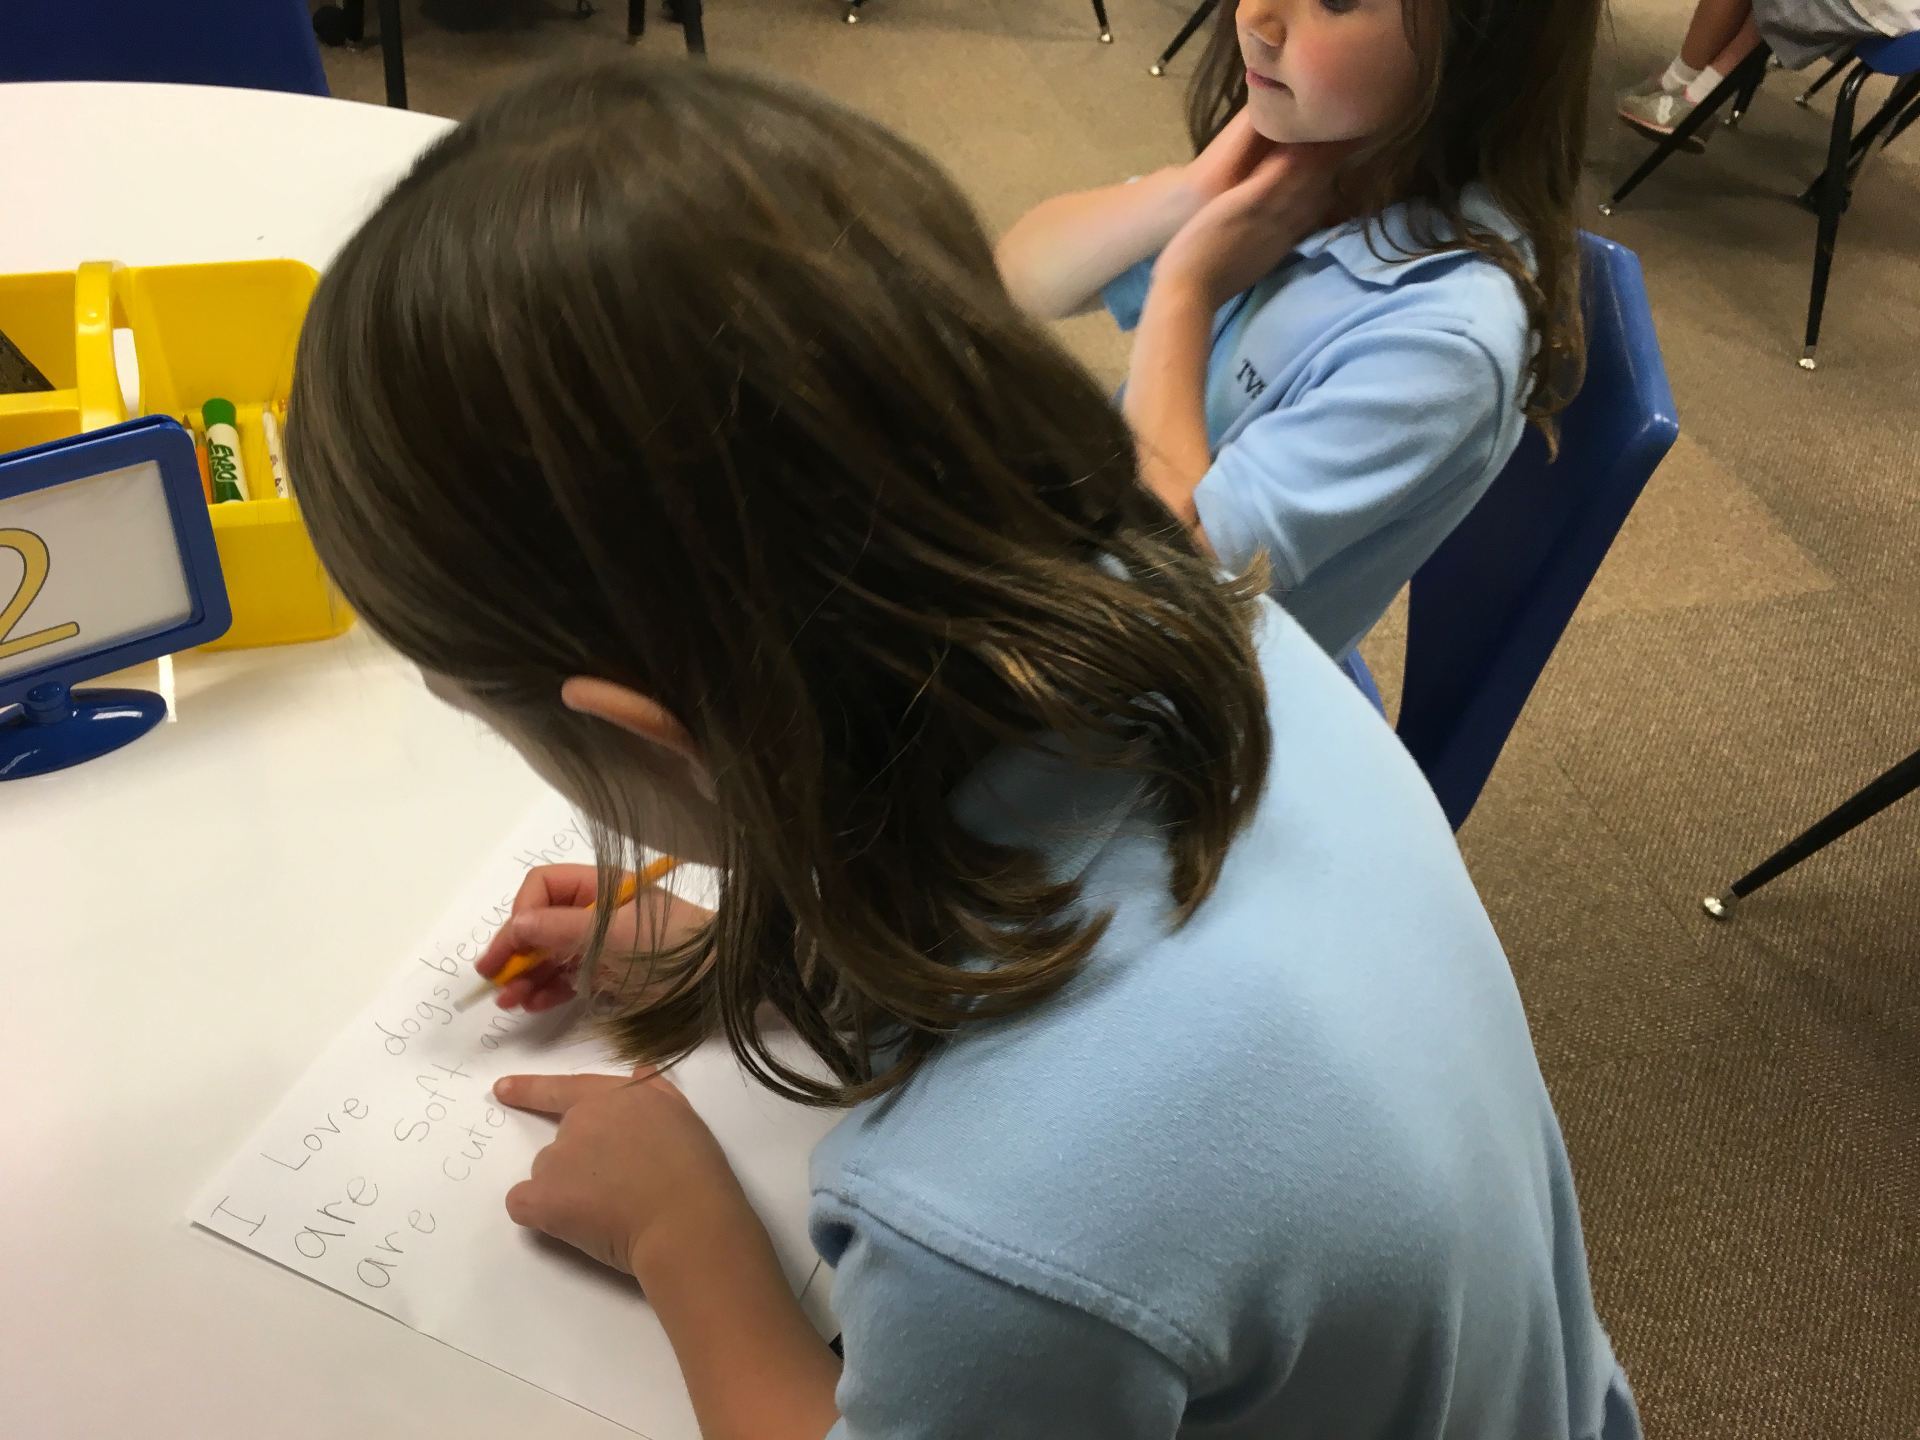
To go along with the homophone spelling unit, a second grade teacher asked if there was a digital way that we could make a homophone book. My go-to app is Book Creator and I felt like this would be perfect for the activity.
Prior to class, the students were given a set of homonyms. They were to create one sentence using all of the homonyms. On my part, I made a template in Book Creator and air dropped that to our lab iPads. When the students came in all they had to do was type in their sentence, illustrate the it, and record.
They had so much fun creating fabulous sentences.
And, their illustrations were amazing! This one was funny because her sentence originally had been written as, The four brown horses got some yolk on their yoke. After drawing two and realizing how much room that took, Annie came over to ask, “May I change this to two horses!”
After recording, the students came to me to air drop their book to my iPad so that I could create the class books. I absolutely LOVE working with Book Creator – easy to use and the students can do just about anything they want with all of its features. There are many others apps that we could use but Book Creator worked out perfectly for this project.
The teachers and I were very proud of how the books turned out. The students did such a great job with their illustrations and sentences.
Below are links to the books. These were saved in two formats – as an ePub book to be read in iBooks and as a video. We had so many students absent with the flu that not all children were able to make a page.
Directions to Download to iBooks:
Click on the book link while on an iOS device (iPhone or iPad). It will not work on a Mac or PC.
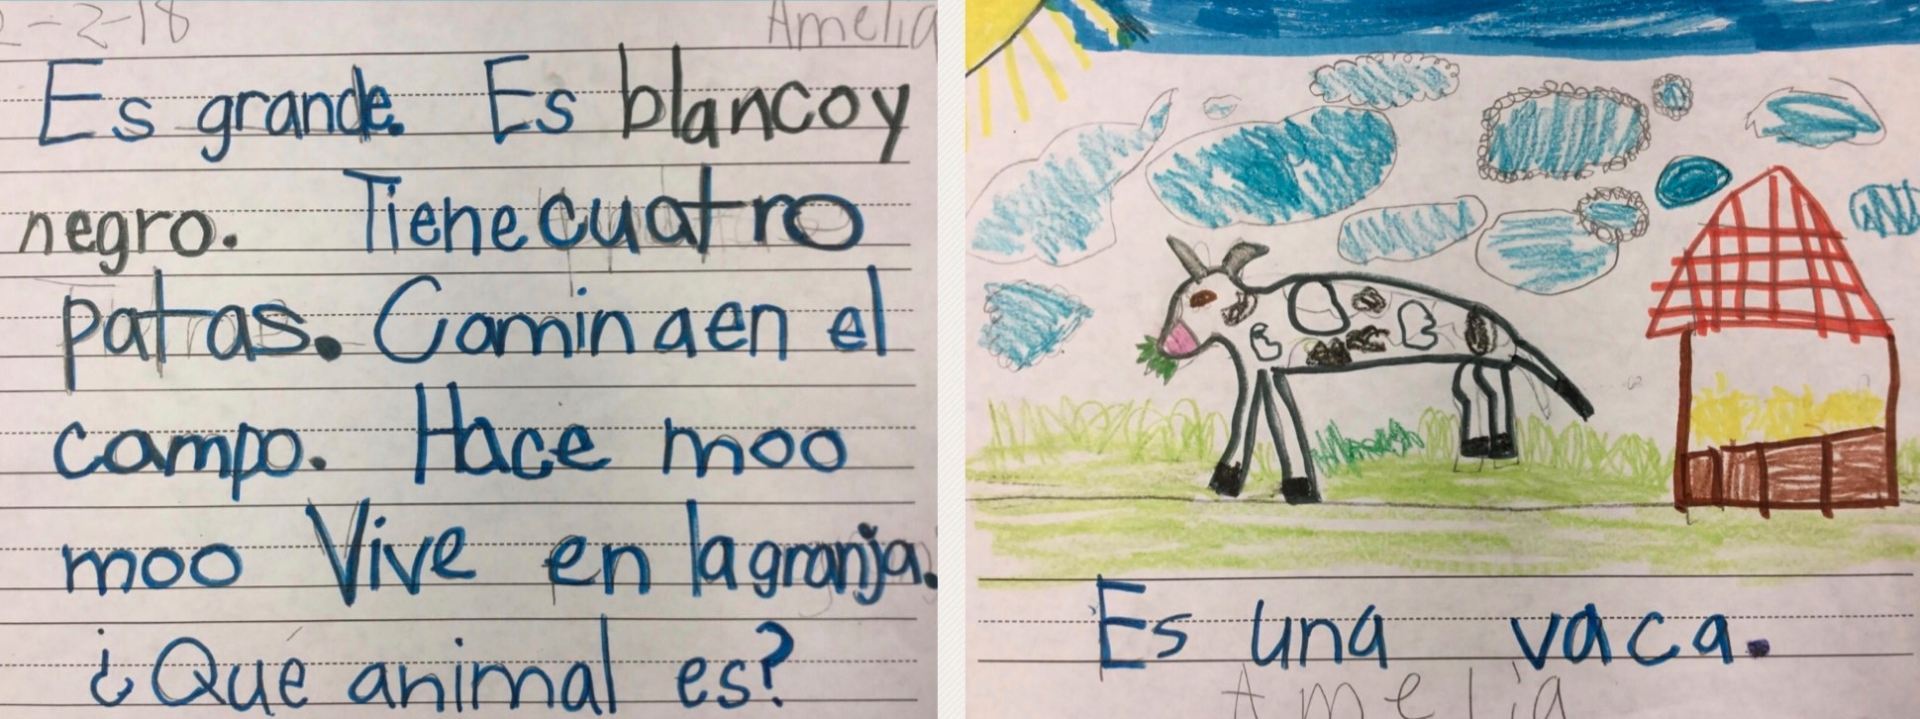
Our first grade children have created the cutest project in Spanish class with Sra. Ross. Here’s what she said about the animal project:
As part of our farm animal unit, we discussed using tiene, it has, to describe the different body parts each animal has. We talked about what color the animal is using es, it is, learned the vocabulary for each part, discussed how many parts each animal has, and also what actions the animals do.
In Spanish, the students had written a description on the first page and written and illustrated the answer on the second.
Sra. Ross asked what we could do to record the students and get their work uploaded to Seesaw digital portfolios. Since there were two pages to this, I thought Book Creator would be perfect. The children could make their book and then air drop that to be combined for a class book. The class books could be placed on the class iPads so that students could practice listening and practicing their understanding of Spanish.
For my part, I created a template in Book Creator and air dropped that to each iPad. I then went into each iPad to personalize each book with student and teacher’s names. The children can set this up but I find it saves a LOT of time, especially for the younger students, to prepare as much as possible ahead of time!
In the first class, we had the students take a photo of each paper using the camera that’s built in to Book Creator. In that class, only 6 students completed their book (steps to completion: take photos, insert into Book Creator, record the Spanish, let Sra. Ross listen to it, and air drop the book to me. For a 30 minute class, that was TOO MUCH to do! We only had about 6 people complete their book.
After that class, I suggested that we take the photos and insert them into the books before students arrived. That was SO much better!
Once Sra. Ross checked the work, the students came to me where they added page colors to their books then they air dropped them to me.
Two of the three classes completed their books. The books were saved in the ePub book format as well as a video. Here’s one of the videos (the title slide was created with the Assembly app).
Instructions for Downloading Books:
In order to read the books, you will need to have the iBooks app installed.
Tap on the link while on an iOS device (iPad or iPhone).
I met Beth a few years ago while attending an EdTechTeacher conference and she is one of the most creative and knowledgeable persons I know. I ALWAYS learn so much in her sessions! Her focus is on pedagogy first; using technology ONLY if it is the correct tool to help meet the objective. So, I knew whatever she had to say would be well-worth reading!
Since Book Creator is my go-to app and coding is an area I feel is important for all ages, the title certainly caught my eye!
As it turned out, I focused on a variety of coding activities using Ozobots (to the delight of all the students) and ran out of time for other options. This month, I revisited Beth’s post and incorporated it into the fourth grade lessons.
Take a look at Beth’s video, Teach Coding as a Language with Book Creator.
Following Beth’s ideas, I started with these instructions, telling students I could only speak in concise sentences:
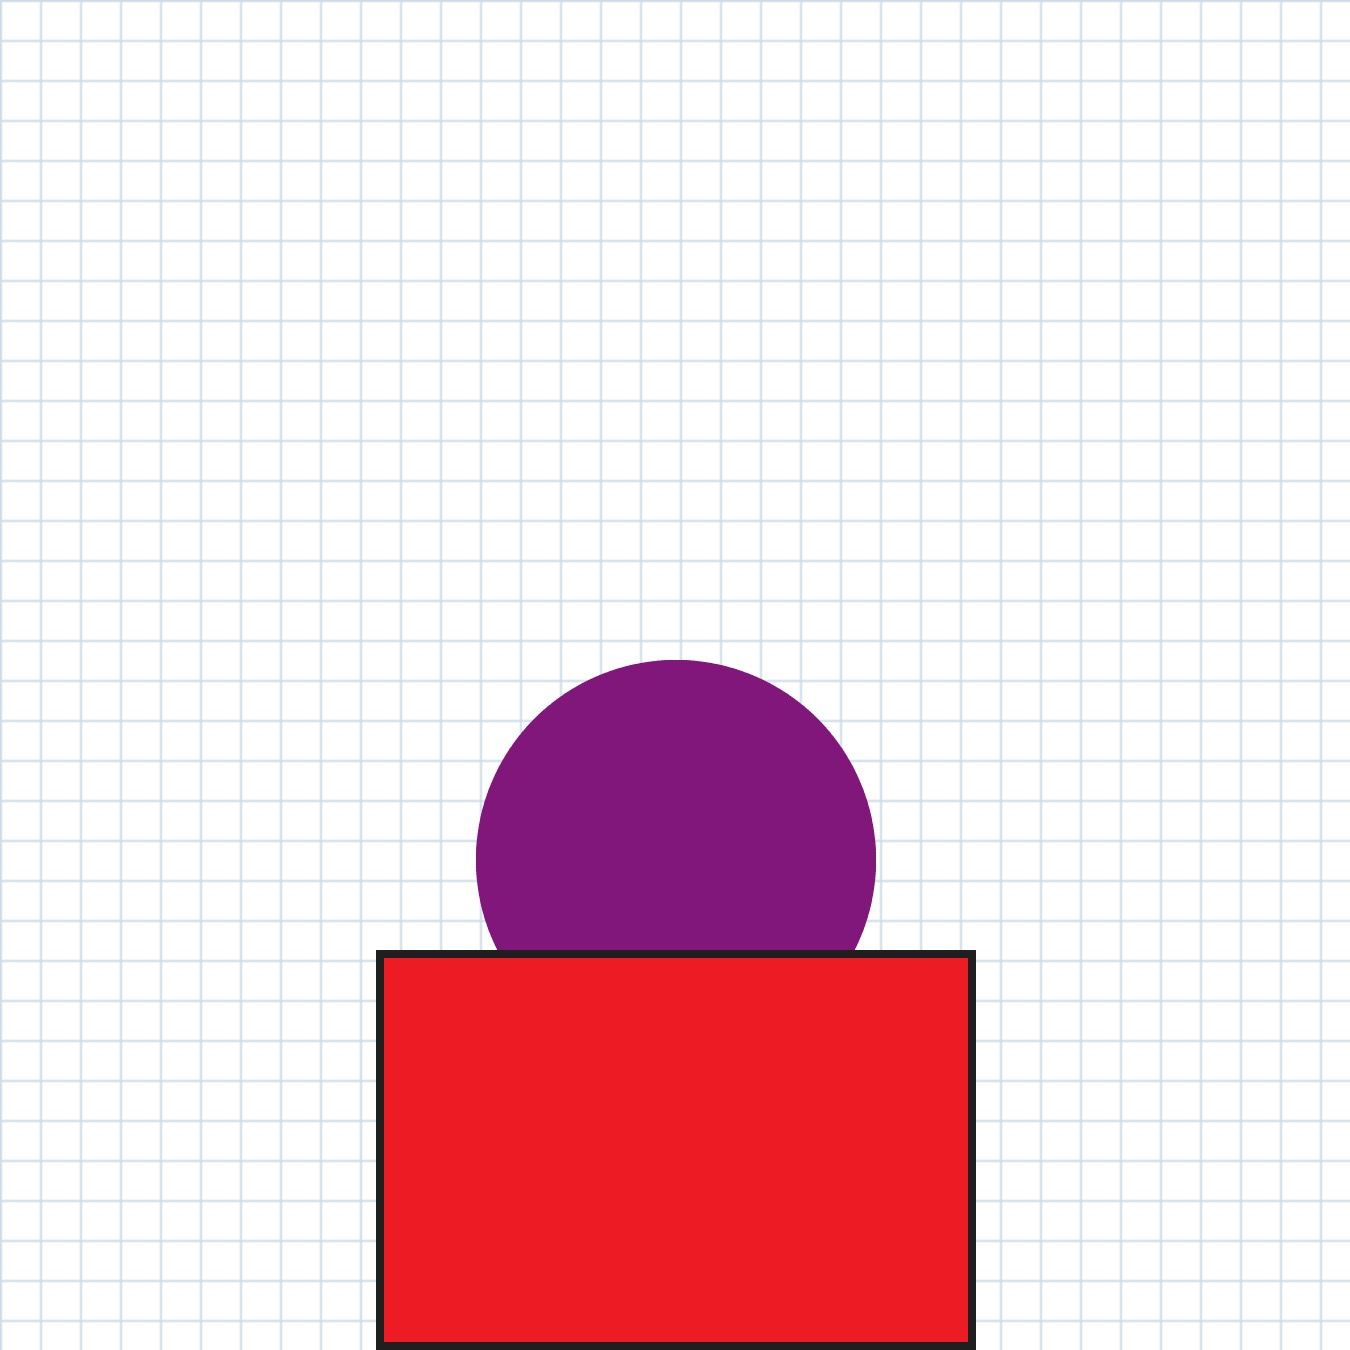
Add > Shape > Rectangle
“i” > Color > Red
“i” > Border On > Color > Black
Add > Shape > Circle
“i” > Color > Purple
Move Circle > x=238; y=338
“i” > Move to Back
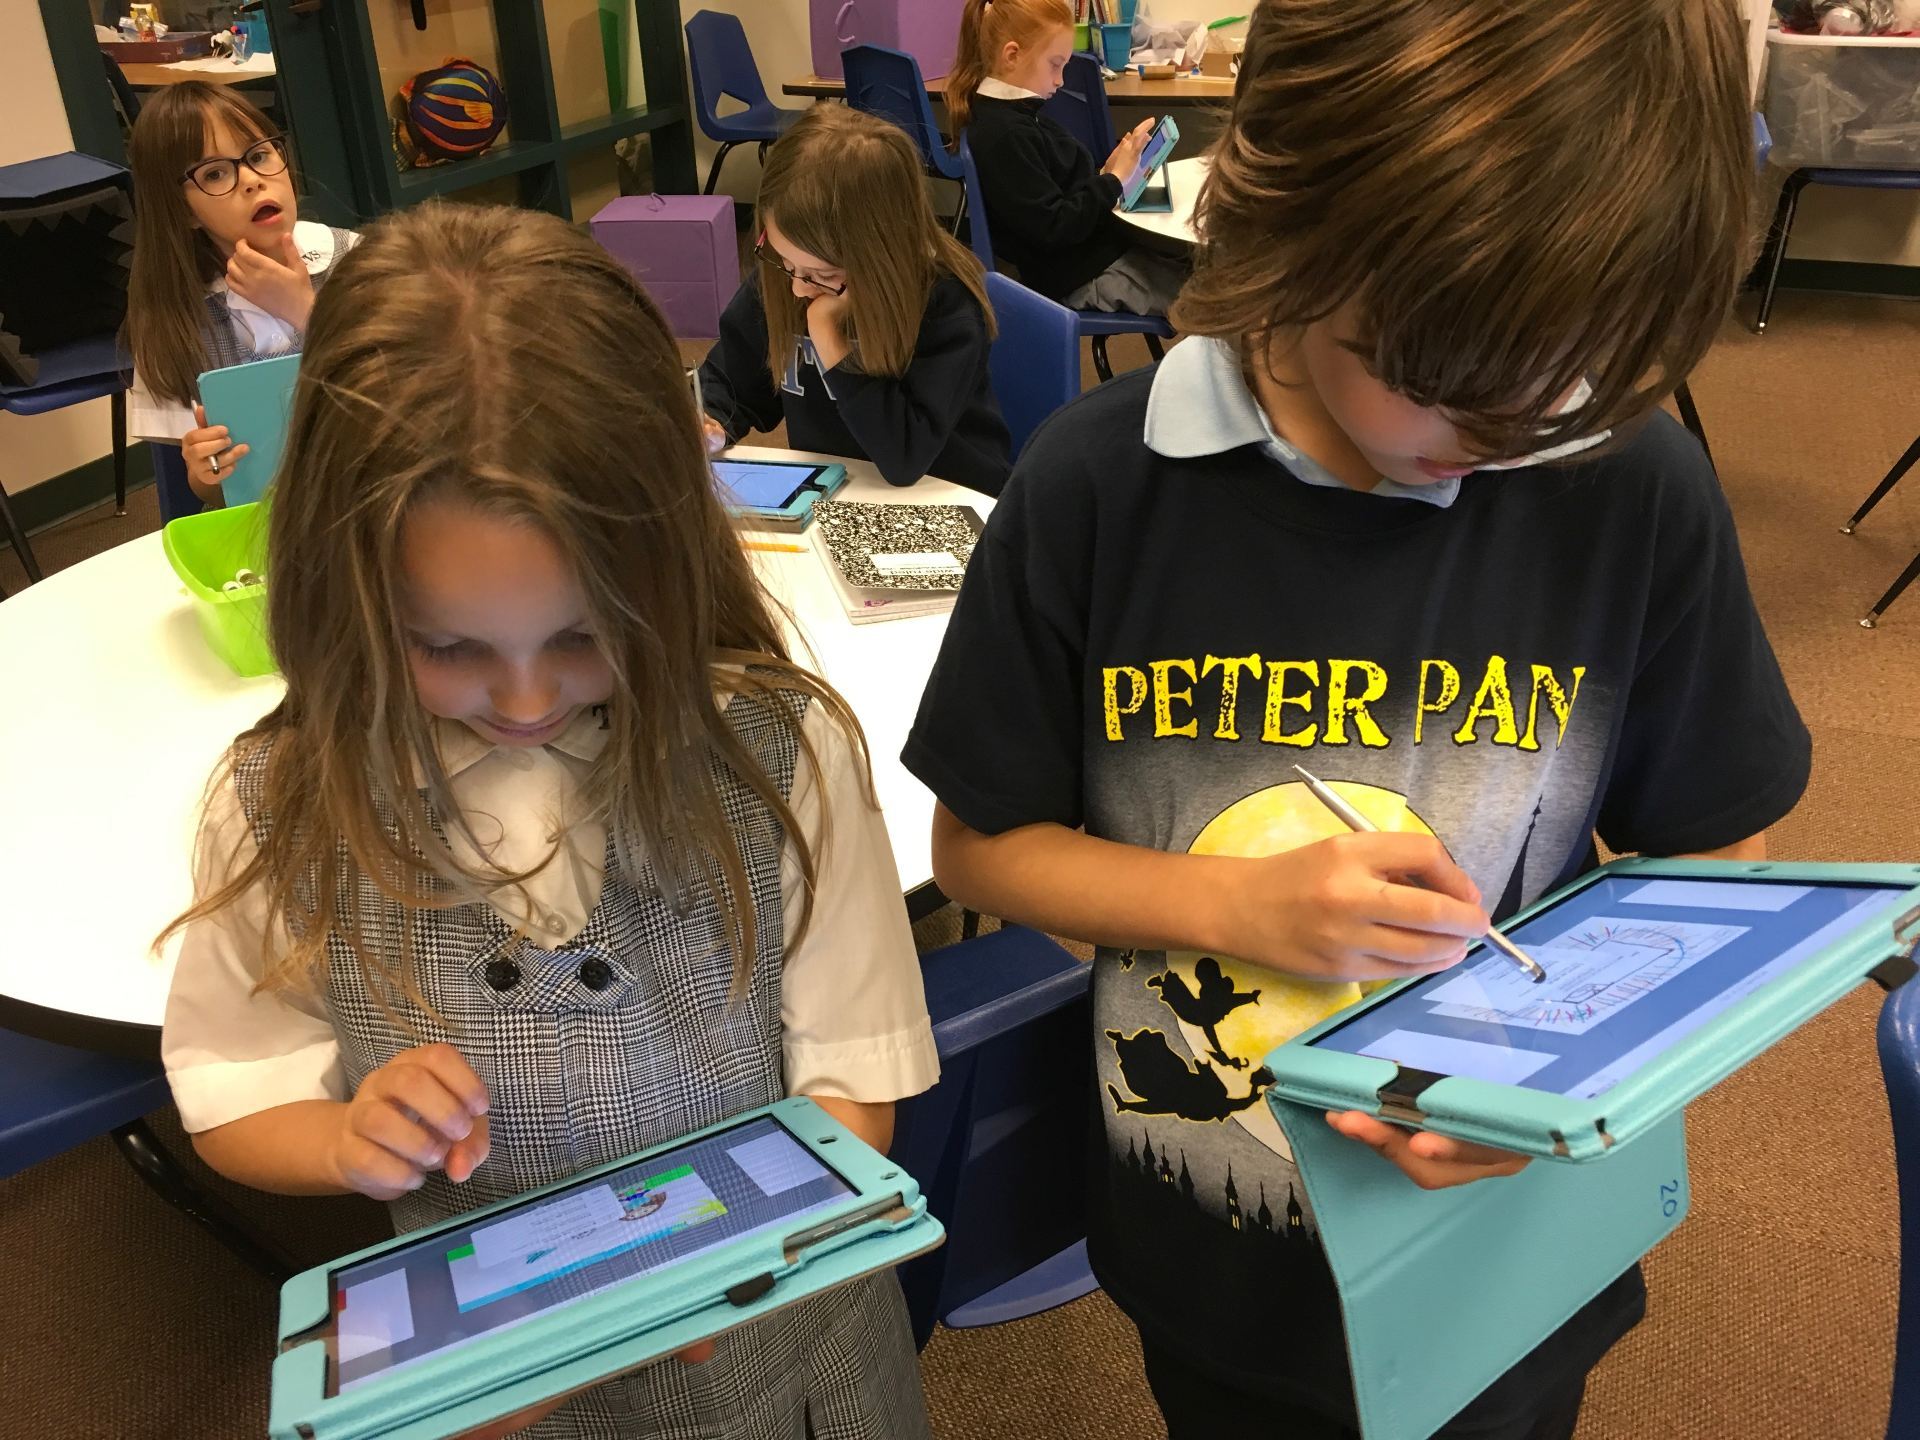
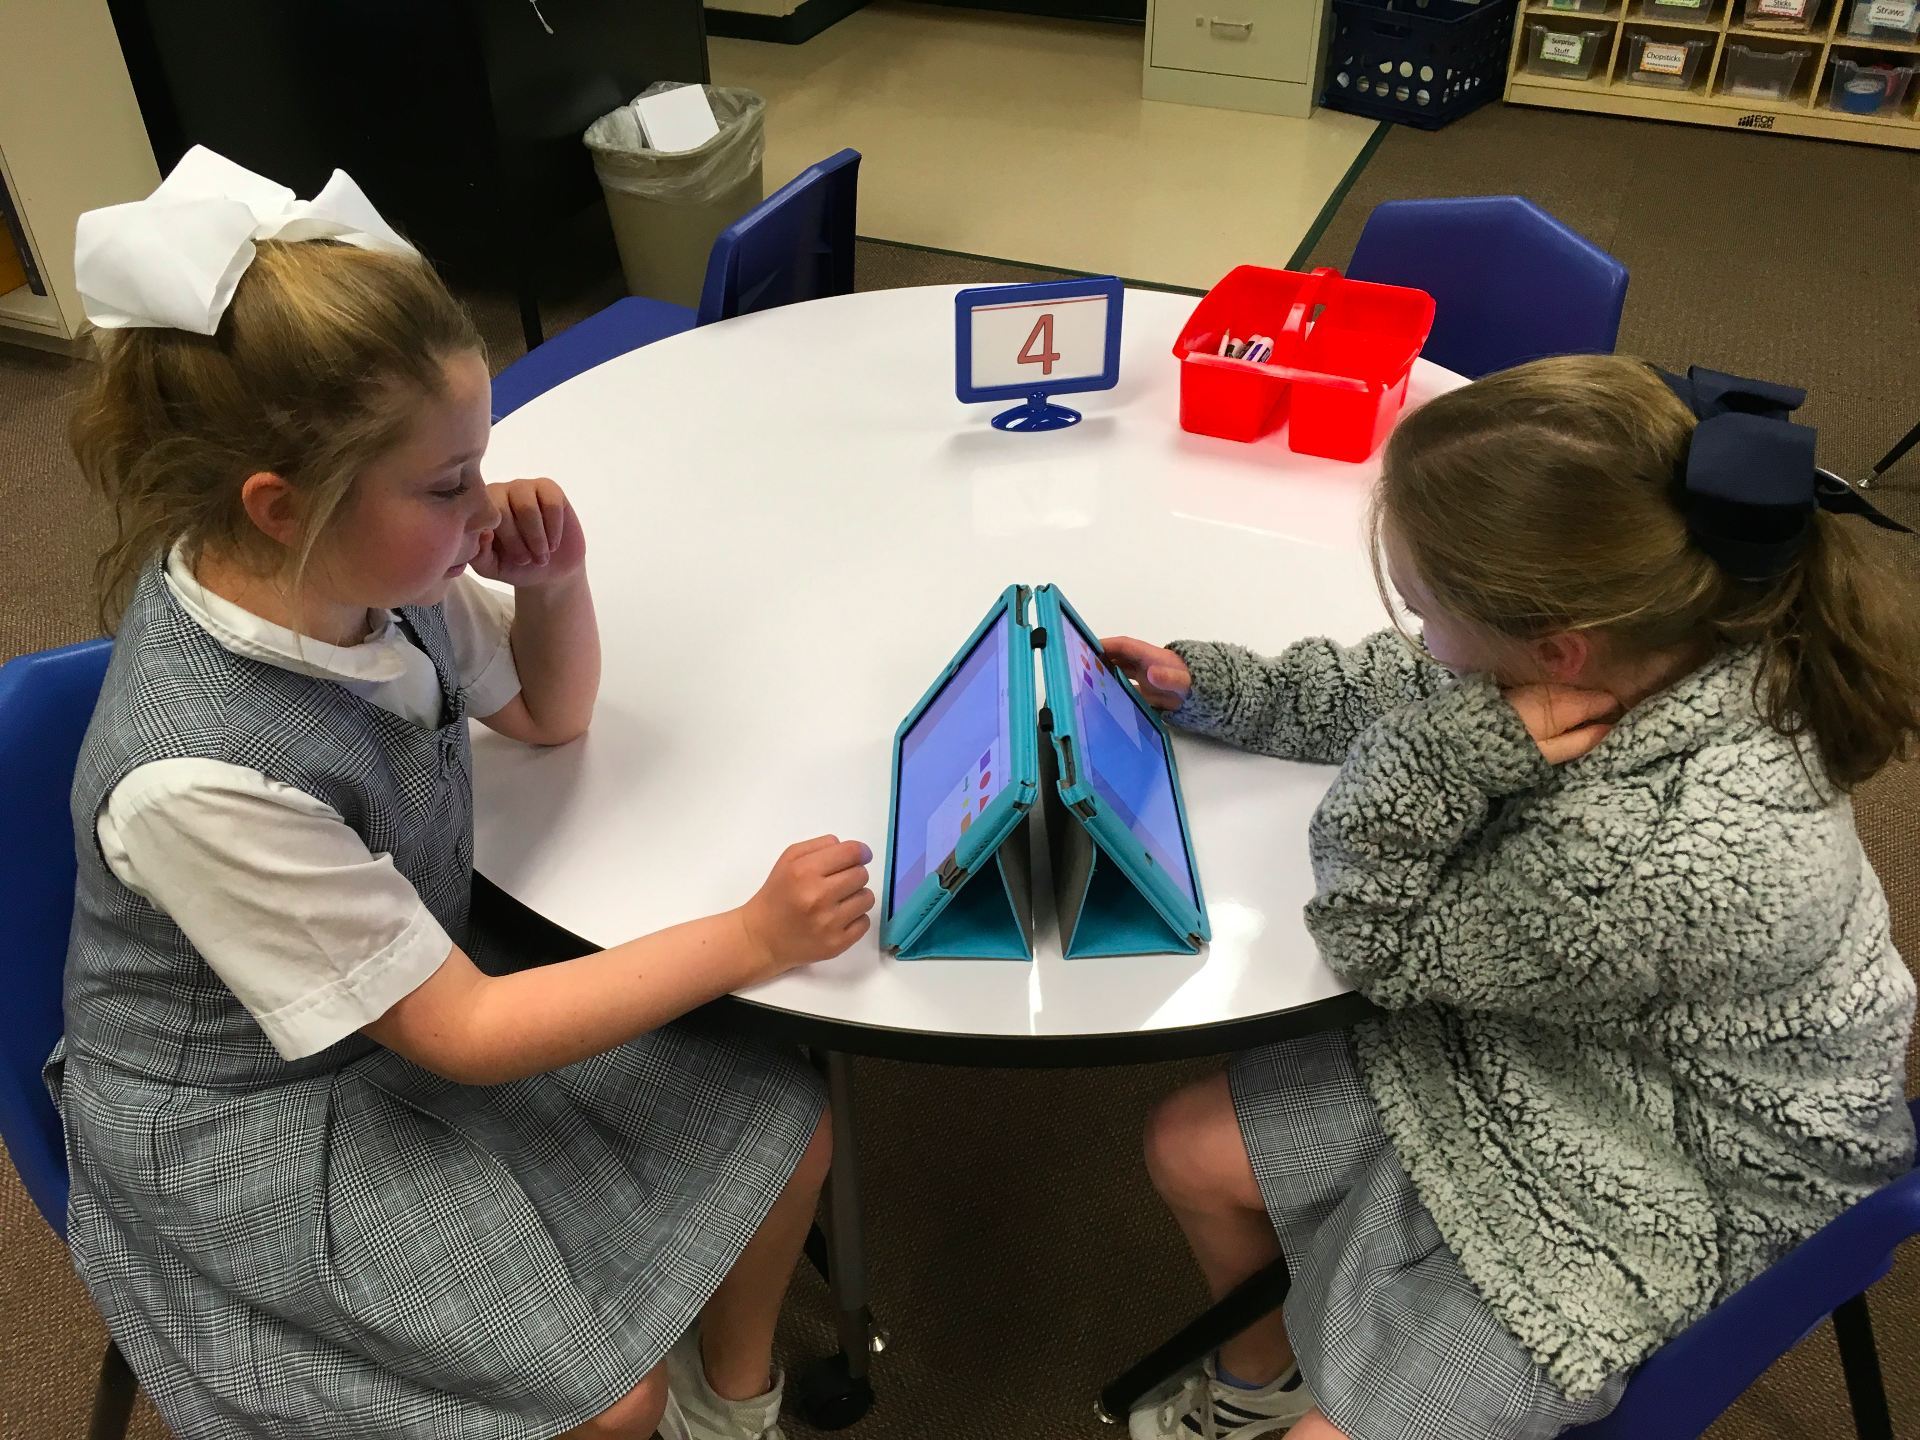
The next step was to ask the students to pair up and set up their iPads so that they couldn’t see the partner’s drawings. They were to alternate directions, giving one line only for each turn. They could create whatever they wanted.
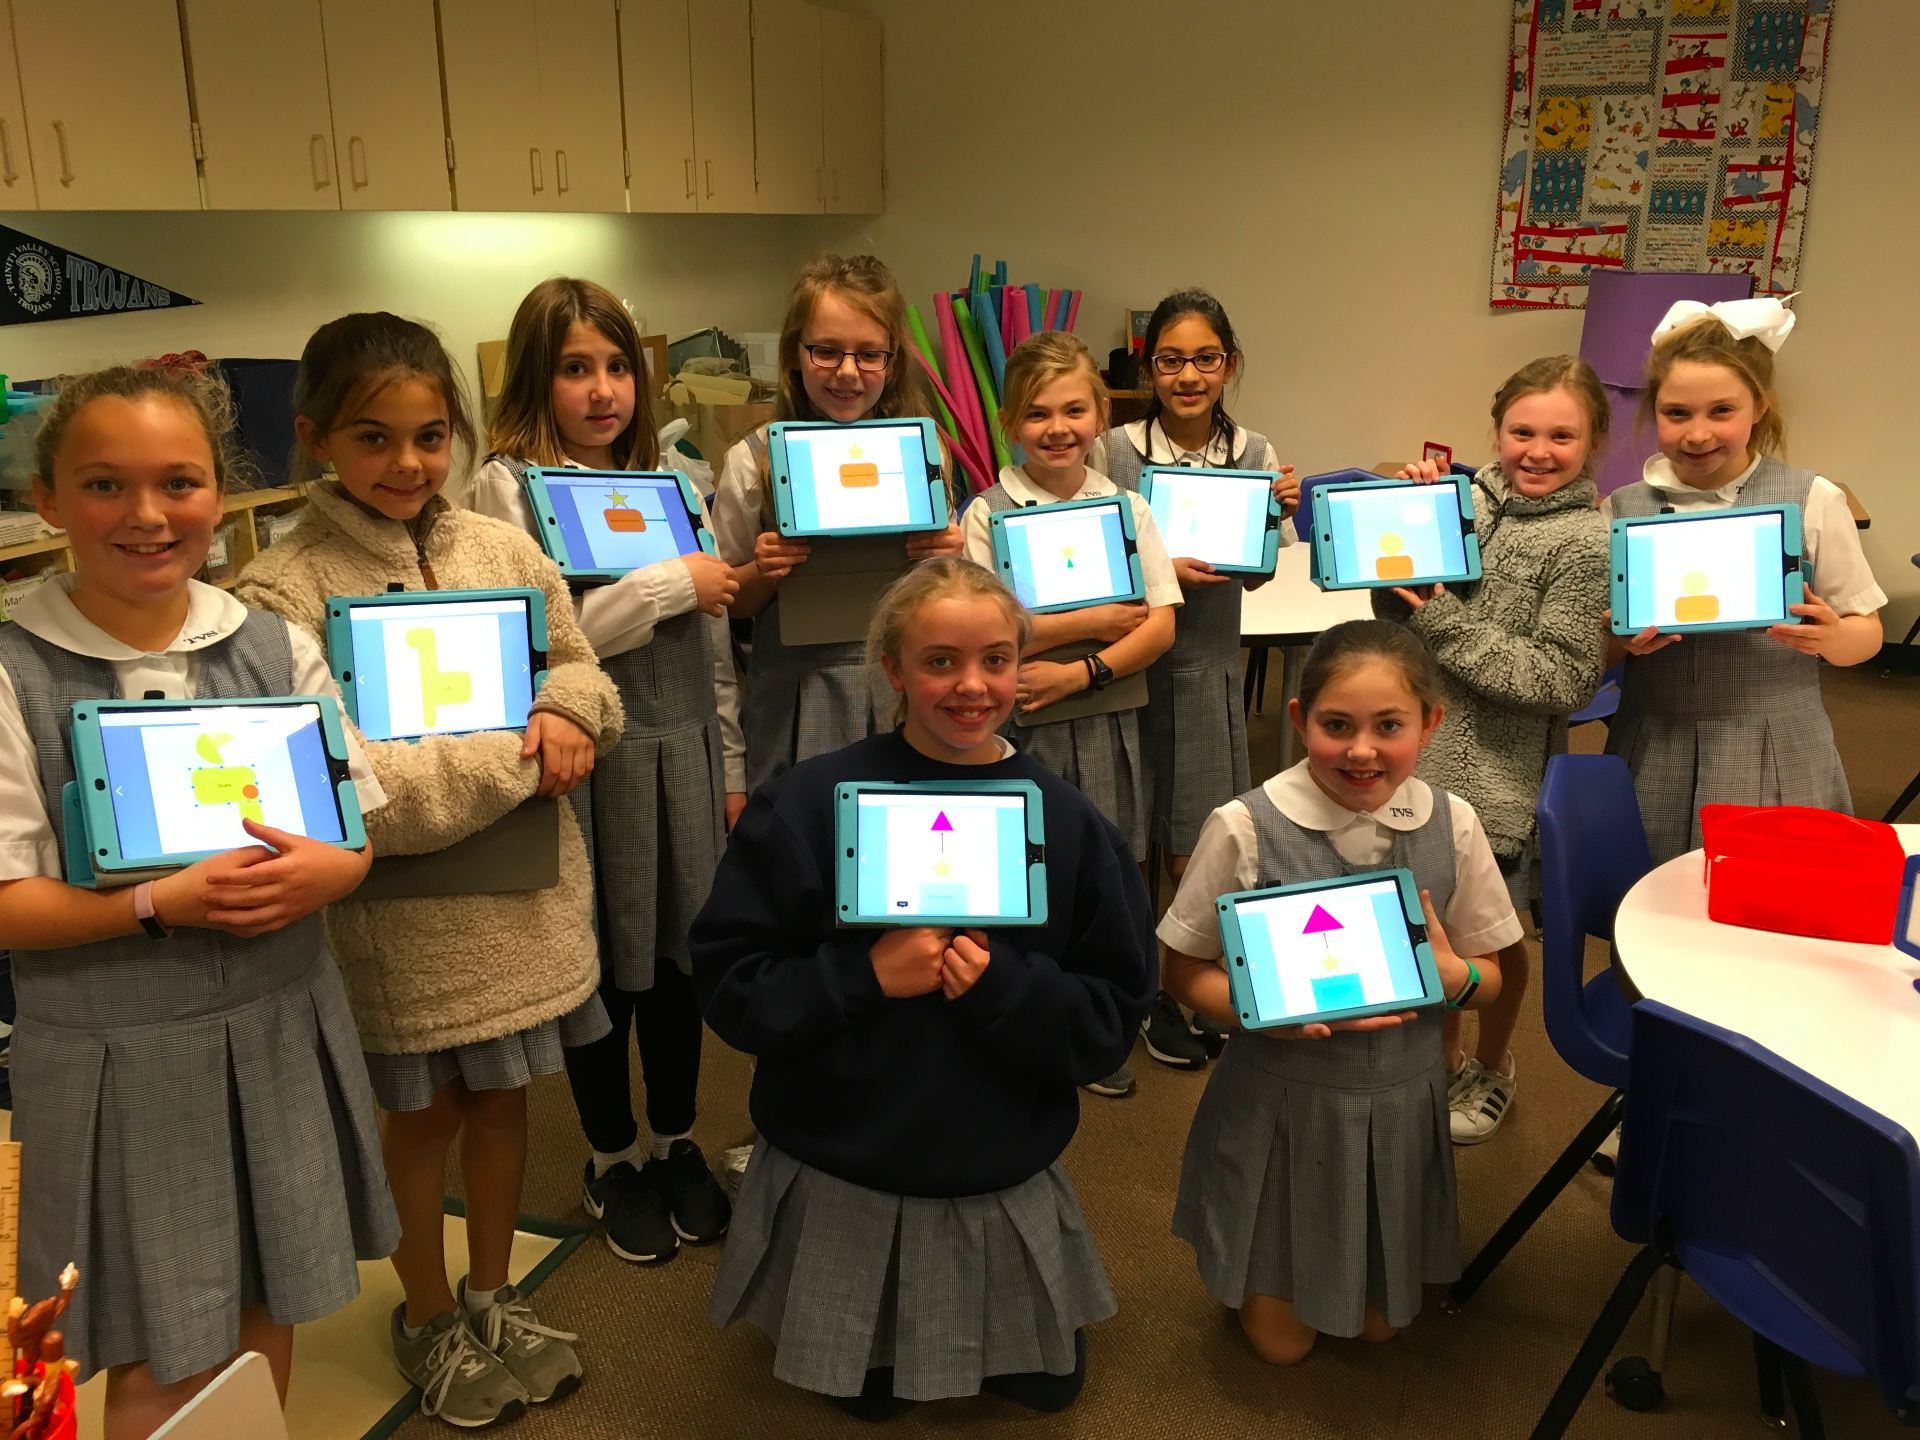
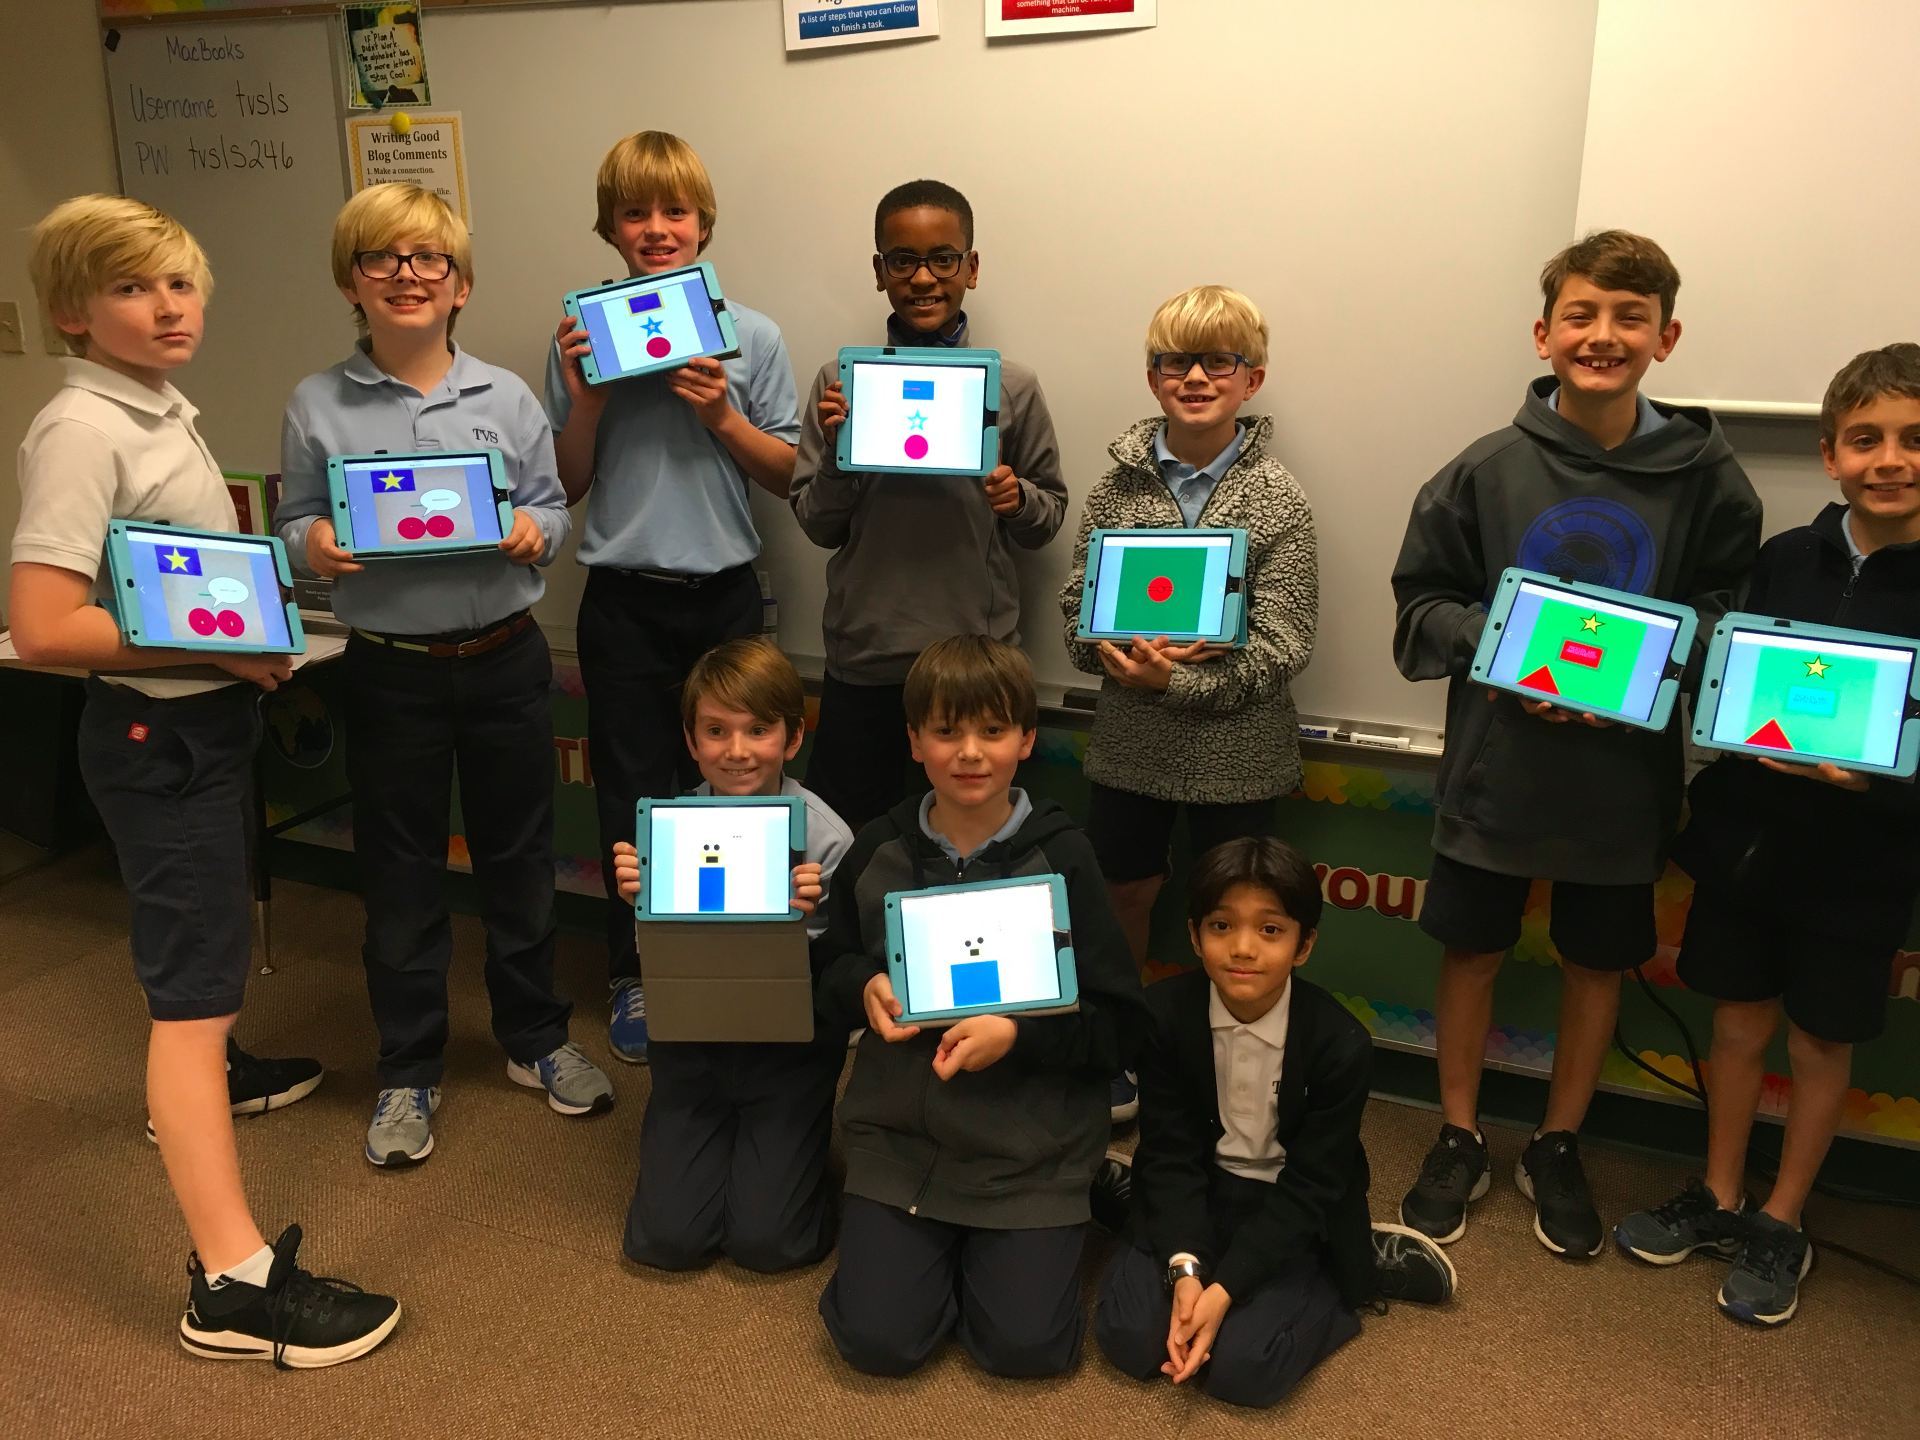
Oh, my goodness! I honestly don’t think I’ve ever had EVERY SINGLE student on task for the entire class period! Talk about fully engaged!! The only complaining heard was when the bell went off for the end of class – no one wanted to stop!
Here are photos of the partners with their drawings. They did a pretty good job giving and following instructions!
Of course, the “coding” we do in the lower grades is not the same as what programmers do for a living. However, it is an excellent way to teach problem solving, perseverance, computational thinking, communication skills, and so much more.
Beth Holland says this quite well in the second paragraph of her post, “However, after speaking with computer science educator, Douglas Kiang, I learned that the real power lies in teaching computational thinking and creative problem solving – not any specific type of code.”
I was amazed at how well this activity went and how quickly the students picked up the concise “coding” language as they directed their partner what to draw.
I love incorporating literacy skills into lab activities and bringing in technology is a fun and effective way to make predictions.
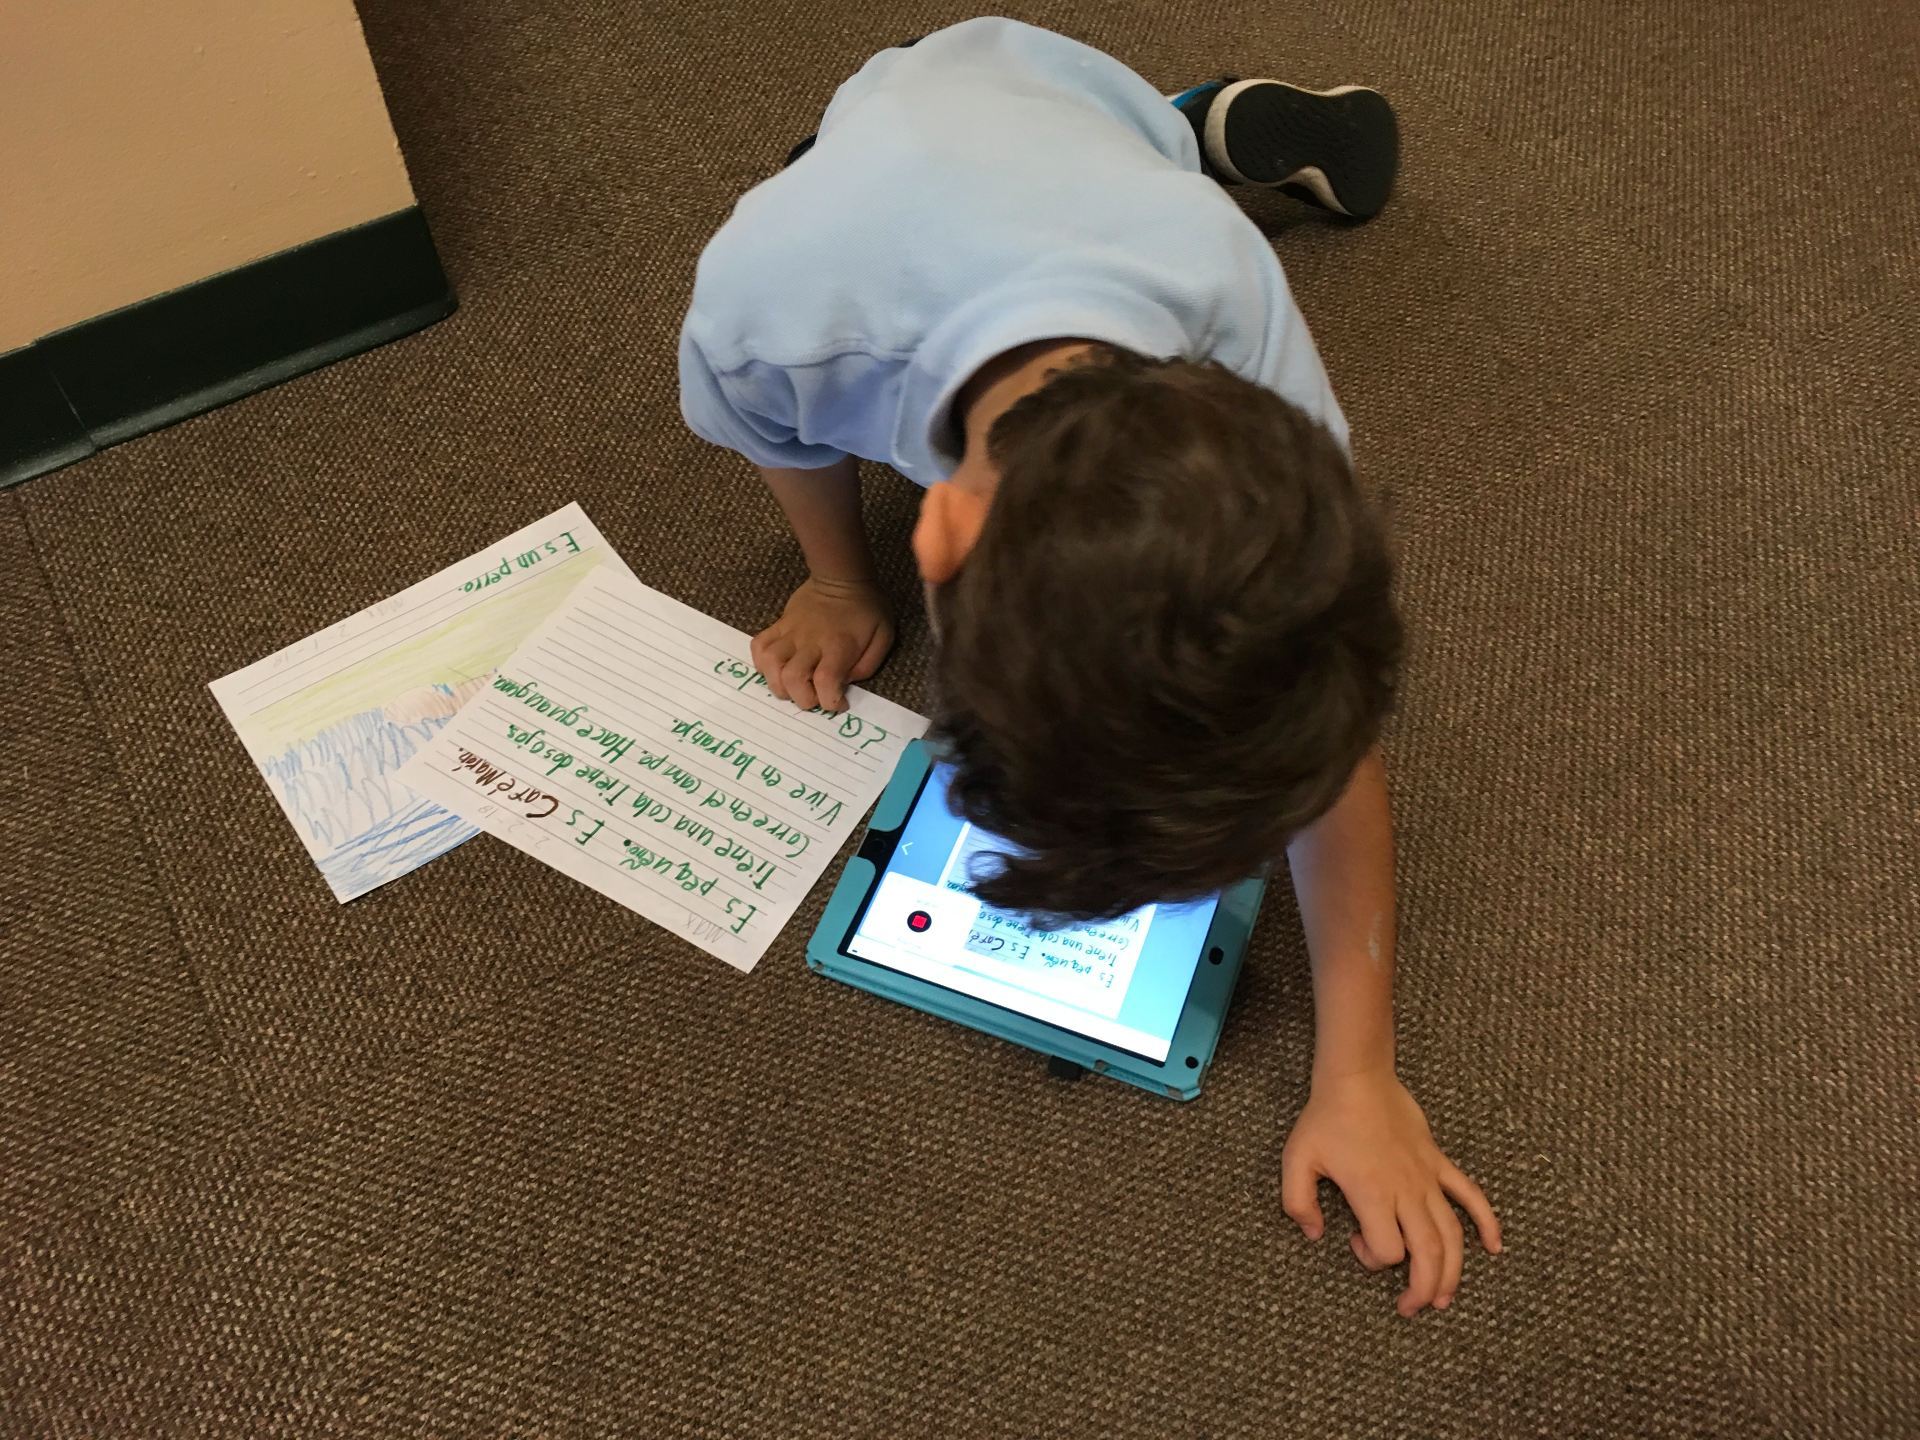
This year, I discovered the book, What’s Under the Bed, by Joe Fenton. It’s a quick, rhyming book about a boy named Fred who is trying to go to sleep but hears noises under his bed. He finally decides to check it out: “One, Two, Three, Four . . . It’s time to look on the floor!” And, that’s where I stopped!
Before class, I created a template and air dropped it to our shared iPads. When the students arrived, we worked together to add a name to their page and set up the drawing feature. After doing some predicting by discussing the title, I told the children they could illustrate as I read. We read till we reached the page where Fred was about to look under his bed. At that point, the directions were to:
finish illustrating your prediction,
write your prediction, and
record your prediction.
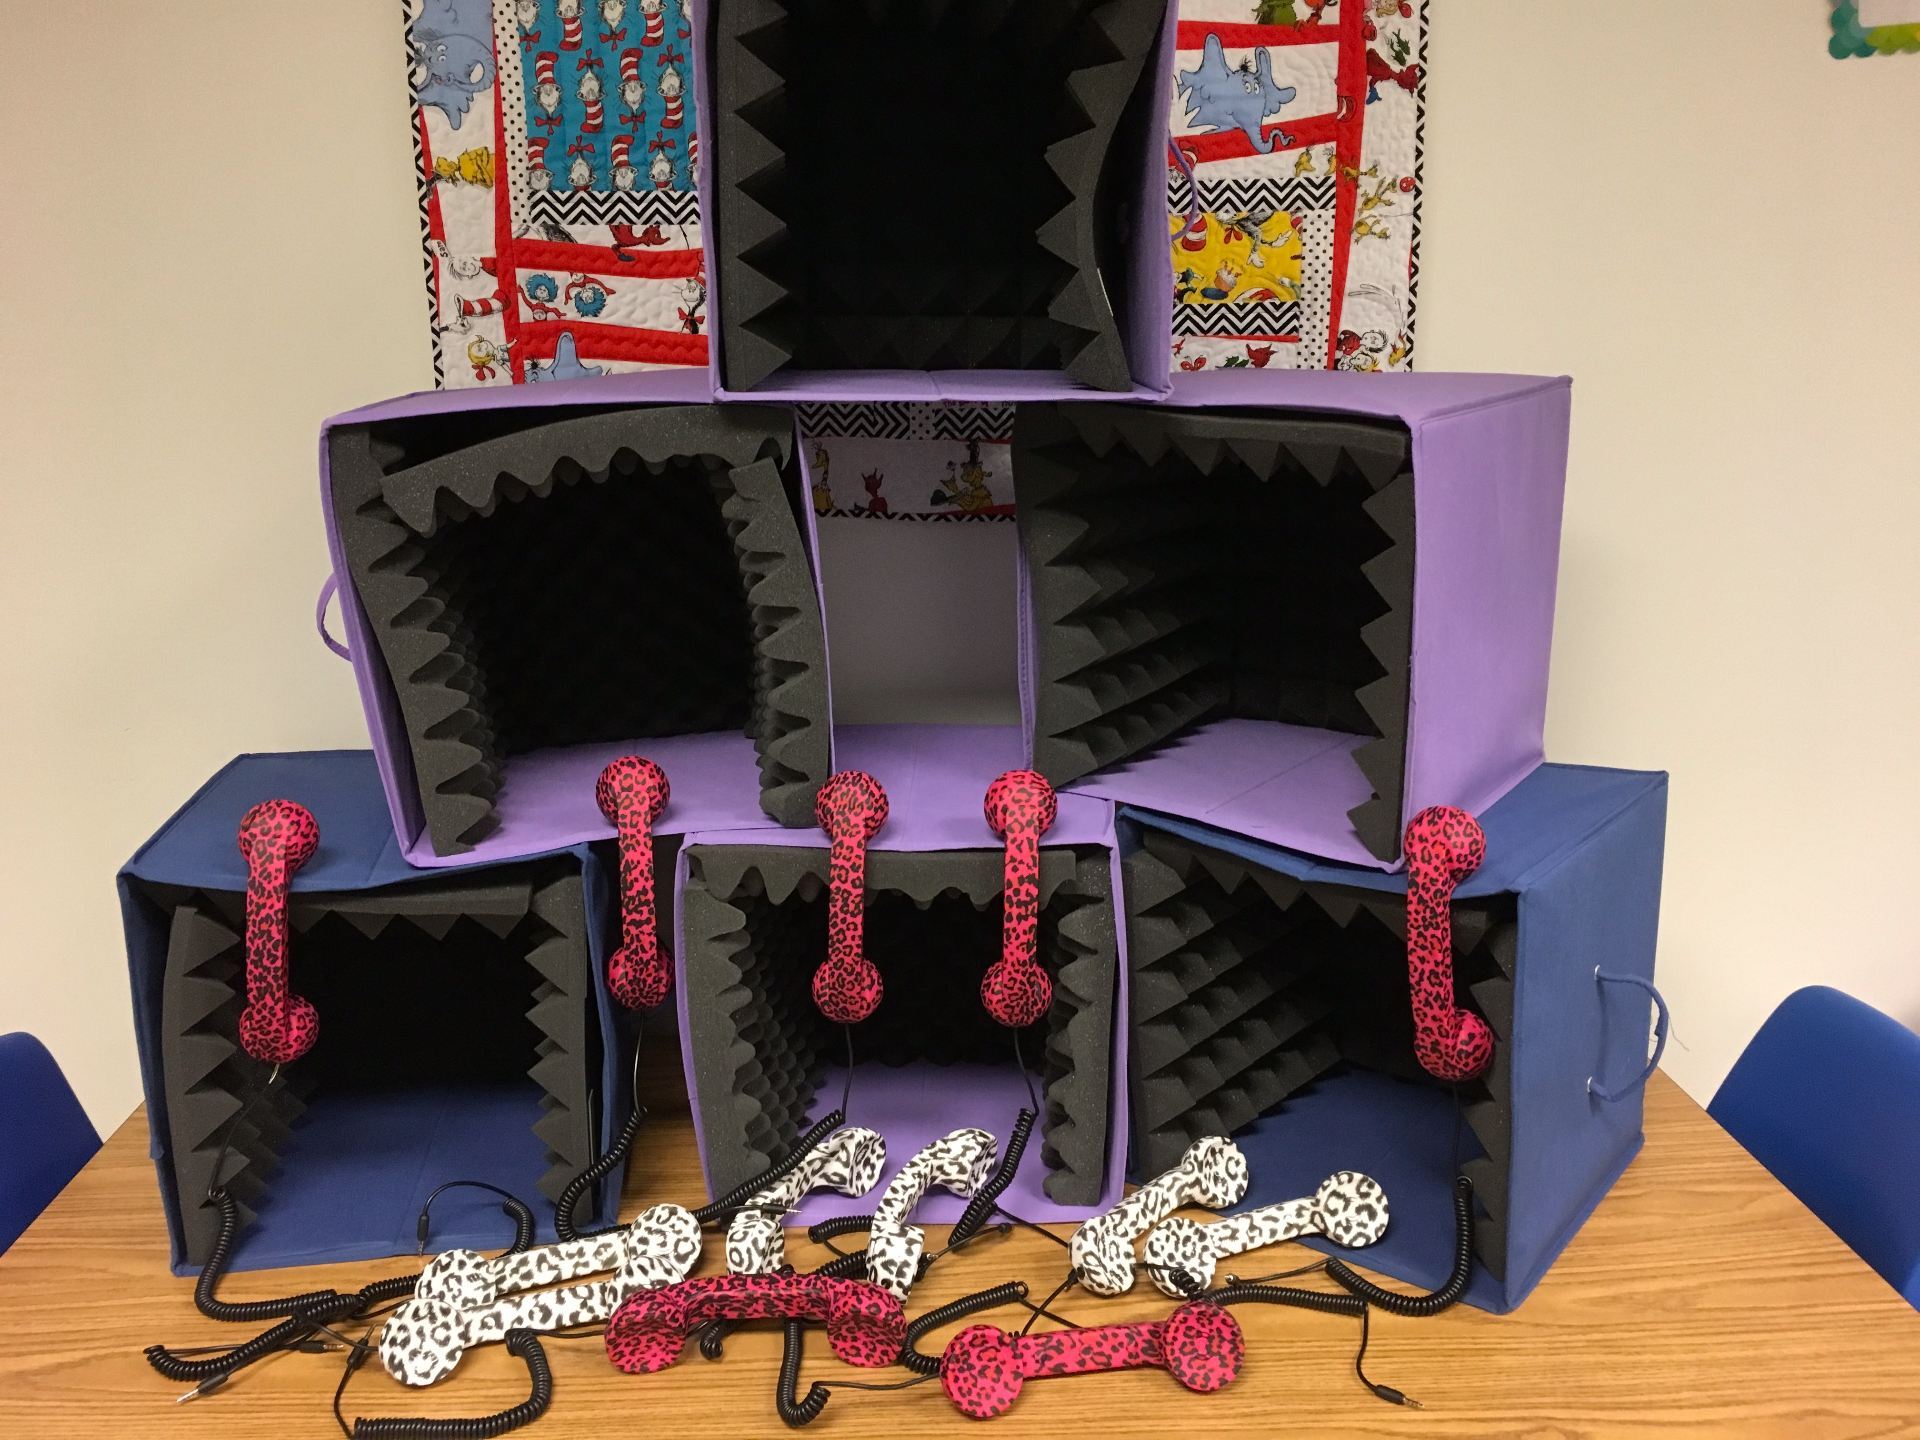
Instead of giving all the instructions at once, the students drew for about ten minutes. As they began to wrap up the drawings, I showed how to record. Soon all were off to various corners of the room, using our “telephone’ mics or the recording cubes.
When everyone had completed their one-page book and air-dropped it to me, we finished reading. What is great about this book is that there are visual clues to what is under the bed. It’s several pages back and you have to watch to catch it. This was a great way to discuss how important it is to look at ALL clues – in the text as well as in the illustrations!
The class ebooks can be read on an iOS device (iPad or iPhone) by following the directions below. This eBook will NOT work properly on any other device (i.e. Kindle, Android tablet or phone). However, the books have also been saved as a video that can be seen on any computer or mobile device.
Instructions for Viewing Books and Videos:
If you are downloading the ePub books, remember that you need to click on the book link while on an iPad or iPhone that has the iBooks app. Choose download and open in iBooks.
Click on the word “book” or “video” to view the projects.

 I’ve never started making books so early in the year with our kindergarteners but, as Book Creator was perfect for what I wanted to do with them, I was eager to give it a try. My challenge was: Have our littlest ones illustrate AND record using an app they had never seen before, all in a 30 minute session! Challenges don’t scare me! Although, I have to admit, I did warn the teachers that I had no idea how this would turn out!
 I came across the book, I Need My Monster, by Amanda Noll. It’s about a child who creates a “comfortable” monster that lived under his bed; one that helps him overcome his fears. One day, the boy discovers a note from his monster saying that he’d gone fishing and would be back in a week. The little boy goes through a series of “substitute” monsters before his returns.