Archive of ‘Professional Development’ category
TVS teachers – this is just for you!
This is a summer where you can’t go up to school so, here is a challenge for you should you decide to work from home. Have some fun exploring new technologies or spend time learning even more about ones you already know. Below are ideas to help you get started.
 Kidblog (free app although we have the upgraded subscription) – Use our TVS Lower School blog to start posting and/or commenting on others’ posts. You are able to use Kidblog from a computer as well as an iPad. On an iPad, you’ll need to set up the class. Open the app and tap on settings. Choose Add a Class then Login to Kidblog. The Class URL is TVSLowerSchool. Once you’ve typed that, your username will show up at the bottom of the screen. Click Kidblog setup on app for directions.
This would be a great place to post what you are learning about this summer, vacations, favorite books, or anything else you would like to share! If you create anything with apps, post that to your blog! Remember, if you can save to photos, you can post it on a blog! Click What can be posted? for samples.
 Book Creator ($4.99) – In addition to saving as ePub books (to read in iBooks), did you know that Book Creator now allows exporting content as videos? This is great for sharing with families who don’t have iOS devices.
Create a book about you to share with your new students. Export as a video and upload to Vimeo. (Email me if you need the log in information.) Or, create an ePub book about a topic you want your students to learn. Make the book interactive by adding hyperlinks (Hint: This is accomplished in the Add Text section. Tap and select word then choose link.)
To learn more about Book Creator’s features, click here. Follow Book Creator on Pinterest for lots of ideas!
 Coding Apps – I grouped these together because they are all excellent for computational thinking. Programming teaches children to problem-solve and think creatively. For more background on the reasons to learn to program, read this article, It’s Time for Every Students to Learn to code.
- Kodable (app and web-based; free; paid school version allows deeper exploration) – coding curriculum for elementary ages
- Lightbot and Lightbot Jr (average cost per app $2.99; Jr for ages 4-8; Lightbot for ages 9+) Teaches programming logic through puzzles.
- Scratch Jr (free) ages 5-7 – drag and drop coding blocks where students can program interactive stories and games
 Draw and Tell HD ($1.99) – So much more than a drawing app, Draw & Tell allows children to illustrate something, record their voice telling about it (orally share their thinking), and then share with others. Our students typically share to their blog. The app was created for ages 5 and younger but first and second graders would enjoy the app and find it very easy to use.
How would you incorporate the Draw & Tell app? What topics could students share? Would this be something you could use for students to show their understanding of a concept?
 Explain Everything ($2.99) – This my favorite screen casting app for ages 8+! Yes, it has a learning curve but it is extremely powerful and there is SO much you can do with it. The app developer’s web site has excellent video tutorials for you to view.
Play around with the various tools in the app. Practice recording and drawing at the same time. Since Explain Everything isn’t as intuitive as other screen casting apps, students will need some practice but I’ll be glad to help with that.
Click here to see how Mrs. Wideen uses EE in her class. How could you use this with your children?
 Adobe Voice (free) – “Show Your Story” is how this app is described. The user adds photos and narration and produces a short video that can be shared. To use with children under age 13, the teacher must create either a class account or individual accounts (By law, students under age 13 can not create their own account).
This is a quick and easy way for students to “tell” their story, save to photos, and share to their blog. Create your own story and post it this summer!
 Adobe Slate (free) – Create a story with a magazine-type layout. Add images and text. You’ll need a class account (see Adobe Voice). This app doesn’t have recording but it can be a great writing activity.
 My Create ($4.99) – Students capture a series of photos then create a stop-motion video. Audio can also be recorded.
Think about all that you can do with this! I’ve used it for Lego building but what about keeping track of a plant’s growth? Or, chick eggs waiting to hatch? Or, take photos of trees as they go from bare to covered with full-sized leaves. Popplet (lite is free; full version $4.99) – A visual mindmap for students, Popplet is easy to use. Students can add images and facts to help organize information. Work in groups and have each member add their own facts. Export as JPEG and upload to the blog. Try the free version and let me know if you would use this in your classroom.
App Smashing – combining two or more apps to create a product. Read Unleashing Creativity: Greg Kulowiec App Smashing for a wealth of information. Since he coined the phrase, he truly is the guru of this!
Try your hand at app smashing.
- Make videos using Adobe Voice and My Create. Save to photos. Join these together in iMovie and upload to the blog. If it’s too large, upload to Vimeo (refer to my email for log in info) and either provide the link on your blog or embed the video. (Note: When embedding a video on the blog, I always find it easier to work on a desktop to that I can choose the HTML option from the New Post window. Then I just paste the embed code.)
- Make a book in Book Creator. Export as a video. Create a screen cast using either Draw & Tell or Explain Everything related to the book. Pull all together in iMovie. You can even make an introduction in one of the screen casting apps. In iMovie, just split the Book Creator clip, delete the cover that you had previously made in that app, and insert the new introduction.
- Create a written story in Adobe Slate. Bring that into Adobe Voice to provide narration.
- Make a collage with the Pic Collage app (Did you know that there is a new Pic Collage Kids?) and import that into Adobe Voice for adding narration.
More Resources:
Something to Think About:
At some point you’ll need to upload student work to a cloud storage space. Check out Google Drive – 15 GB free storage. Create folders for work that is uploaded. Make the file free, get a link, share with parents.
Web-Based Programs to Explore:
I gave you lots of information with enough details to make your head spin! The best way to learn is just jump in and explore. Use your experiences over the summer to create anything you want. It doesn’t have to relate to school! I’m eager to see your creations!
Enjoy!
Have fun!!
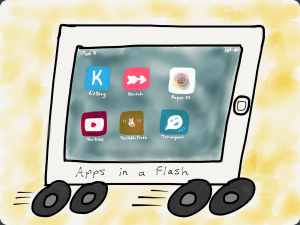
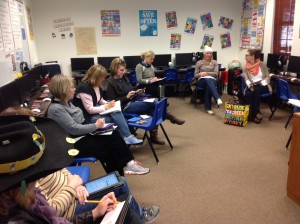
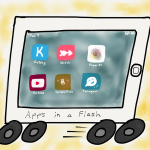 Today’s Apps in a Flash workshop focused on the Book Creator app. Book Creator is available for iOS (free and paid versions) and, as of a few days ago, for Android ($2.00 at the moment)!
Because our Apps in a Flash workshops are only 15 to 20 minutes long, I created a “Book Creator: Tips and Examples” book for our teachers. Just click on the above link, download, and open in iBooks.
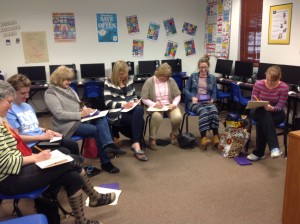
We had a small group for our workshop but still brainstormed several ideas for using the app. Instead of using an index card for the exit ticket, we worked on a Padlet wall. Feel free to add your ideas to the list!
Another “Apps in a Flash” workshop took place yesterday afternoon.
We didn’t have as many participants but that’s okay. It’s a hectic time of year!
Our topic this week was the Tellagami app (free from the App Store and Google Play). Tellagami lets the user create a short (30 second) animated video called a “Gami.” An avatar is created that “moves” with the narration. There are some free backgrounds plus the option to buy others. What I prefer doing is to upload images from the camera roll.
You are able to save the finished “Gami” to the camera roll where you can use it in other apps (such as iMovie). Or the “Gami” can be emailed – that gives a link to where it is stored on the Tellagami site. From there, you are able to get an embed code for blogs.
Here is a PDF tip sheet for the app: Tellagami
There are all kinds of educational activities that can be done with Tellagami.
- Draw a self-portrait and record a bio-poem. Embed in a blog or combine all to form a class video.
- Add your own Tellagami to your blog as an introduction to your class.
- Students can use it to introduce themselves at the beginning of the year.
- Add images of landforms and describe.
- Our kindergarteners make a display of a planet during their solar system unit. They could take a photo of their project then tell what they have learned. Combine into a class video.
- Use for foreign language practice – take picture of vocabulary learned and tell about it in another language.
These are just a few ideas. What have you done with Tellagami? We would LOVE additional thoughts!
Our second “Apps in a Flash” 15 minute session featured the Draw & Tell app. I had used this about a month ago with first graders explaining fact families so a few of the teachers were familiar with it.
This is a simplified screen casting app for younger children. The user is able to draw a picture or upload from the photo roll. What I like is the easy recording aspect and the fact that students can manipulate stickers and “highlight” parts of the image with a laser-like pointer. The recording can be saved to the photo roll and from their emailed to parents, uploaded to the student blog, etc.
 After a quick overview of the app, I used one of Kristen Wideen‘s Ready to Go iPad Centers – “Making One Dollar 4 Different Ways.” Each teacher received a copy of Mrs. Wideen’s dollar organizer and a bag of play money. By going through the process, the teachers were able to experiment with the app while doing an activity that their students could do.
As we wrapped up, I again asked for an “exit” ticket listing ideas on how to use the app with their students.
Brainstorming!
Ideas from Our Teachers:
- Use for making arrays.
- Use for fractions when explaining a fraction of a group.
- Fact families
- Money
- Give kids a paper with sentences (no punctuation) and ask them to punctuate. Take a picture and explain the punctuation that was added. Or use for capitalization.
- Pretend you are a teacher and teach someone else how to add, subtract, show place value.
- For art: Draw the elements of design and describe (i.e. Create repetition with stamps or variety with stamps.); Create variety of lines.
- While studying addition and subtraction, the kids could create an addition/subtraction story using stamps and the pencil tool. Then they can tell us about the story they have written.
- In math, take pictures of a concept learned and explain.
- Stamps would be good for showing multiplication and division.
- In Language Arts, design then explain a story.
- In Kindergarten – Make addition/subtraction sentences using the stamps. Use with our money unit. For penmanship, trace letters (take a picture of a worksheet).
- Spanish: Illustrate spoken sentences. Have kids draw picture then explain what is happening while touching corresponding sections of picture.
- Spanish: Identifying Vocabulary – make vocab sheet, take picture then have child record and highlight words.
Thanks to Amy, Melissa, Kay, Kate, Harriett, Leslie, Gail, and Jane for sharing their thoughts!
Draw & Tell Handout
Knowing how busy our teachers are but wanting to provide professional development, I started “Apps in a Flash” as a quick way to introduce an app to the Lower School faculty. The promise was a 15 to 20 minute look at an app and how it could enhance learning.
 I tried my artistic (or rather inartistic) ability using the Paper app to create a logo to hopefully generate interest.
Our first session featured Tell About This and Write About This. I had no idea how many teachers would come to the workshop so I was thrilled when 9 showed up! It was fast talking to fit everything into 15 minutes as promised! Before leaving, the teachers were asked to fill out an “exit ticket” to provide ideas on how they might use the apps with their students.
Here are their fantastic thoughts!
Tell About This:
- You could load a picture of money and ask the kids to tell you how much is there and how they counted it.
- With our Lucy Calkins program – Brainstorm for writing assignments such as beginning, middle, end; “small moments”
- Have pictures of objects and list adjectives.
- Seasons (pics of trees) – explain weather in picture
- Use to explain science, math, social studies concepts, etc
- Create an illustration based on a story you just heard – take a picture and tell about it.
- Children build something with geometric figures and describe shapes used.
- Positive Actions – Pictures of Pix It & Nix It and explain a specific scenario.
Write About This:
- Use this as a journal. After teaching a certain convention (i.e. commas) tell the children you will be checking their writing for correct usage of commas.
- A child could first record their idea. Then, have the child transcribe their story.
- Use vocabulary to have students create a sentence and then discuss the meaning.
- Use this app to demonstrate ability to write and use it along with other things for use in student portfolios and student-led conferences.
- Take a photo of favorite artwork done so far and write about it.
- Take a picture of an element of design (example: value) and discuss it.
- Science: Science research/drawings; lab reports; scientist of the week
- Social Studies: Take photos of campus and write about locations.
- Record special events (such as Seuss week) and write a “news” story each day.
- Write and explain regrouping (i.e. 32-17)
- Flat Stanley – Write and share pictures of where he’s been and what he did.
- Literature: Upcoming unit on Boxcar Children, retell the story using the map.
A huge thanks to Allison, Jane, Leslie, Carol, Amy, Diane K, Gail, Kim, and Diane M for sharing their thoughts about the apps!
Handouts:
Tell About This
Write About This
In May I discovered an online course – Creative Computing Online Workshop, (CCOW), designed and facilitated by members of the ScratchEd Team at Harvard University. Over the past couple of years, I’ve been working with 4th graders on the very basics of Scratch, a programming language designed for ages 8 and up. However, the basics were about all I could do! One of my goals this summer had been to practice Scratch so when I learned about the course, I immediately signed up.

The About Scratch page describes Scratch:
With Scratch, you can program your own interactive stories, games, and animations — and share your creations with others in the online community.
Scratch helps young people learn to think creatively, reason systematically, and work collaboratively — essential skills for life in the 21st century.
Scratch is a project of the Lifelong Kindergarten Group at the MIT Media Lab. It is provided free of charge.
Back to the course – the workshop was 6 weeks long and well-worth the time spent! The first three weeks were fast and furious; learning more and more about the power of Scratch. I quickly realized that, although this was a program designed for children, my non-analytical mind just couldn’t grasp everything as quickly as I’d hoped. At one point I became so frustrated that I was ready to quit! I’m glad I stuck with it! We were supposed to be looking at other design notebooks and leaving feedback and it was all I could do just to keep up with each week’s assignments.
Fortunately, the ScratchEd team AND the CCOW community were absolutely fantastic! From the excellent how-to videos to the “office hours” to each week’s activities, the designers of this workshop guided us to the point where we were ready to create a final project to share with our fellow CCOWers. I can’t say enough about the community of learners! There were beginners all the way to expert programmers who easily created amazing Scratch projects! And, then there was me – plodding along, not able to figure out why something didn’t work . . . But my fellow workshop members were ALWAYS available to fix issues, answer my “why” questions, and offer guidance on how to feel more comfortable using Scratch.
Throughout the six weeks, we kept a design notebook describing our thoughts, practice projects, and finally, our final project.
My project was three-fold:
- Continue practicing Scratch projects. (I struggled with some projects that I just couldn’t get to work but I was particularly proud of a multiplication and addition game – thanks to lots of help from the CCOW community).
- Collect resources and create a Scratch Resources LiveBinder.
- Make some new Scratch cards to use with my students.
Although I didn’t progress as quickly as I’d hoped (As I mentioned before, programming baffles me!), I am definitely further along than before taking the course. This was challenging but one of the most rewarding experiences I’ve ever had! I am excited to use Scratch again with my students and now feel that I can do a much better job guiding them to ask questions and problem-solve with each other.
I did learn something important. Normally, learning comes easily for me but this time it didn’t. It’s important to share with children the struggles that occur in the learning process – how important it is to ask for help, to share ideas, to understand that sometimes you just have to step away for a bit, that learning is ongoing!
Now that the CCOW workshop is over, my learning won’t stop. I know it will takes LOTS of practice to feel confident with Scratch. I’m now enjoying having the time to examine the many projects created by my fellow CCOWers. What I’ve seen so far is superb! As I titled my final project –

Image from Haiku Deck
Last week our technology director discussed planning a workshop for our teachers to cover how to “keep the learning going” in the case of school closure due to winter weather or illnesses of students as well as teachers. There are several topics we’ll discuss – Skype, blogs, wikis, etc. My focus will be using screencasting apps to share lessons.
We are focusing on three apps: ScreenChomp, ShowMe, and Explain Everything (the first 2 are already on our iPads; EE will be added this week). All of the apps we’ll be discussing allow the user to:
- record audio and annotations
- change pen color
- erase parts of the screen or delete everything
- import a background image from camera roll or take a photo to use for background
- upload in some fashion for online viewing
 Let’s start with ScreenChomp, developed by TechSmith Labs. ScreenChomp is free and is extremely easy to learn. Background photos can be added from the camera roll or you can take a photo. There are 3 different pens, each with a choice of colors and pen size. The app allows the user to record, pause, and continue recording. The finished video can be shared by sharing the link with others.


 ShowMe, like ScreenChomp, is a free app and very easy to use with just a few basic tools available for creating a screencast. Again, the user is able to record, pause, and continue. There is only one pen size with 7 color choices. ShowMe requires the user to create an account (free). When the account is created, you are able to choose topics to follow. One of the best things about ShowMe is that the access to numerous educational screencasts shared by teachers. Search for a topic and you are likely to find that someone has already created a teaching video.


Among the free apps is another that is certainly worth consideration – EduCreations is very similar to the above-mentioned apps in that the interface is simple; not many pen color choices, one width for pens; text can be typed as well. However, besides being able to insert pictures from the camera roll (pictures can also be locked in place which is a nice feature), there are background choices for lined or graph paper and a coordinate grid – excellent for math! Like ShowMe, an account is needed to post and share lessons. Plus, you are able to search their collections of educational videos.
 Explain Everything is a $2.99 app with a slightly steeper learning curve than the previously mentioned free apps. However, I used this with 2 fourth graders and they picked it up in literally seconds! (see post)
There are several advantages to Explain Everything:
- ability to add slides and rearrange them in the slide sorter
- import a variety of file types
- many options for color and pen thickness
- ability to add shapes, text
- has a laser pointer
- record, pause, re-record without having to start over completely
- many export options – YouTube, DropBox, etc


Really, what you choose is personal preference! But don’t think that screencasting is just for you as the teacher. Yes, it’s an excellent method to use to create mini-lessons for your students. It’s also a way to assess student understanding and to peer teach. Let your students explain a topic to share with peers!
To learn more:
Last November, one of our second grade teachers and I were able to attend EdTechTeacher‘s excellent iPad Summit conference in Boston. All of the teachers at our school were given iPads at the beginning of the school year and we were eager to learn ways to use them that would move students from being a consumer to becoming a creator.
We were asked to facilitate a 2 1/2 hour workshop on the day we returned from the holidays. Having been a classroom teacher, I know the last place educators want to be the day before students return is listening to someone else talk! So, we had to do our best to make this an active workshop!
Jane, our 2nd grade teacher, had attended Beth Holland’s “iPads in the Elementary Classroom” pre-conference workshop and I chose Greg Kulowiec’s “Creating Digital and Multimedia Content” presentation (click here to see their resources). We learned SO much in these sessions and were excited to share what these two innovative instructors shared with us.
We decided to focus on the power of a few apps:
Knowing we wouldn’t be able to get to every app, we chose to have the teachers participate in a QR Code Scavenger Hunt. We had found examples of student-made projects using these apps so we linked to them using QR Codes. The codes were placed along the hall. The teachers were told to get into groups of no more than 4 and their job was to scan a code and match it to a description on their “hunt” sheet.
It is amazing how fast a group of teachers can move when there is the mention of a prize! We had one group back in less than 5 minutes! Of course, there was no way they could have listened to every link but they received the prize anyway. It was my fault! What I neglected to say before hand was that they should LISTEN at each station (my assumption was that they would do just that; should have known better – this is a very competitive group!!).


We were able to share pedagogy (objectives first then choose technology IF it’s appropriate) as well as explore some of the apps and brainstorm how they could be used in the classroom.
We have a phenomenal group of teachers and they were an awesome audience! As presenters, we had a fun morning. I’m looking forward to working with our educators as they implement iPad technology into their classrooms.
Our presentation:
Our tech committee tried something new this year and we were thrilled with the response! Before school began, all faculty received an iPad. Of course, everyone was at a different skill level. Some needed just a little help with the “how to” aspect of various apps that were installed on their iPad. Others weren’t sure where to begin; not even knowing which questions to ask!
One of the members of our committee, Melissa Burkhead, suggested that we offer a “Genius Bar” based on the services offered at Apple Stores. Melissa bought shirts for us and someone scrambled around, searching for those Apple stickers that come in the iPad box. On the day of the event, we arrived in our “uniform” (thoroughly confusing students – “You work at the Apple store?”).

It was decided that we would have several “stations” set up in our library so that faculty and staff could go where they felt would serve them best. The stations were:
- Apps
- Pictures
- Video/Facetime/Skype
- Music
- Basic
- Basic
- Basic
- Intermediate
- Intermediate
We deliberately had several basic stations so that we could offer more individualized help. Although we had specific assignments, anyone could go to any station to receive help in whatever area they needed. We all answered all types of questions! (more…)

 Kidblog (free app although we have the upgraded subscription) – Use our TVS Lower School blog to start posting and/or commenting on others’ posts. You are able to use Kidblog from a computer as well as an iPad. On an iPad, you’ll need to set up the class. Open the app and tap on settings. Choose Add a Class then Login to Kidblog. The Class URL is TVSLowerSchool. Once you’ve typed that, your username will show up at the bottom of the screen. Click Kidblog setup on app for directions.
 Book Creator ($4.99) – In addition to saving as ePub books (to read in iBooks), did you know that Book Creator now allows exporting content as videos? This is great for sharing with families who don’t have iOS devices.
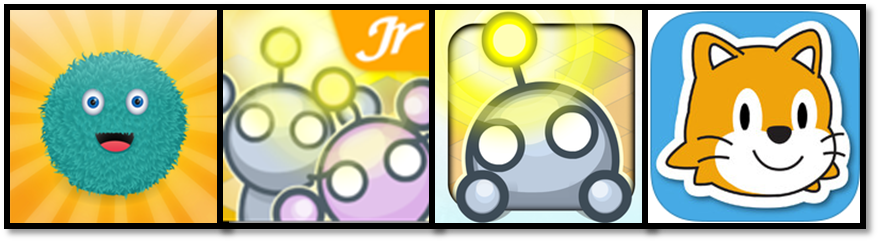 Coding Apps – I grouped these together because they are all excellent for computational thinking. Programming teaches children to problem-solve and think creatively. For more background on the reasons to learn to program, read this article, It’s Time for Every Students to Learn to code.
 Draw and Tell HD ($1.99) – So much more than a drawing app, Draw & Tell allows children to illustrate something, record their voice telling about it (orally share their thinking), and then share with others. Our students typically share to their blog. The app was created for ages 5 and younger but first and second graders would enjoy the app and find it very easy to use.
 Explain Everything ($2.99) – This my favorite screen casting app for ages 8+! Yes, it has a learning curve but it is extremely powerful and there is SO much you can do with it. The app developer’s web site has excellent video tutorials for you to view.
 Adobe Voice (free) – “Show Your Story” is how this app is described. The user adds photos and narration and produces a short video that can be shared. To use with children under age 13, the teacher must create either a class account or individual accounts (By law, students under age 13 can not create their own account).
 My Create ($4.99) – Students capture a series of photos then create a stop-motion video. Audio can also be recorded.
 Popplet (lite is free; full version $4.99) – A visual mindmap for students, Popplet is easy to use. Students can add images and facts to help organize information. Work in groups and have each member add their own facts. Export as JPEG and upload to the blog. Try the free version and let me know if you would use this in your classroom.


