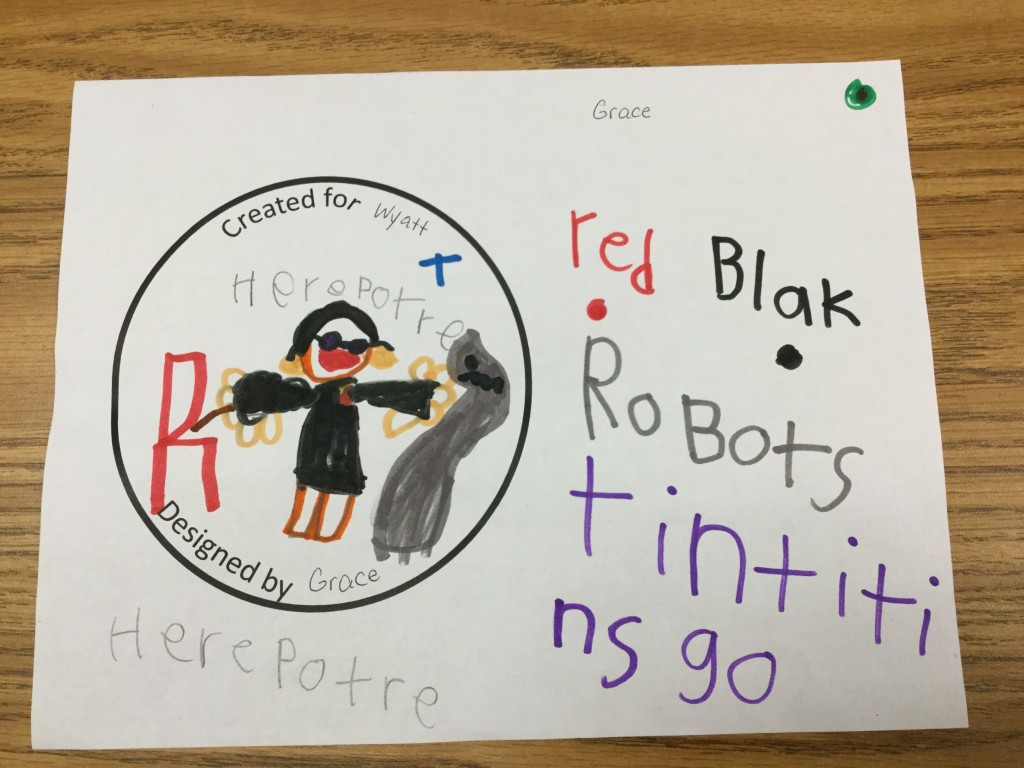
Drawing apps, literature, and predicting are a fantastic combination! The first graders were introduced to the Drawing Pad app ($1.99 but any drawing app would work) in an earlier meeting so that they had time to experiment with all the tools.
This week we added a new component: predicting what will happen in a story using the clues the author/illustrator provides. The book we read is an old one but the children really enjoy it – The Dark at the Top of the Stairsby Sam McBratney. The story is about three young mice, living in a cellar, who want to explore what is at the top of the stairs.
To begin the lesson, I reviewed the tools in the app; including how to save. Then I read the first couple of pages to grab their interest. As I continued to read, the children were asked to open their iPad and start drawing what they predicted the mice would find at the top of the stairs. Just as the we reached the point where the door to the cellar opened, revealing what was at the top, I closed the book and let the students complete their drawings. You could have heard a pin drop!
The children were asked to write their name along with their prediction (most remembered!) and then they saved their work to the camera roll. The first ones finished were shown how to air drop the images to my iPad and then they were to help others. We had quite a workflow going with lots of fabulous helpers!
Although our students have been blogging since first grade, I always like to have the fourth graders start off with a paper blogging activity. After working with this age over a number of years, I’ve discovered that many become lax in their posts and comments; submitting writing that isn’t their best!
The paper blogging idea is not my own but comes from a post entitled, Workshop Activity: Paper Blogs, by Leonard Low. He used it with teachers to show that blogging is a “powerful strategy for empowering and engaging learners.”
Usually, the paper blogging takes two 40-minute sessions but I only had the students for one 30 minute class so it was a challenge to fit everything in, but we did it! We began with a quick review of what is okay to share and what should be kept private.
From the time we began blogging in first grade, I’ve discussed penny vs dollar comments/posts so the children can quickly tell me that just as a penny is worth hardly anything, penny writing is just as worthless. A penny comment might be only one word. Or it could be something like “great” or “wow” – words that don’t really tell anything to the writer. Penny posts lack detail or don’t make sense. Dollar posts paint a picture for the reader; adding details that help the reader make connections. Dollar comments ask questions, make specific compliments, keep the conversation going.
Using the food idea from Mr. Low’s post, I asked the students to think about their favorite food. What was it? Where was the best place to get it (home, restaurant)? What made it so special? I gave them 10 minutes to write and most were able to finish.
We then discussed tags. Everyone could tag this as “food” and then they could add additional tags.
The next step was commenting. Each student had 3 sticky notes. They were to move around the room till I told them to stop. Once at that spot, they were to read the post then write a comment on the sticky note.
Normally, we’d have time for 4 or 5 comments but with our shortened class period, two was the limit. The third sticky note was for each student to return to their post to respond to one of their comments.
An important part of the lesson is to discuss the quality of comments. I asked for volunteers to share what they considered to be “dollar” comments. And, there were many! We then moved on to “penny” comments with the rule that no names should be shared. As this was discussed, we also brainstormed how to transform a penny comment to a dollar one.
I’m eager to see if the quality seen in the paper blogging transfers to our online blogs next week!
The Common Sense Media Education website has a wealth of information for teachers (and parents) from digital citizenship to app evaluation and much more.
Our first graders recently discussed Going Places Safely on the Internet. The lesson includes a short video designed for grades K-2 along with a detailed lesson plan.
When the students arrived, I asked what they would do if they wanted to go some place. “We would ask our parents or our teacher!” I next asked what they would do if they wanted to go on the internet. Most said they would need to ask permission to do that.
We watched the video then I told the students we would be taking some “field trips” to visit online places far away from our school.
I chose to make some changes from the suggested sites in the lesson plan. Here are the ones used for this year.
The children were asked to explore the sites for a few minutes. Then they would need to decide what their favorite “field trip” was so that they could illustrate it. The students enjoyed visiting the faraway places but the takeaway was the importance of always being safe online. This lesson is an excellent way to make connections in that, just as we practice safety in the real world, we also need to do so when we are online.
Safety Rules to Follow When Going Online:
Always ask your parent or teacher first.
Only talk to people you know.
Stick to places that are just right for you!
Here’s a quick look at the students exploring the sites and choosing their favorite place to visit.
After attending a Design Thinking workshop this summer (see previous post), I thought a perfect way to weave this into the curriculum would be an International Dot Day activity.
Based on the book, The Dot, by Peter H. Reynolds, the story tells about a young girl (Vashti) who thinks she can’t draw. Her art teacher tells her to “Just make a mark and see where it takes you.” Vashti jabs the paper with a dot and then signs her name as requested by her teacher. As the story moves on, Vashti discovered that she really can be creative. And, as a little boy looks at all her paintings, she encourages him just as her teacher encouraged her. International Dot Day, celebrated September 15th-ish, is a day to help children (and adults) focus on how to “make their mark.”
Enter Design Thinking! The empathy part of the process is what grabbed me so here is what we did.
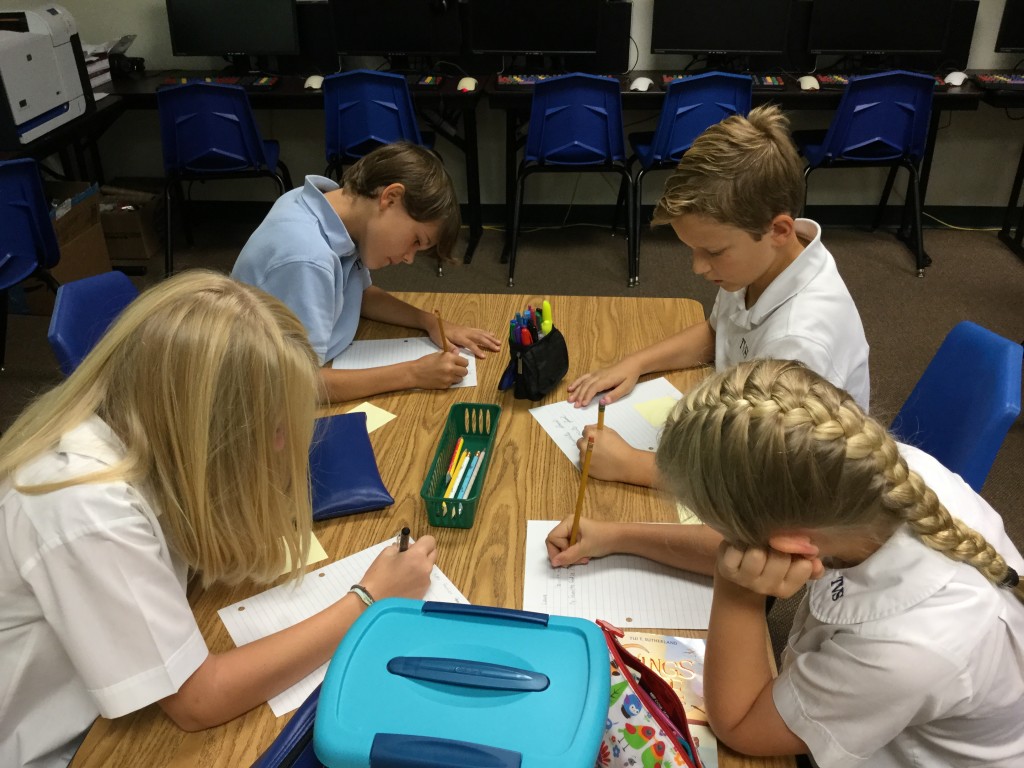
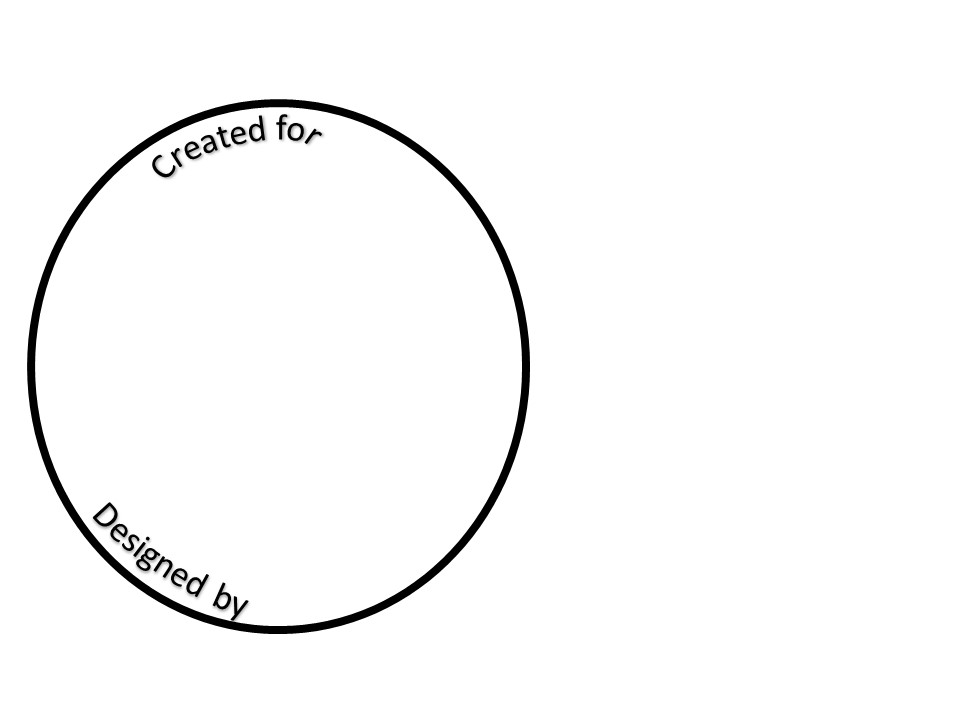
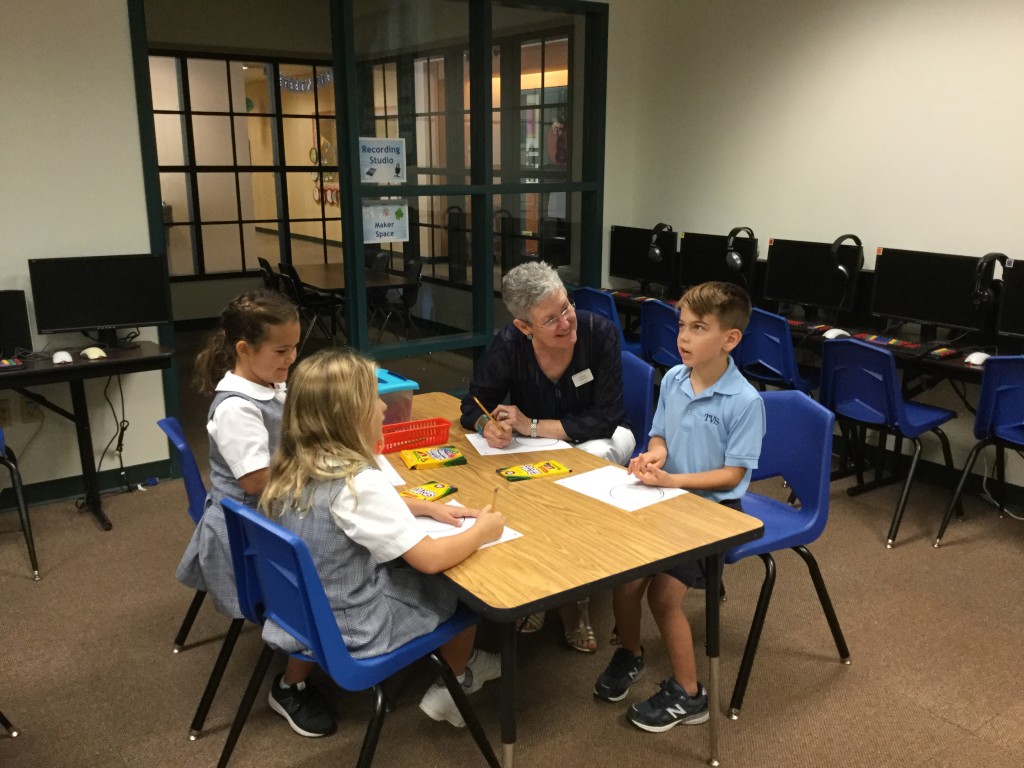
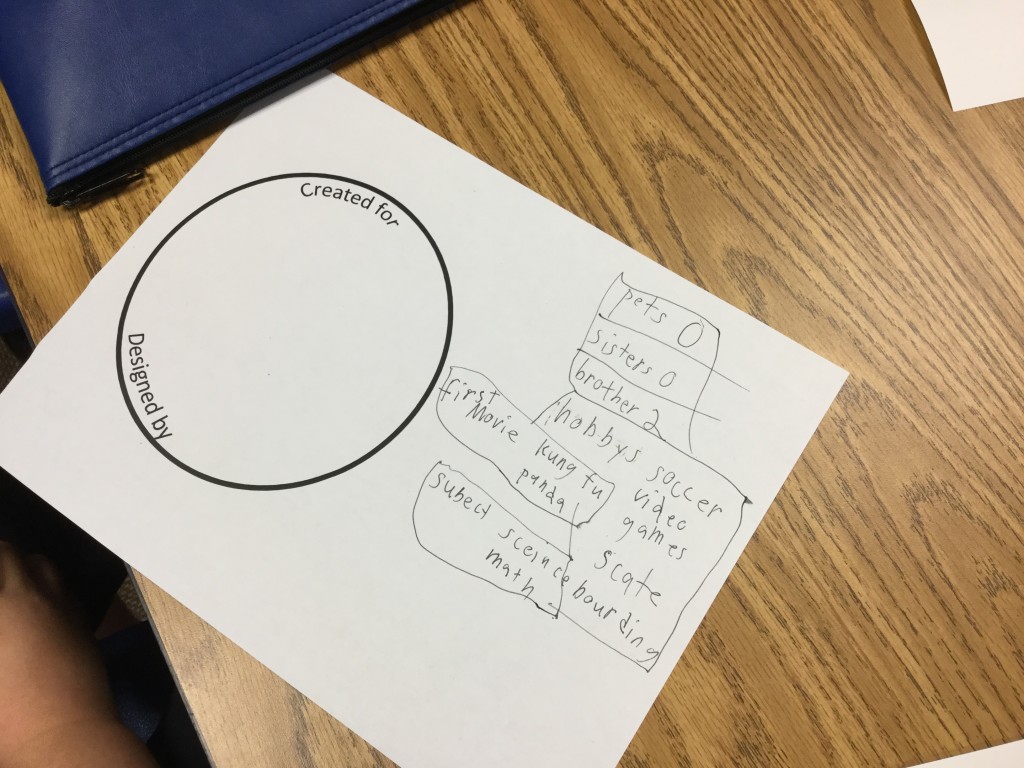
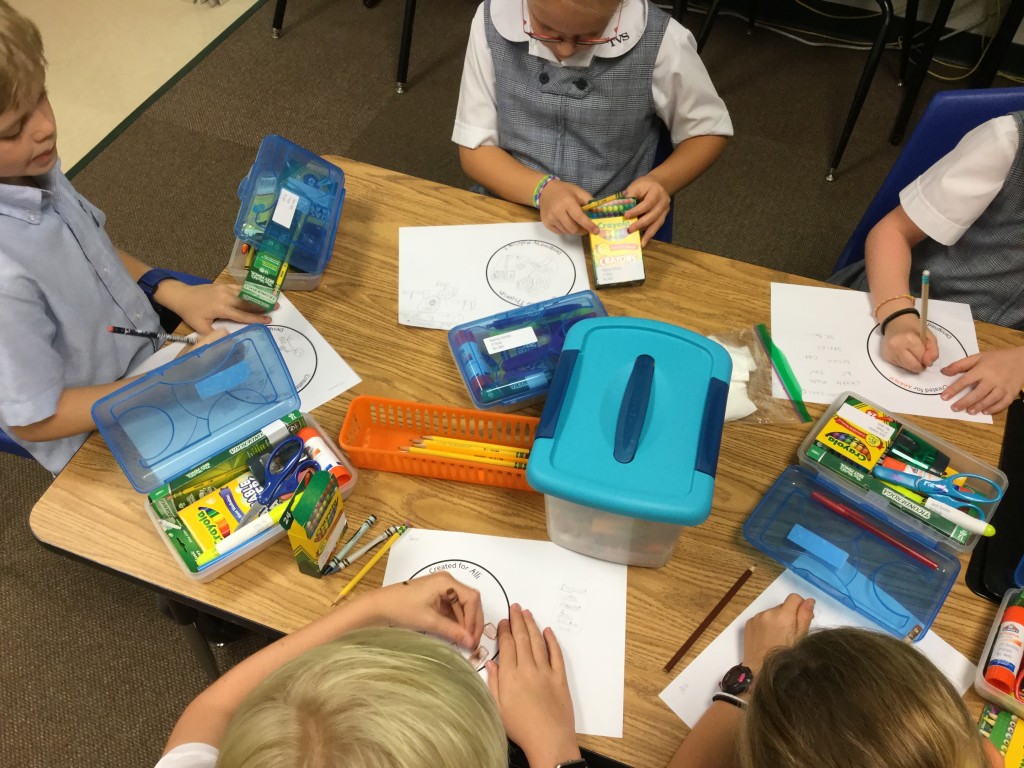
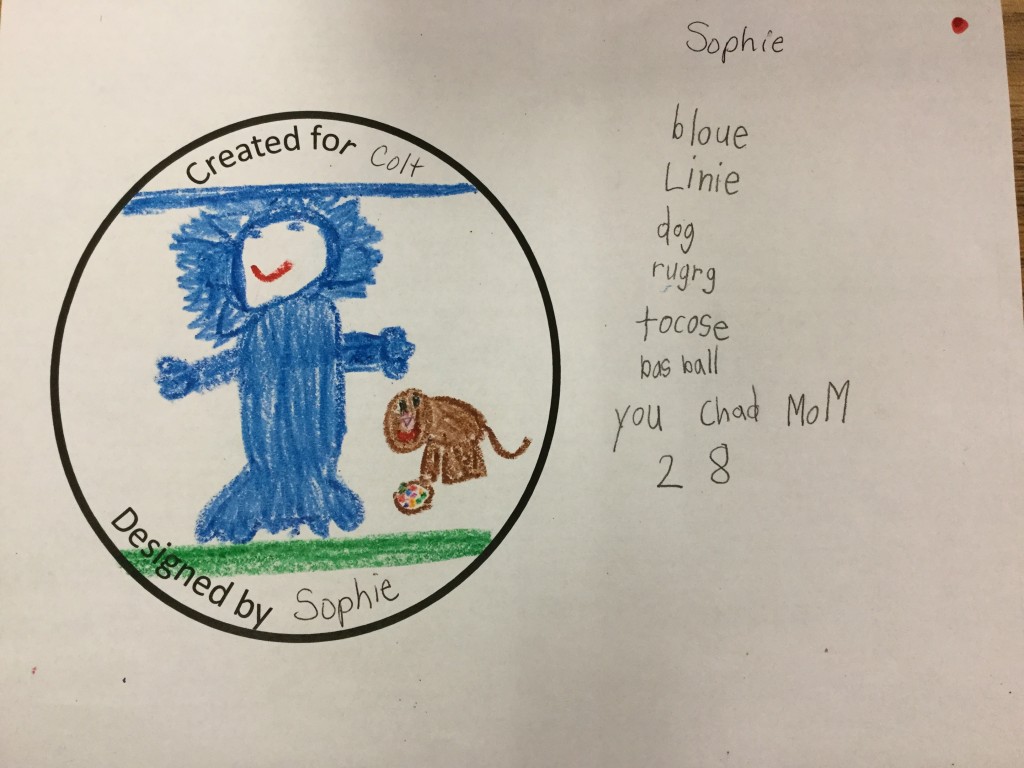
Each student received a design-thinking-dot-activity sheet with a large circle drawn on it. The dot is drawn off-center to allow for jotting notes. The children were told to choose a partner who was not their best friend – I wanted them to learn something new about someone they didn’t know quite as well.
I started the lesson by telling students that I’d taken care of the “L” for them.
L – Look, Listen, and Learn: This is looking for a something to create, fix, make better . . . The problem the students had to solve was to create a dot that told about their partner.
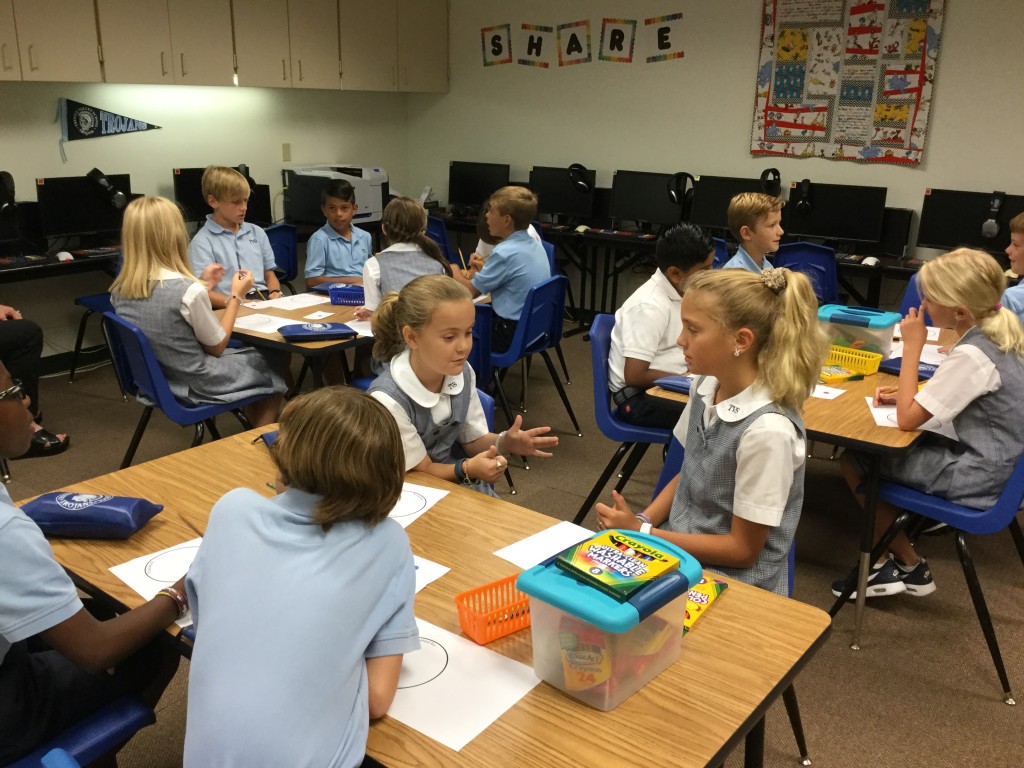
A – Ask tons of questions:We brainstormed a few questions that students could ask their partner such as, “What are your favorite foods, colors, sports? What places to you like to visit?” Students were given 2 minutes each to ask questions. They were to jot down answers in the space next to their circle. What was funny is that every time the timer went off, you could hear the groans – “That was too fast!” “I’m not finished!” I assured them they would get another chance.
U – Understand the problem or process: This is where students had the chance to ask additional questions of their partner. If they couldn’t think of anymore to ask, they could always say, “What else would you like to tell me?” For this, I gave the students 1 minute each to wrap it up.
N – Navigate ideas: We discussed what navigate means; for example, making connections to a phone’s navigation system. I told the students they had to navigate through all they had learned and then decide how they would decorate the dot in a way that told about their partner. This was the hardest part because it was 1-2 minutes (depending on age) of quiet thinking time! They could sketch ideas outside of the circle but no questions were allowed and they couldn’t start drawing inside the dot! I was amazed at how focused the students were as they just sat there and thought! As I walked around during a 1st grade class, I heard a gasp from a little girl. I leaned over and asked if she had suddenly had an idea. “Yes!” she said, as she grinned and excitedly nodded her head.
C – Create: Only after going through the above steps were the students ready to draw. I reminded them that they were NOT to draw something they liked; it had to be for and about their partner. No using the designer’s favorite colors! A comment from a first grader confirmed that she “got it” – as I announced it was now time to start creating, I heard a voice call out, “But, I’m still on the U. I’m not ready for C yet!”
H – Highlight and fix:After 10 minutes or so, I asked everyone to stop where they were because we needed to move to the “H” step. This involved checking with the partner to get their opinion. Was the designer drawing what the partner had in mind? Was there anything else the designer needed to add? I absolutely LOVED listening in on these conversations! These were some of the most thoughtful discussions I’ve ever heard from entire groups of students. Not one person said anything negative! I heard conversations like, “Are you going to add the food I like?” “Yes, I was planning to do that next.”The video below shows a 4th grade teacher working with a student. The audio isn’t good but you can still see how they are talking through what changes they can make and what they like.
LAUNCH! Our launch was a simple one; the students shared their dots by describing what their partner liked. Then they were placed on the bulletin board.
I was amazed at how well this lesson went – for every single age group (1st – 4th)! All I did was guide the process and the students took off! It was great to see the teachers involved. Design thinking is new to them, too, but they eagerly joined in. Some of their comments:
“You know, this design thinking can be used in other areas, too. I’m thinking writing for sure and maybe even math.”
“Today’s lesson was so therapeutic.”
Another teacher told me, “I was a bit stressed about drawing. Who’s going to see this? What if it’s not good enough?”
Sometimes it’s hard for teachers to “let go” but when we do, the work students produce is incredible! I almost decided not to do this with first graders; just wasn’t sure if they could grasp the concept. Wow! Was I ever wrong!! It didn’t matter one bit that they couldn’t spell what their partner told them. These little ones were able to jot down symbols, pictures, whatever it took to remember their partner’s answers.
I am so excited to continue my journey of learning about implementing design thinking into the curriculum!
To celebrate International Dot Day, Mrs. Crumley’s first graders searched for dots in our courtyard. The students were divided into groups of three and given these instructions:
Each person takes a photo of something shaped like a dot.
Take a selfie or get someone else to take a photo of the members of the group.
After a couple of photography pointers to avoid blurry images, we headed out to our courtyard.
Within just a few seconds, we heard excited voices getting their team’s attention by calling out such things as:
“Look! A snail! That’s shaped like a dot.” “Look at that pipe. It has round holes that look like dots!”
After all photos were collected, we returned to the lab where the pictures were added to Pic Collage for Kids (love this version because there are no ads). Collages were printed for everyone (you know how important it is for children to take something home!).
I pride myself on being up on educational strategies but have to admit that Design Thinking slipped right past me until I attended an amazing workshop by EdTechTeacher entitled, Creating Innovators with Design Thinking and Maker Spaces. The maker spaces part was what sold me on this but after a 2-day low-tech workshop, I knew this absolutely HAD to become a part of my curriculum!
What is design thinking? The simple answer is, “Design thinking is a formal method for practical, creative resolution of problems and creation of solutions, with the intent of an improved future result.” (from Wikipedia)
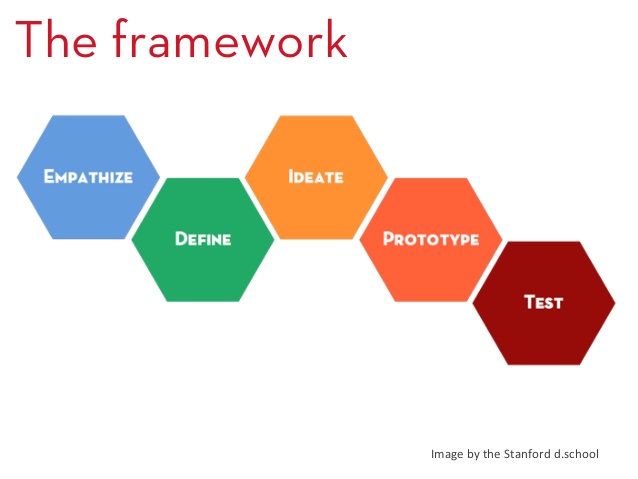
However, it is really so much more. Design thinking starts with empathy – gaining a strong understanding of what the user needs; not what the designer thinks he/she needs! The image below from Stanford’s d.School shows the framework for design thinking.
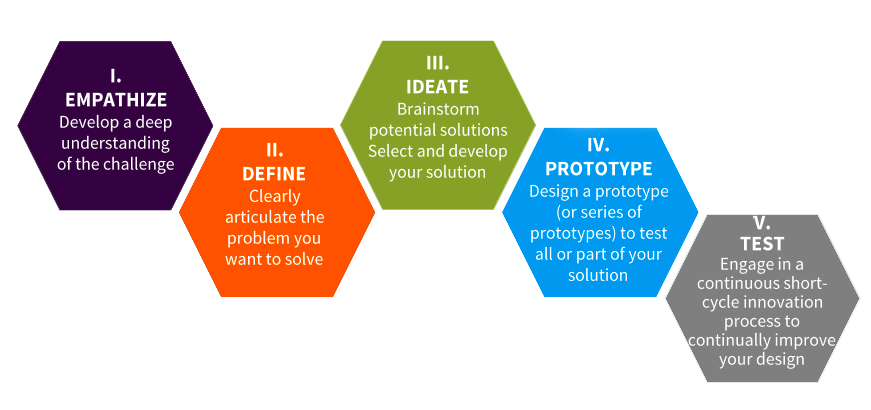
Here is another image that includes details for each segment of the process.
The hook for me was the empathy! The reason – last year I worked with students on creating a collection of memories from that grade. What I noticed over and over was that students were more concerned with taking selfie after selfie rather than collecting photos of events and friends! Yes, young children think a lot about themselves. That’s normal. But, if there was something that could be done to help guide children to think of others, isn’t that what we would want to do to develop empathetic citizens?
On returning home, I started looking for resources to continue my learning. During a visit with our new headmaster, Ian Craig, discovered that design thinking WAS being taught in our middle school and I had no idea! Also, Ian told me this had been a focus at his previous school so he will be a wealth of information.
In my search, I came across the book, The Launch Cycle: A Design Thinking Framework for K-12, by John Spencer and A.J. Juliani. What I really like about this book and their website is that it is geared toward classroom teachers.
The end of school was near and everyone was ready for summer vacation. In other words, it was really important to find something that would challenge the students! I asked the students to produce something that would “teach” something to their peers. I wanted to share one particular project because it certainly showed ingenuity and resilience!
Collin and Tiernan asked if they could use the green screen to teach soccer fundamentals. I mentioned the app, Green Screen by Doink and showed them where the green screen was kept. A bit about our green screen – it was made from a trifold science board (cardboard). No, it wasn’t the sturdiest thing in the world but that didn’t stop these boys! The funniest moment was when the boys brought the green screen back to class in pieces (you can see it split toward the end of the video)!
Is this a “polished” video? No! Would a real green screen have worked better? Yes! What’s important is that the boys worked with what they had on hand to create an informative soccer fundamentals video that will be helpful to other students. Did they learn a lot? You bet! And that is exactly what makes their creation so valuable!
I never cease to be amazed at the creativity of students. Giving students a squiggle to start a drawing is something I’d done with children when I had my own homeroom! Last year, I saw this idea on Pinterest and decided to let the students create using MS Paint.

 Drawing apps, literature, and predicting are a fantastic combination! The first graders were introduced to the Drawing Pad app ($1.99 but any drawing app would work) in an earlier meeting so that they had time to experiment with all the tools.
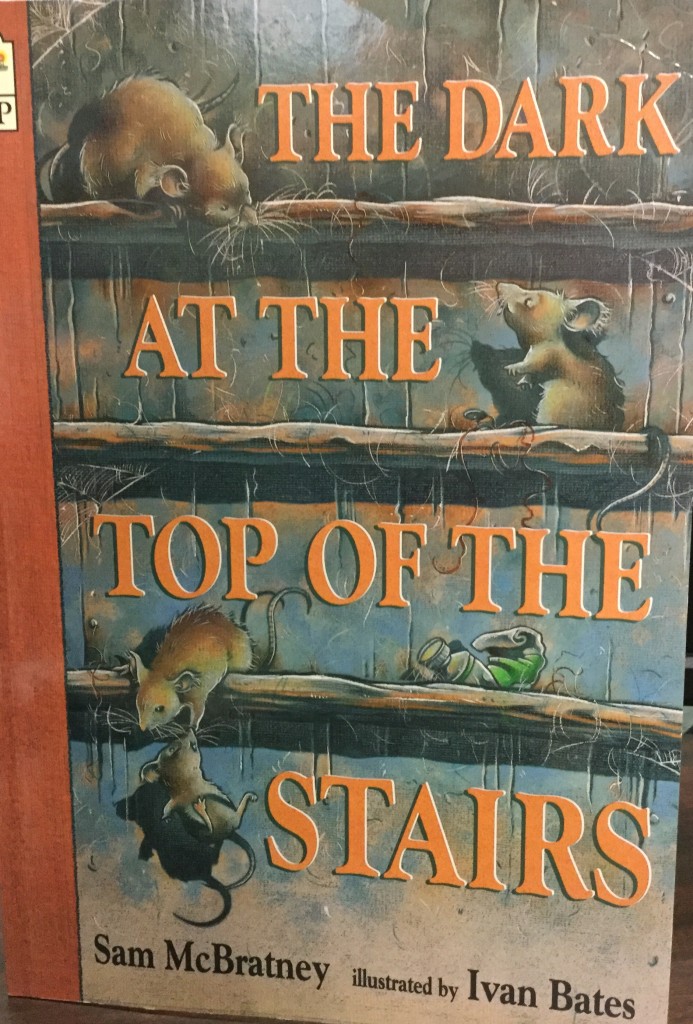 This week we added a new component: predicting what will happen in a story using the clues the author/illustrator provides. The book we read is an old one but the children really enjoy it – The Dark at the Top of the Stairs by Sam McBratney. The story is about three young mice, living in a cellar, who want to explore what is at the top of the stairs.